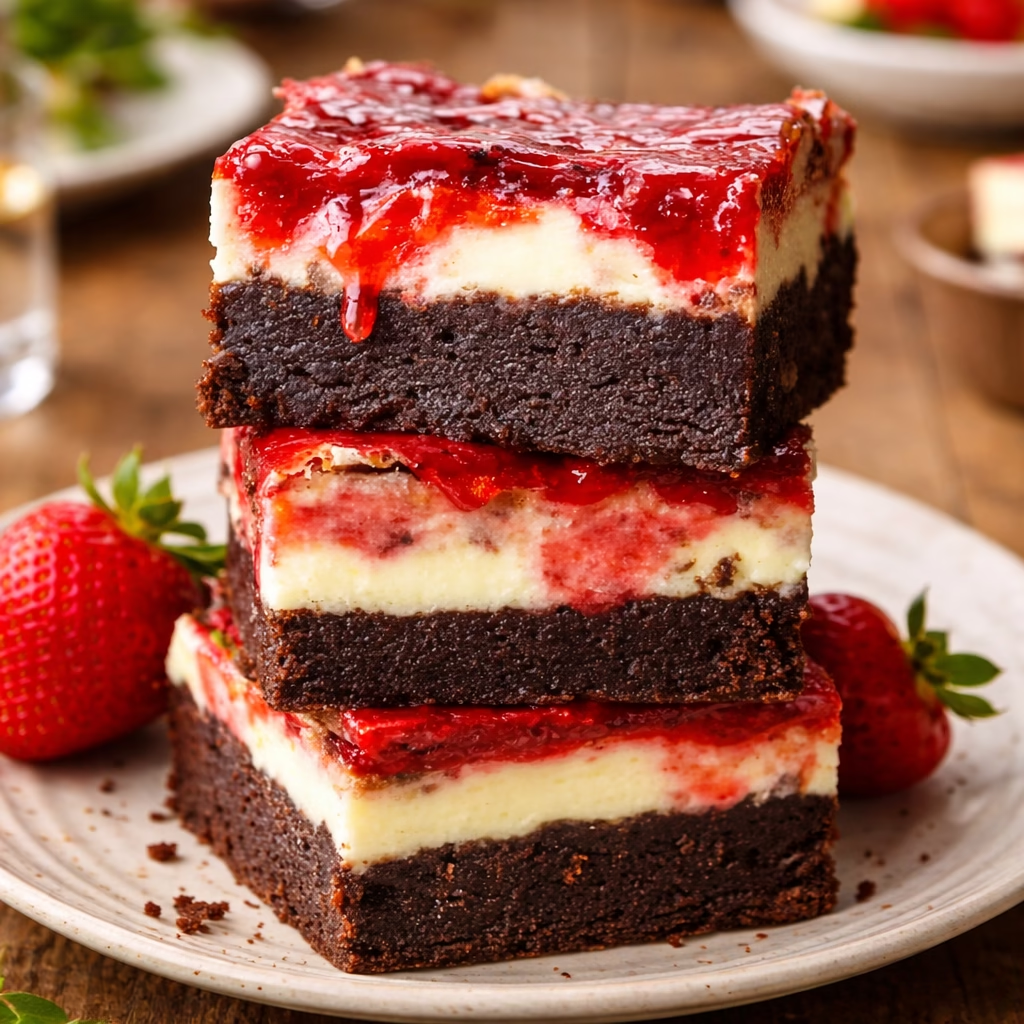
Strawberry Cheesecake Brownies are the kind of dessert that bridges the gap between comfort and decadence. By stacking a fudgy chocolate brownie base, a silky vanilla cheesecake layer, and a vibrant strawberry swirl, this recipe delivers three bites in one. Whether you’re craving a bakery-quality treat for your family or a showstopping dessert for guests, it’s designed to feel familiar yet upgraded. The real magic lies in how these layers complement each other—chocolate anchors the richness, cheesecake brings a velvety texture, and strawberries add bright, tart bursts that balance the sweetness.
My first attempt at layered desserts came when I tried combining classic brownies with a spiced fruit compote, but the proportions were off, and the layers didn’t hold together. That taught me the importance of texture harmony in multi-layer desserts. Strawberry Cheesecake Brownies, by contrast, use the density of the brownie to support the tender cheesecake, while the strawberry filling adds structure and moisture. It’s a recipe that feels like a creative leap but sticks to the fundamentals established by decades ofโฮมเมด dessert-making. And let’s face it—there’s something thrilling about biting into three distinct textures and flavors with every slice.
Pro tip: Don’t skip chilling the brownies for at least 4 hours. It allows the layers to set properly and makes for clean, dramatic slices that highlight the depos. Trust me, the wait is worth it when you see the colors come together in that first cross-section of chocolate, cream cheese, and strawberries.
What is Strawberry Cheesecake Brownies?
At first glance, Strawberry Cheesecake Brownies appear like an ode to bold flavors, but in reality, they’re a masterclass in balance. The chocolate brownie layer forms the foundational depth—it’s dark, fudgy, and slightly crackled on top, much like an old-fashioned batch from your grandmother’s oven. The cheesecake layer is the secret to their famous moistness. Made with room-temperature cream cheese blended with sugar and eggs, it’s dense yet billowy, with a tang lightly tamed by the sweetness of vanilla. The strawberry swirl adds brightness, acting like a fruit sauce that prevents both layers from feeling too heavy.
This dessert is rooted in American coffee shop innovation, where bakers began repackaging beloved classics as handheld treats. Layered brownies, in particular, became a trend after New York cheesecake and Texas sheet cakes were combined into rectangular bars. The recipe I’m sharing keeps things simple but elevates the outcome using three foundational techniques: precise ingredient ratios, temperature control for texture, and presentation through wonky swirling patterns once the strawberry filling is added.
What makes it truly special? The contrast. The crunch of the brownie’s surface gives way to the soft, almost airy cheesecake, then the syrupy strawberries ooze. It’s a crunch-soft-syrup trifecta in a single bar. And since every layer is dense and won’t collapse under slicing, there’s no mess or layer separation to worry about.
Reasons to Try Strawberry Cheesecake Brownies
If you love desserts that bring a crowd together, these brownies check nearly every box. For starters, they take less than an hour in the oven (plus prep and chilling) to make in a single 9×9-inch pan. The ingredients are standard—flour, cocoa, cream cheese, and strawberries—so no strange pantry clears. And while the instructions require attention to order (like letting the brownie set before adding the next layers), the steps are linear and beginner-friendly. Even if you’ve never worked with cheesecake batter before, the recipe’s written with intuitive layering in mind.
The real charm comes during the final presentation. Slicing through the chilled layers reveals a vibrant pink swirl that looks professionally finished on a home cook’s kitchen counter. This makes them ideal for potlucks, bridal showers, or school bake sales where visual appeal matters alongside taste. And for those with dietary adjustments? The base can easily be made gluten-free, and the cream cheese can be swapped out for vegan versions.
Let’s not forget the versatility. Want to swap the strawberries for other berries at peak season? Use pie filling in blueberry or peach. Planning a dessert table with themes? These brownies can be wrapped in pretty cellophane with lemon verbena cream on the side for a spring meal. It’s the kind of recipe that stays in regular rotation because each iteration feels fresh.
Ingredients Needed to Make Strawberry Cheesecake Brownies
Granulated sugar (1 cup) – This provides sweetness and helps with batter viscosity and browning. It’s used more heavily in the brownie than the cheesecake to encourage a denser, more fudgy texture in the base.
All-purpose flour (½ cup) – Creates the brownie’s structure while balancing the density of the sugar and cocoa. You’ll keep this in the dry mix so it’s evenly distributed.
Dutch-processed cocoa powder (⅓ cup) – Imparts deep chocolate flavor without being acidic. The bitterness clashes with the sweetness of the cheesecake, so this type is essential for balance.
Kosher salt (¼ teaspoon each for brownie and cheesecake) – Enhances the sweetness and prevents the high sugar content from feeling cloying in the finished brownies.
Baking powder (¼ teaspoon) – A small leavener to keep the brownie layer slightly light and avoid being too dense-looking on the surface.
Large eggs (2, room temperature for brownies and 2 for cheesecake) – Eggs in the brownie help bind the flour and sugar into a batter. The room-temperature eggs for the cheesecake layer assist in incorporating air, making the texture creamier.
Vanilla extract (1 teaspoon each) – Used in both layers to amplify the sweet notes, especially in the cheesecake to cut through the tang of the cream cheese.
Unsalted butter (½ cup, melted and cooled) – Gives the brownie its signature fudgy texture. Cooling it after melting helps prevent overbaking and results in a better chew.
Cream cheese (16 oz, room temperature) – The backbone of the cheesecake layer. It’s best softened in a bowl in the microwave or stand mixer for 30-60 seconds to avoid lumps and ensure a smooth texture.
Strawberry pie filling (1½ cups) – Acts as the colorful swirl between the layers and gives a fruit punch that offsets the heaviness of the chocolate and cheesecake. Look for seedless or well-drained options to avoid pooling in the finished product.
Instructions to Make Strawberry Cheesecake Brownies – Step by Step
Step 1: Start by preheating your oven to 350°F (175°C) and lining a 9×9-inch pan with parchment paper that hangs over the edges for easy removal. Use a metal pan if possible—it distributes heat evenly. Grease the pan just in case the parchment slips during the swirling step. Use a whisk to combine the brownie dry ingredients in a bowl: 1 cup sugar, ½ cup flour, ⅓ cup cocoa powder, ¼ teaspoon salt, and ¼ teaspoon baking powder. Stir it together until the mix forms a loose powder with no clumps, which makes the wet-dry combination smoother later.
Step 2: In another bowl, add the wet brownie ingredients: 2 large eggs that have been at room temperature for at least 30 minutes, 1 teaspoon vanilla extract, and ½ cup cooled melted unsalted butter (melt in the microwave first, then let rest 5 minutes to avoid overbaking). Use a whisk to blend everything together. It’s crucial to work with room-temperature eggs and cooled butter—they emulsify better, avoiding a lumpy texture from cold fats mixing with warm proteins.
Step 3: Now it’s time to introduce the wet and dry. Scoop the dry ingredients into the wet components and mix with a spatula until just combined. Overmixing can lead to a denser brownie with less structure, so when you notice the edges becoming too glossy or when you see it start to pull away from the bowl as a solid mass, give it a gentle swish a few times and place the batter into the pan as is. Spread it with the spatula or an offset one for even, thin layers. Don’t worry about perfection here—the brownie layer will set in the oven and support the softer cheesecake layer.
Step 4: Next, take the cream cheese out of the fridge. If it’s still cold to the touch, microwave it in 10-second intervals, stirring each time until it reaches a ribbon-like smoothness, or beat it with a mixer on high speed for 30 seconds. Add the 2 room-temperature eggs (must be room temperature to avoid curdling), ⅓ cup sugar, and a teaspoon vanilla. Mix at low speed until the eggs are fully incorporated, then increase to high speed for about 30 seconds to aerate the mixture for a silky texture. Pour this over the set-in-pan brownie base and spread it with the spatula. The goal is to cover as much of the brownie as possible so the cheesecake layer sets uniformly during baking.
Step 5: Now for the final layer. Spoon the strawberry pie filling onto the red layer in small dollops—that’s the key to creating defined swirls. Take a knife or skewer and gently draw it from the center to the sides, back to the center again, and around the edges. This creates those classic “Frankenstein” stripes that look like they came from a bakery. Avoid pressing too deep—the filling should sit above the cheesecake but not sink into it.
Step 6: After the passive build-up, it’s time to bake. Slide the pan into the oven and set the timer for 35–40 minutes. The center should appear firm to the touch but have a slight springy motion when gently pressed. The chocolate-brownie layer will turn from a deep cocoa brown to a smoky, almost burnt look on the surface. Remove the pan from the oven and let it sit at room temperature for 30 minutes while it cools. Then refrigerate for 4 hours to set the layers completely before slicing and serving. This step is non-negotiable—if you cut too soon after baking, the layers will likely mix together into an unappetizing sludge.
Chef’s Tips for a Perfect Result
- User room-temperature eggs for both the brownie and cheesecake layers. They bind better to warm ingredients and prevent curdling in the cheesecake.
- Loop room-temperature cream cheese in the stand mixer first. This warms it enough to avoid clumps while preserving the tangy richness.
- Pop the mixed brownie batter in the fridge for 10 minutes before baking. This fortifies the gluten strands a bit more and gives a fudgier texture.
- Use seedless or drained strawberry filling to prevent sogginess in the cheesecake after chilling. Otherwise, the excess water could melt the swirled layer into a layer of fruit juice.
- Press the strawberry filling gently with a knife, not a knife press. The goal is to create visible bold streaks, not a paint-like smear.
Variations and Substitutions
- Vegan Option: Swap the cream cheese with vegan nut-based cheeses, ensure the eggs in the brownie layer are substituted with flax eggs (1 flax egg = 1 tbsp flaxseed + 3 tbsp water, let sit 5 mins), and use coconut oil instead of butter.
- Gluten-Free Alternative: Replace the all-purpose flour with a 1:1 gluten-free flour blend and use gluten-free cocoa powder for avoidance. Test with a sensitivity-compatible brand first.
- Low-Carb Version: Reduce the sugar in both brownie and cheesecake layers by 25%, using erythritol or allulose. Replace the strawberry pie filling with a sugar-free version or a fruit purée with low glycemic index (e.g., blackberries or applesauce).
- Budget Swap: Use a generic brand of pie filling or create your own with fresh strawberries and a simple cornstarch-based glaze (1 tbsp cornstarch + ¼ cup water + 2 tbsp sugar, heat until thickened).
- Alternate Flavor: For a blueberry switch, use huckleberry pie filling or a no-churn berry jam, which adds the same depth of flavor with a different color for a unique presentation.
How to Serve and Pair
Serve Strawberry Cheesecake Brownies at room temperature after they’ve chilled—this ensures you cut them cleanly and the layers have maximum separation. Wrap the brownies in cellophane or parchment with ribbon if gifting. Pair them with a cup of iced coffee or afternoon tea during spring brunches for contrast. At dinner parties, tops with a dollop of spiced vanilla bean ice cream to accent the diffs in temperature though the mouthfeel. For a child-friendly twist, add mini marshmallows on top for some whimsy.
Storage and Reheating
Refrigerator: Store sealed brownies in an airtight container for 3–4 days. This keeps the signature layers cohesive and prevents the brownies from drying out. Don’t underestimate the effectiveness of a simple lidded container with parchment paper over the top before covering with plastic wrap to prevent sticking.
Freezer: Wrap tightly in plastic wrap or aluminum foil and store frosty for up to 3 months. Double wrap if you plan to freeze for more than 6 weeks to avoid freezer burn. Thaw overnight in the refrigerator for a consistent texture in the layers and the fruit filling.
Room Temperature: If you’ve already chilled the brownies and they’ll be served the same day, leave outside of the refrigerator up to 3 hours. Beyond that, moisture shifts may cause blending of the layers or separation of the strawberry filling.
Reheating: For best results, wrap the brownie in a paper towel and micro for 30 seconds. This warms it through without melting the texture of the cheesecake. You can also heat at 275°F for 8–10 minutes in the oven, but it risks over-browning the top and coagulating the cheese. Avoid stovetop methods entirely unless you’re willing to melt the brownie into spreadable jam—a survival tactic, not a recommendation.
Nutritional Values
- Calories: 494
- Protein: 9g
- Carbohydrates: 68g
- Fat: 27g
- Fiber: 2g
Approximate values.
Frequently Asked Questions
Q1: Can I substitute the cream cheese with a different type of cheese?
No. Cream cheese is uniquely suited for this recipe due to its high fat and moisture content, which prevents the layer from separating from the brownie base. Low-moisture cheeses like grated Parmesan would introduce an off-dry texture and lack the tang that balances the sweetness of the layers.
Q2: How do I know when the brownies are fully baked and not undercooked?
Insert a toothpick into the center of the cheesecake layer—not the brownie itself. If it comes out clean or with 1 small line of moisture, it’s done. Checking the brownie at this stage would give a false positive because the lighter batter doesn’t jiggle on the inside until much later in the baking process.
Q3: My brownies turned out too dry and cakey. What went wrong?
Either the brownie batter was overmixed in the bowl, or the total baking time was too long for the layers. Next time, mix the dry and wet ingredients just until combined and timer bake for close to 35 minutes first. Brownies can be done even if the edges look overheated.
Q4: Can I make these the day before serving as a make-ahead dessert?
Absolutely. In fact, this is ideal. Assemble the layers up to 24 hours in advance and keep in the refrigerator. Make sure the brownie layer has fully cooled and hardened before layering the cream cheese to avoid a soggy base that dissolves the prep!
Q5: What’s the best way to customize these for a vegan or gluten-free audience?
For vegan adaptations, substitute eggs with flax eggs and use coconut oil in place of butter. The cream cheese can be replaced with vegan cheese in a 1:1 ratio. For gluten-free swaps, replace the regular flour with a 1:1 gluten-free flour blend and double-check all other ingredients like vanilla and pie filling are gluten-free. You’ll also need to use a gluten-free cocoa powder in these cases.
Conclusion
Strawberry Cheesecake Brownies are a treasure trove of layered contrasts—crunchy and silken, tart and sweet, vibrant and rich. With this detailed approach to build, you’ll understand the rhythm of assembling such a dessert. When you finally take that first bite, you’ll realize how the textures and flavors interplay beyond simple layering. These brownies are a perfect recipe to start with if you’re learning how to work with complex, multi-component desserts. And once you get the hang of it, the possibilities for creating new flavor profiles and visual presentations expand endlessly. Give it a try this weekend—you might find a new signature sweet that fits perfectly into your cooking repertoire.
Print
Strawberry Cheesecake Brownies: A Layered Dessert Party in Every Bite
- Prep Time: 15 minutes
- Cook Time: 40 minutes
- Total Time: 4 hours 55 minutes
- Yield: 9 brownies 1x
- Category: Dessert
- Method: Baking
- Cuisine: American
- Diet: Vegetarian
Description
Strawberry Cheesecake Brownies combine a rich chocolate brownie base, creamy vanilla cheesecake layer, and a sweet strawberry swirl for an indulgent and fruity dessert perfect for gatherings.
Ingredients
For the Brownie Base:
- 1 cup granulated sugar
- 1/2 cup all-purpose flour
- 1/3 cup Dutch-processed cocoa powder
- 1/4 teaspoon kosher salt
- 1/4 teaspoon baking powder
- 2 large eggs, room temperature
- 1 teaspoon vanilla extract
- 1/2 cup unsalted butter, melted and cooled
For the Cheesecake Layer:
- 16 ounces cream cheese, room temperature
- 2 large eggs
- 1/3 cup granulated sugar
- 1 teaspoon vanilla extract
- 1/4 teaspoon kosher salt
For the Strawberry Swirl:
- 1 1/2 cups strawberry pie filling
Instructions
1. Preheat oven to 350°F (175°C) and line a 9×9-inch baking pan with parchment paper, leaving overhang on the sides for easy removal.
2. In a bowl, combine the granulated sugar, flour, cocoa powder, kosher salt, and baking powder.
3. In another bowl, whisk together the eggs, vanilla extract, and cooled melted butter until smooth.
4. Add the wet ingredients to the dry ingredients and mix until a thick brownie batter forms.
5. Spread the brownie batter evenly into the prepared baking pan.
6. In another bowl, beat the cream cheese until smooth, then add the eggs, sugar, vanilla extract, and salt and mix until creamy.
7. Spread the cheesecake mixture evenly over the brownie batter.
8. Spoon the strawberry pie filling over the cheesecake layer and gently swirl with a knife or skewer.
9. Bake for 35 to 40 minutes, until the center is set.
10. Cool at room temperature for 1 hour, then refrigerate for at least 4 hours before slicing and serving.
Notes
Allow the brownies to cool completely before chilling so the cheesecake layer sets properly.
Store covered in the refrigerator for 3 to 4 days.
For freezing, wrap tightly and freeze for up to 3 months.
Nutrition
- Serving Size: 1 brownie
- Calories: 494 kcal