What is Mini No-Bake Lemon Cheesecake Tarts?
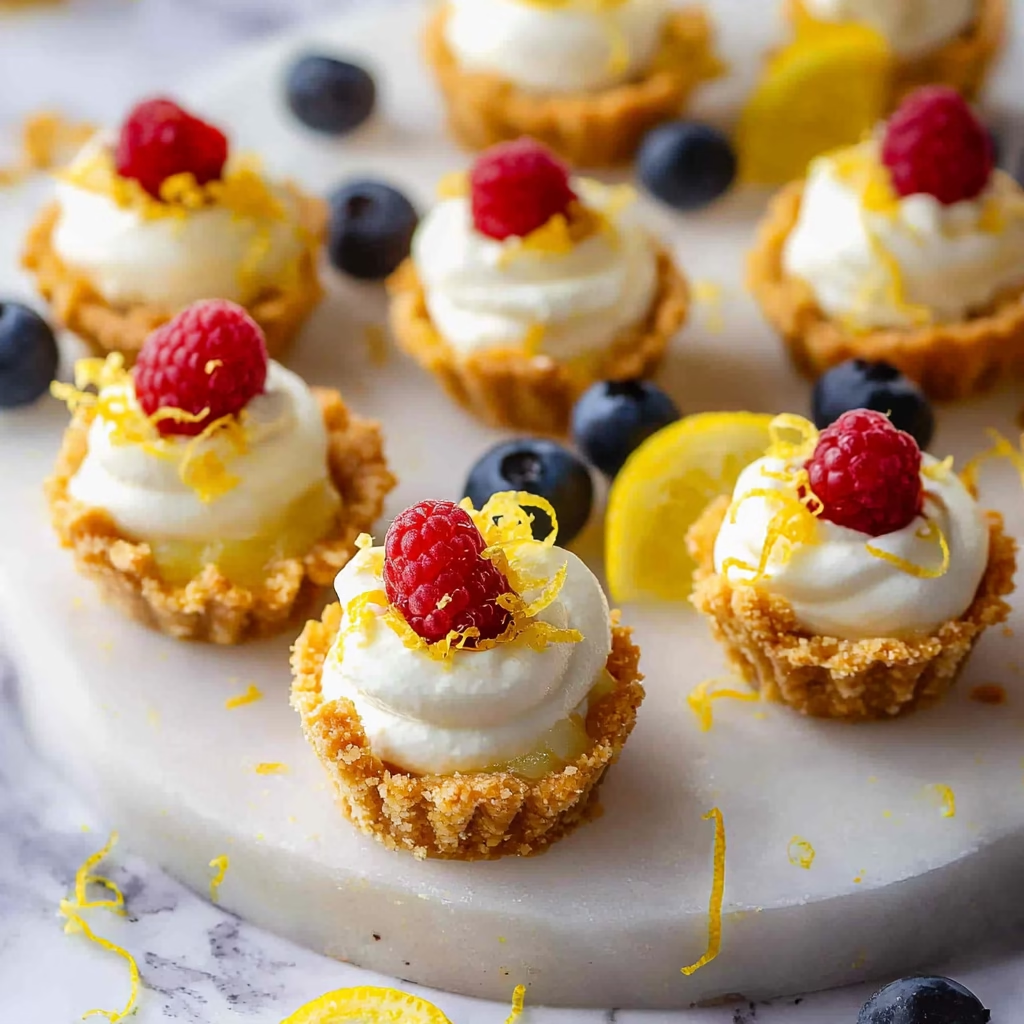
Mini No-Bake Lemon Cheesecake Tarts are delicate, bite-sized versions of classic New York cheesecake with a zesty twist. Each tart features a buttery graham cracker crust and a smooth cream cheese filling infused with fresh lemon zest and juice. The no-bake method relies on the natural setting power of chilled cream cheese and whipped cream to create their creamy texture. Popular since the 1970s party food boom, these tarts became beloved for their balance of tangy brightness and velvety richness.
What makes them special is the perfect crust-to-filling ratio in each tiny shell. The filling retains just enough whipped cream airiness to feel lighter than standard cheesecakes, while the lemon components add that refreshing springtime zing. These tarts can be dressed up beautifully for events or kept casual for afternoon tea, proving that impressive desserts don’t always require an oven.
Reasons to Try Mini No-Bake Lemon Cheesecake Tarts
These tarts solve a common summer dilemma: craving dessert while avoiding oven heat. Their make-ahead nature is perfect for entertaining – just prepare 30 minutes before guests arrive and let them chill while you host. Beginners thrive with this approach – no baking skills required, just layer, chill, and garnish.
The versatility is another bonus. Customize with fruit toppings for a fresh twist or swap lemon zest for orange during colder months. With options for gluten-free crusts and vegan adaptations, this recipe bridges comfort food and dietary needs seamlessly. They’re particularly popular at potlucks where people appreciate how each small size disappears quickly without leftovers.
Ingredients Needed to Make Mini No-Bake Lemon Cheesecake Tarts
- 1 cup graham cracker crumbs (about 10 crushed crackers)
- 2 tablespoons granulated sugar
- 6 tablespoons unsalted butter, melted (about 30g or 1/4 cup)
- 8-oz cream cheese, softened to room temperature
- 1/2 cup sugar, sifted with a fine mesh sieve
- 2 teaspoons fresh lemon zest, saved in a citrus peeler
- 2 tablespoons freshly squeezed lemon juice (avoid bottled varieties)
- 1/3 cup heavy whipping cream, chilled before use
- 1/4 teaspoon pure vanilla extract
- Fresh fruit slices or fruit preserves for decoration
Use a plastic crumb press tool for consistent tart shells or press evenly by hand after lining your muffin tin with plastic wrap. The cold whipping cream helps the mixture set properly, while room-temp cream cheese ensures no lumps in the final texture.
Instructions to Make Mini No-Bake Lemon Cheesecake Tarts – Step by Step
Step 1: Start by prepping the muffin tin. Cross two sheets of plastic wrap over a 24-cup mini pan, letting them overlap generously. This trick makes removal easy later. Press the melted butter into the dry cracker-sugar mixture until it resembles damp sand. Think of it as creating a crumbly dough that’ll hold its shape when pressed into each cavity using your fingertips for maximum coverage.
Step 2: While the crusts chill, whip the filling in stages. First blend softened cream cheese, sugar, and half the lemon zest until smooth. The room-temp cheese ensures no clumps form during mixing. Next, whip the cold heavy cream with vanilla to stiff peaks – you’ll want them to hold a peak when you lift your whisk. Fold gently into the base mixture in thirds to preserve the delicate air bubbles that give the tart a melt-in-your-mouth texture.
Step 3: Fill each shell with the lemon-cream swirl through a spoon or small piping bag. Add enough to fill halfway and even out the surface. Chill them for at least two hours in the fridge – this allows the cream cheese gel to set properly. For the final touch, scatter fresh berries over the top and sprinkle the reserved zest for that lemon burst that lingers with each sweet bite.
Chef’s Tips for a Perfect Result
- Let cream cheese sit for 30 minutes before mixing to reach ideal room temperature
- Use a microplane grater for lemon zest – it captures more aroma without white pith
- Pre-chill your whip cream and mixing bowls for fluffier peaks and smoother blends
- Microwave tart shells for 30 seconds before adding filling if making ahead of time
- Freeze fully assembled tarts on a baking sheet first to prevent clumping
- Keep tarts refrigerated until serving to maintain structural integrity
Variations and Substitutions
Looking to switch things up? Try these ideas:
- Vegan Option: Replace dairy cream cheese with cashew-based vegan cream cheese and use plant-based whipped topping
- Gluten-Free Alternative: Use crushed digestive biscuits or rice crackers in place of graham crumbs
- Low-Carb Version: Substitute monkfruit sugar and use coconut flour to bind crumbs
- Budget Swap: Substitute cream cheese with Greek yogurt for a lighter version (adjust sugar)
- Herb Infusion: Add chopped fresh mint or basil to the crust or filling for a unique flavor
- Fruit Creations: Pair lemon filling with specific fruits – blueberries enhance the tang, raspberries add contrast
How to Serve and Pair
For formal serving, place these tarts on vintage dessert plates with lemon slice drizzles and mint sprigs. Pair them with chilled white wines like Pinot Grigio or non-alcoholic elderflower spritz for a refreshing summer dessert trio. For casual gatherings, fill decorative canning jars as cups for handheld convenience. They’re equally delightful at afternoon teas with Earl Grey, or alongside brunch elements like mimosas in mason jar cocktails.
Arrange them on pastel platters for Easter or spring picnics. A small edible flower like nasturtiums adds elegance if you’re comfortable with garden-to-table presentation. Keep them simple with a dusting of powdered sugar through a sieve for a rustic country feel.
Storage and Reheating
Refrigerator: Store up to 3-5 days in a sealed container with parchment paper between layers. Maintain cold temperatures to preserve texture and prevent the crust from softening.
Freezer: Freeze for 3 months on a parchment-lined tray first to prevent sticking, then transfer to zip-top bags. Defrost 30 minutes in fridge before serving. Note cold storage keeps them best when frozen fully assembled.
Room Temperature: Leave out for up to 1 hour if covered – past that, the custard filling begins to soften the crust.
Reheating: Not necessary, but warm gently by microwaving 5-7 seconds for room service. Avoid heating as texture relies on chilled cream cheese consistency. For a cold treat, serve directly from freezer.
Nutritional Values
Per tart (1 serving):
- Calories: 81kcal
- Protein: 2g
- Carbohydrates: 9g
- Fat: 4g
- Dietary Fiber: 0.5g
Approximate values
Frequently Asked Questions
Can I use low-fat cream cheese for these mini tarts?
No, full-fat cream cheese creates the proper custard texture. Low-fat versions won’t hold shape or deliver the same richness.
How do I know when the whipped cream is ready?
Stiff peaks form when you lift the whisk and the cream stands straight up without collapsing. Under 60 seconds of whipping in a cold bowl indicates proper consistency.
My crust is sticking after freezing – how to fix this?
Microwave tart shells 30 seconds in 2-minute intervals first. This firms up the butter without melting it completely. Add filling while shells are still firm, then chill for final setting.
Can I assemble these the night before serving?
Absolutely! Store them in single layer at rear of fridge (coldest spot) for up to 20 hours. Gently rewarm before garnishing if using delicate fruit toppings.
What’s the best way to decorate them for a child’s birthday?
Use lemon curls, colored sprinkles, or fruit-shaped candies. Skip fresh garnishes on kids’ parties to prevent squished fruit – opt for edible decorations that withstand handling better.
Conclusion
These mini tarts transform a classic dessert into an accessible, customizable treat without sacrificing flavor. By following simple, time-saving steps and embracing seasonal garnishes, you’ll create a dessert that feels both impressive and effortless. The bright, juicy lemon flavor will steal hearts whether as spring snacks or after-dinner finishers.
Print
Mini No-Bake Lemon Cheesecake Tarts
- Prep Time: 15
- Total Time: 120
- Yield: 24 mini tarts 1x
- Category: desserts
- Method: No-Bake
- Cuisine: American
- Diet: Vegetarian
Description
Delicate, bite-sized no-bake tarts with a buttery graham cracker crust and zesty lemon cream cheese filling. Perfect for summer heat or make-ahead desserts, these tarts balance fresh lemon brightness and creamy richness with minimal effort.
Ingredients
1 cup graham cracker crumbs (about 10 crushed crackers)
2 tablespoons granulated sugar
6 tablespoons unsalted butter, melted
8-oz cream cheese, softened
1/2 cup sugar, sifted
2 teaspoons fresh lemon zest
2 tablespoons freshly squeezed lemon juice
1/3 cup heavy whipping cream, chilled
1/4 teaspoon pure vanilla extract
Fresh fruit slices or fruit preserves for decoration
Instructions
Line a 24-cup mini muffin tin with plastic wrap, allowing it to overlap the edges for easy removal.
Combine graham cracker crumbs, 2 tablespoons sugar, and melted butter. Press 1 tablespoon of crust mixture into each mini cup, using a crumb press or the back of a spoon to flatten. Chill for 15 minutes.
In a bowl, beat cream cheese and 1/2 cup sugar until smooth. Mix in lemon zest, lemon juice, and vanilla. Gently fold in chilled whipping cream until light and airy.
Spoon 2 tablespoons of filling into each prepared shell. Smooth tops and chill for 2 hours before serving.
Garnish with fresh fruit slices or preserves just before serving.
Notes
For gluten-free crusts, use certified gluten-free graham crackers. For vegan options, substitute vegan cream cheese and omit the fruit preserves (if non-vegan ingredients are present).
No-baked tarts can be assembled up to 6 hours ahead and stored in the fridge.
Adjust tart size by using a 12-cup mini muffin tin for larger servings.
Nutrition
- Serving Size: 1 mini tart
- Calories: 150
- Sugar: 12g
- Sodium: 100mg
- Fat: 10g
- Saturated Fat: 6g
- Carbohydrates: 14g
- Fiber: 0.3g
- Protein: 3g
- Cholesterol: 20mg


