No-Bake Strawberry Crunch Cheesecake. The words themselves feel like a promise, don’t they? A creamy, dreamy dessert that requires no oven time but delivers all the decadent flavor and satisfying crunch you could ever wish for. It’s the kind of treat that brings a little sparkle to an ordinary Tuesday or makes a special occasion feel even more festive. I remember the first time I made a no-bake cheesecake; it felt like discovering a secret shortcut to pure bliss. This strawberry crunch variation takes that concept and elevates it with vibrant berry notes and that irresistible, textured topping.
If you’ve ever felt intimidated by traditional cheesecakes or simply needed a dessert option that comes together with minimal fuss, this recipe is for you. It’s remarkably forgiving and always a crowd-pleaser. Imagine that cool, smooth cream cheese filling swirling with a sweet strawberry purée, nestled atop a buttery cookie crust, and finished with a delightful crunchy topping. It’s a symphony of textures and tastes that just works, and I can’t wait to share how easy it is to bring this delight to your own kitchen.
What is No-Bake Strawberry Crunch Cheesecake?
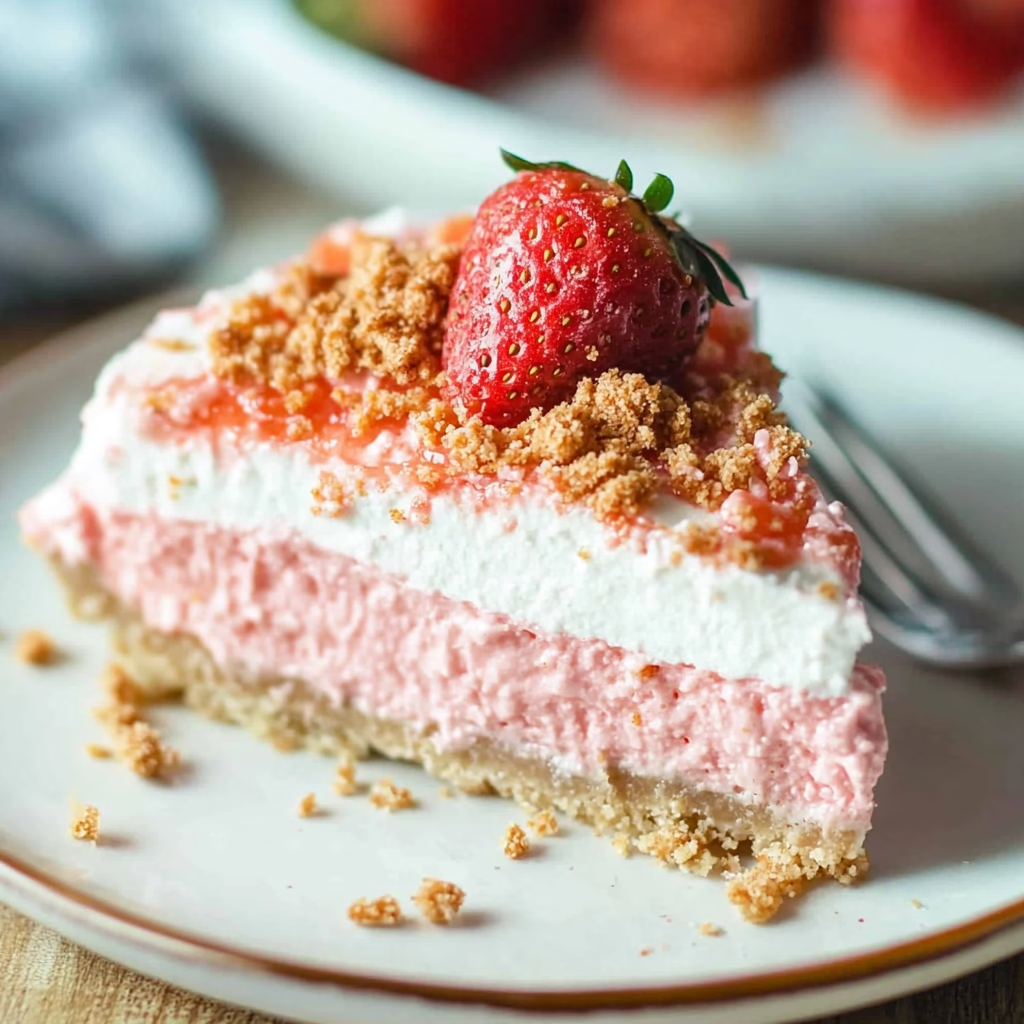
This No-Bake Strawberry Crunch Cheesecake is a delightful dessert that skips the oven entirely, relying on chilling time to achieve its perfect set. At its heart, it features a classic cheesecake filling, made rich and creamy with cream cheese, sugar, and whipped cream, enhanced here with a vibrant strawberry purée. The magic really happens with the “crunch” element, which typically involves a crushed cookie crust and a flavorful crumble topping that adds a wonderful textural contrast to the smooth filling.
Unlike its baked counterpart, this no-bake version is often simpler to prepare and perfect for warmer weather or when you simply want to avoid heating up the kitchen. The combination of sweet strawberries, tangy cream cheese, and a buttery, crunchy finish creates a truly irresistible dessert that feels both elegant and comforting. It’s a celebration of simple ingredients coming together to create something truly special, proving that sometimes, the easiest recipes are the most rewarding.
Reasons to Try No-Bake Strawberry Crunch Cheesecake
There are so many reasons why this No-Bake Strawberry Crunch Cheesecake should be your next go-to dessert. First and foremost, it’s incredibly easy to make, making it perfect for beginner bakers or anyone who needs a dessert on short notice. The “no-bake” aspect means you can whip it up without the stress of water baths or worrying about cracks, and it’s a fantastic option for those hot summer days when you’d rather not turn on the oven.
Beyond its simplicity, the flavor and texture combination is simply divine. The creamy, tangy cheesecake filling is perfectly balanced by the sweet, fresh strawberry swirl and the satisfying crunch of the topping. It’s versatile, too; you can easily adjust the sweetness or strawberry intensity to your liking. This recipe is a lifesaver for busy home cooks, busy parents, or anyone looking to impress guests without spending hours in the kitchen. It’s a guaranteed crowd-pleaser that delivers maximum impact with minimal effort.
Ingredients Needed to Make No-Bake Strawberry Crunch Cheesecake
- 24 Golden Oreo cookies (about 2 standard packages), finely crushed
- 4 tablespoons (59 ml) salted butter, melted
- 24 ounces (680 g) cream cheese, 3 packages, softened to room temperature
- 2 cups (240 g) powdered sugar, sifted
- 1 cup (144 g) fresh strawberries, puréed until smooth (about 1 cup of purée)
- 2 teaspoons (10 ml) vanilla extract
- 1 ½ cups (355 ml) heavy whipping cream, cold
- 1 batch strawberry shortcake crumble (recipe often includes crushed cookies, butter, sugar, and sometimes a pinch of salt for topping)
Instructions to Make No-Bake Strawberry Crunch Cheesecake – Step by Step
Step 1: Begin by preparing the delightful crust that forms the base of your cheesecake. Take your 24 Golden Oreo cookies and crush them into fine crumbs. You can easily do this by pulsing them in a food processor until they resemble coarse sand, or for a more hands-on approach, place them in a sturdy zip-top bag and use a rolling pin to crush them into submission. Once you have your crumbs, add the 4 tablespoons of melted salted butter. Stir everything together until the crumbs are evenly saturated with butter, resembling wet sand. This ensures that the crust will hold together beautifully.
Step 2: Next, prepare your springform pan and press the crust mixture into it. Lightly spray a 9-inch springform pan with cooking spray to prevent sticking. Then, carefully press the buttery cookie crumb mixture evenly into the bottom of the pan. Use the bottom of a glass or your fingers to compact it firmly, and then press it about an inch up the sides of the pan to create a sturdy edge. This edge not only looks lovely but also helps contain the cheesecake filling. Once your crust is in place, pop the pan into the freezer for at least 15-20 minutes while you get started on the luscious filling.
Step 3: Now, let’s create the luscious cream cheese filling. In a large mixing bowl, combine your softened cream cheese (ensure it’s truly at room temperature for the smoothest texture), the vanilla extract, and the sifted powdered sugar. Add the lemon juice for a hint of brightness, then beat these ingredients together with an electric mixer (a hand mixer works wonderfully here) until the mixture is completely smooth and wonderfully creamy. There should be no lumps of cream cheese visible; a smooth base is key to a velvety cheesecake.
Step 4: In a separate, chilled bowl, whip your cold heavy whipping cream. Using the whisk attachment of your electric mixer, beat the heavy cream until medium to stiff peaks form. This means when you lift the whisk, the cream should hold its shape without collapsing. Be careful not to overbeat, as this can turn the cream into butter. Gently folding this whipped cream into the cream cheese mixture will give the cheesecake its airy, light texture.
Step 5: Gently fold the whipped cream into the cream cheese mixture. Use a rubber spatula and a light hand, cutting down through the center and folding the cream cheese mixture over the whipped cream. Continue this motion until just combined. The goal is to incorporate the whipped cream without deflating it, preserving that lovely lightness. Once you have a beautiful, smooth, and airy cheesecake base, it’s time to add that gorgeous strawberry swirl.
Step 6: Divide the cheesecake mixture and add the strawberry purée. Carefully spoon about half of the creamy cheesecake mixture into another clean bowl and set it aside. To the first half of the mixture remaining in the main bowl, gently fold in 1 cup of the fresh strawberry purée. Again, use a gentle folding motion to ensure the purée is incorporated evenly, creating a lovely pink swirl. You want ribbons of strawberry, not a uniformly mixed pink batter at this stage.
Step 7: Assemble the cheesecake layers in the prepared crust. Retrieve your chilled crust from the freezer. Carefully spoon the plain cream cheese mixture into the crust and spread it evenly. Then, spoon the strawberry-swirled mixture over the plain layer. Use your spatula to gently smooth the top, creating attractive swirls of both colors. This layering technique ensures you get both flavors in every bite.
Step 8: Chill the cheesecake until firm. Once assembled, cover the springform pan tightly with plastic wrap. Place the cheesecake in the freezer for at least 4 to 5 hours, or preferably overnight, to allow it to set completely. Proper chilling is crucial for achieving that perfect cheesecake texture, ensuring it’s firm enough to slice cleanly.
Step 9: Finish with the strawberry crunch topping. When you’re ready to serve, carefully remove the cheesecake from the springform pan. If it seems a little too firm to slice easily, let it sit at room temperature for about 10-15 minutes to soften slightly. Now, take your prepared strawberry shortcake crumble and generously coat the top and sides of the cheesecake with it. Press it gently to help it adhere. This step adds that irresistible texture and a burst of extra flavor.
Step 10: Slice and serve your masterpiece. Use a sharp knife, dipped in hot water and dried between each cut, for the cleanest slices. Serve this delightful No-Bake Strawberry Crunch Cheesecake immediately and enjoy the praises! This dessert is best enjoyed chilled, so if you need to firm it up again after slicing, a quick return to the freezer for a short while works wonders.
Chef’s Tips for a Perfect Result
- Ensure your cream cheese is truly at room temperature; this is crucial for a lump-free, smooth filling. Cold cream cheese can lead to a textured, uneven result that’s hard to fix.
- Use cold heavy whipping cream and a chilled bowl when whipping cream. This helps the cream achieve stiff peaks much more effectively and quickly.
- Be gentle when folding the whipped cream into the cream cheese mixture. Overmixing will deflate the air, resulting in a denser cheesecake.
- Chill the crust adequately before adding the filling. This prevents the crust from becoming soggy and ensures clean slicing.
- When puréeing strawberries, slightly reduce the purée on the stovetop if you prefer a more intense, less watery strawberry flavor. Let it cool completely before adding to the filling.
- For the cleanest slices, use a large, sharp knife. Dip it in hot water and wipe it dry between each cut to prevent the filling from sticking.
Variations and Substitutions
Vegan Option
For a vegan version, use vegan cream cheese alternatives and ensure your Golden Oreos are confirmed vegan (most are, but always check packaging). Swap the butter for a plant-based alternative like vegan butter or coconut oil, and use a plant-based whipping cream alternative. The texture might be slightly different but still delicious.
Gluten-Free Alternative
Crush gluten-free OREOs or another favorite gluten-free cookie for the crust and crumble topping. Ensure all other ingredients, like the powdered sugar and any pre-made crumble components, are certified gluten-free.
Low-Carb Version
Use a low-carb cookie or nut-based crust. For the filling, substitute powdered sugar with a keto-friendly sweetener like erythritol or xylitol, adjusting to taste. Heavy whipping cream is generally keto-friendly, but check the carbohydrate content of your cream cheese.
Budget Swap
If Golden Oreos are pricey, consider using other plain sweet cookies like vanilla wafers or graham crackers for the crust. For the topping, a simple mixture of crushed shortbread cookies, melted butter, and a touch of sugar can work if the specific strawberry shortcake crumble is unavailable.
How to Serve and Pair
This No-Bake Strawberry Crunch Cheesecake is a showstopper on its own, but takes on another level with simple additions! For a classic presentation, serve generous slices directly from the springform pan. A drizzle of fresh strawberry coulis or a few fresh strawberry slices on top can enhance its vibrant appeal. A dollop of freshly whipped cream on the side is always a welcome addition for those who love an extra creamy indulgence.
This cheesecake pairs beautifully with a light, refreshing beverage. Consider a chilled glass of sparkling pink lemonade, iced green tea, or a delicate elderflower cordial. For a more decadent pairing, a sweet rosé wine or a crisp prosecco complements the fruity sweetness without overpowering the dessert. It’s perfect for almost any occasion, from a casual backyard barbecue to a more formal celebratory dinner or a cozy night in with loved ones.
Storage and Reheating
Refrigerator
Store leftover No-Bake Strawberry Crunch Cheesecake in an airtight container in the refrigerator for up to 3-4 days. It’s best to cover it snugly to prevent it from absorbing any odors from other foods. The texture may soften slightly over time but remains delicious.
Freezer
For longer storage, you can freeze the cheesecake. Once fully set, wrap it tightly in plastic wrap, then in aluminum foil, or place it in a freezer-safe container. It can be stored in the freezer for up to 1-2 months. Thaw it in the refrigerator overnight before serving for best results.
Room Temperature
This cheesecake should not be left at room temperature for more than 2 hours, due to the dairy content. It is best enjoyed chilled, so keeping it cold is essential for maintaining its texture and food safety.
Reheating
Reheating is generally not necessary or recommended for this no-bake dessert, as it is designed to be served cold from the refrigerator or freezer. If it becomes too hard from freezing, simply allow it to thaw in the refrigerator for several hours or at room temperature for 10-15 minutes before serving. Avoid any form of cooking or direct heat.
Nutritional Values
- Calories: 471 kcal
- Protein: 5 g
- Carbohydrates: 46 g
- Fat: 31 g
- Fiber: 1 g
Approximate values.
Frequently Asked Questions (FAQ)
Can I substitute the Golden Oreos in this recipe?
Yes, you can substitute Golden Oreos with other sweet cookies like vanilla wafers or graham crackers. For a gluten-free option, use gluten-free chocolate sandwich cookies. The cookie choice will subtly alter the final flavor profile and sweetness of the crust.
How do I know when my no-bake cheesecake is ready?
Your no-bake cheesecake is ready when it’s firm to the touch and holds its shape after chilling. Gently pressing the center should feel solid, not jiggly. It should slice cleanly without crumbling or slumping excessively.
What if my cheesecake filling is too soft or doesn’t set?
If your filling is too soft, it typically means it needs more chilling time. Ensure all ingredients were at the correct temperature during preparation, especially the cream cheese and whipped cream. For future attempts, make sure the heavy whipping cream is fully whipped to stiff peaks before folding.
Can I make the strawberry crunch cheesecake ahead of time?
Absolutely! This no-bake cheesecake is ideal for making ahead. It needs at least 4-5 hours to set, but making it the day before is perfect. This allows the flavors to meld and ensures it’s perfectly chilled and firm for serving.
What are the best ways to customize or serve my strawberry crunch cheesecake?
You can customize it by adding a layer of fresh strawberry slices on top of the plain cheesecake filling before adding the swirled layer. It’s also wonderful served with a fresh berry salad on the side or a drizzle of strawberry sauce.
CONCLUSION
This No-Bake Strawberry Crunch Cheesecake is a testament to how simple ingredients and a little patience can create an absolutely stunning dessert. It’s creamy, packed with bright strawberry flavor, and has that addictive crunch that makes every bite delightful. You absolutely must try this recipe; it’s incredibly rewarding to make and even more so to eat. The irresistible blend of cool creaminess and sweet strawberry crunch is truly a winning combination.


