
No-Bake Icebox Cake with Peach Pie Filling is the ultimate effortless summer dessert that will make you look like a total kitchen rockstar without turning on your oven. When the summer heat strikes or you need a quick sweet treat for a chaotic weeknight, this No-Bake Icebox Cake with Peach Pie Filling saves the day. It combines luscious layers of fluffy cream, juicy peaches, and tender graham crackers that melt together into absolute magic.
What is No-Bake Icebox Cake with Peach Pie Filling?
This fabulous dessert is a modern, fruity twist on the classic American icebox cake that grandma used to make. Instead of spending hours measuring flour or worrying about your cake sinking in the middle, you construct this masterpiece using smart layers. By letting it rest in the fridge, the graham crackers absorb moisture from the surrounding layers, softening into a tender, cake-like texture that cuts beautifully.
Reasons to Try No-Bake Icebox Cake with Peach Pie Filling
- Zero Baking Required: You can keep your kitchen blissfully cool because your refrigerator does all the heavy lifting.
- Insanely Fast Prep: It takes just ten minutes of hands-on effort, making it ideal for busy moms and working professionals.
- Crowd-Pleasing Flavors: The combination of sweet peaches and cloud-like cream appeals to everyone from toddlers to grandparents.
- Budget-Friendly Ingredients: You only need a handful of affordable staple ingredients to pull this together.
Ingredients Needed to Make No-Bake Peach Icebox Cake
- 18 graham crackers
- 8 ounces whipped topping (or use the homemade whipped cream recipe below)
- 3 cups peach pie filling (homemade or a store-bought can)
- 1 dash ground nutmeg for garnish
Optional Homemade Whipped Cream Ingredients
- 1 1/4 cups heavy whipping cream (must be completely cold)
- 1/2 cup powdered sugar
- 1 tsp vanilla extract
Instructions to Make No-Bake Peach Icebox Cake – Step by Step
Step 1: Prep Your Whipped Layer
First, you need to get your creamy base ready to rock. If you are using store-bought whipped topping, go ahead and divide it into four equal parts. For those making the ultra-luxurious homemade version, grab a large chilly mixing bowl and pour in your cold heavy whipping cream, powdered sugar, and vanilla extract. Attach your whip tool and beat the mixture beautifully until stiff peaks form, but do not mix too long or you will accidentally create sweet butter. Once your cream is perfectly fluffy, gently spread a quarter of it to evenly cover the bottom of your 9″x9″ square baking pan.
Step 2: Build the First Graham Layer
Next, grab your graham crackers and create your first solid foundation. Lay the crackers side by side directly over that smooth bottom layer of cream. Do not stress if they do not fit perfectly like a puzzle; simply break them into smaller pieces to fill any stubborn gaps. This step by step process is completely foolproof, so feel relaxed and enjoy the assembly.
Step 3: Spread More Cream and Peaches
Now it is time to add the star of the show. Carefully spread another quarter of your whipped cream right over the top of your graham crackers. Once that is smooth, gently spoon half of your juicy peach pie filling over the cream layer, doing your absolute best not to mix the layers together.
Step 4: Repeat the Middle Layers
To build up that gorgeous height, simply repeat the previous steps. Lay down your second tier of graham crackers, snapping them as needed to fit the pan. Spread another quarter of the whipped cream across the crackers, and then carefully float the remaining half of the peach pie filling over the top.
Step 5: The Grand Finale
Finish things off by placing one last layer of graham crackers on top, which will be your third cracker layer. Spread the remaining quarter of your whipped cream smoothly across the top to seal everything in. Grab your ground nutmeg and add a light, aromatic dusting over the top for a gorgeous pop of color and flavor. Pop the pan into your refrigerator for at least two hours so the crackers can soften up into true cake perfection.
What to Serve with No-Bake Peach Icebox Cake
This sweet dessert pairs beautifully with a steaming mug of black coffee or a tall glass of unsweetened iced tea to balance the richness. If you are hosting a backyard barbecue, serve it alongside grilled chicken, fresh corn on the cob, and a crisp summer salad. For an extra touch of indulgence, you can even top individual slices with a few fresh mint leaves or a scoop of vanilla bean ice cream.
Key Tips for Making No-Bake Peach Icebox Cake
- Keep it Cold: If you choose to make homemade whipped cream, your heavy cream must be ice-cold right out of the fridge to whip up correctly.
- Adjust Your Thickness: Use a 9″x9″ pan if you want a thick, towering dessert, or switch to an 8″x11″ pan if you prefer a thinner treat.
- Patience is Key: Do not skip the two-hour chilling time because that refrigeration process is what transforms hard crackers into soft cake layers.
Storage and Reheating Tips No-Bake Peach Icebox Cake
Store any leftover cake tightly covered with plastic wrap or aluminum foil in the refrigerator for up to three days. Because this is a chilled dessert, you never want to reheat it in the microwave or oven. If the cream gets a little too soft while sitting on the counter during dessert time, just slide the pan back into the fridge for fifteen minutes to firm it right back up.
FAQs
Can I use fresh peaches instead of pie filling? Yes, but you will want to simmer fresh peach slices with a little sugar and cornstarch first to create that thick, saucy consistency that prevents the cake from getting soggy.
Can I make this dessert a day in advance? Absolutely, making it the night before is actually wonderful because it gives the graham crackers plenty of time to soften up completely.
Can I freeze this icebox cake? Yes, you can freeze it for up to two weeks; just let it thaw in the refrigerator for about an hour before you plan to slice and serve it.
Final Thoughts
This No-Bake Icebox Cake with Peach Pie Filling is a total lifesaver when you need a crowd-pleasing dessert without any stress. It delivers maximum flavor with minimal effort, making it the ultimate recipe to keep in your back pocket all year long. Give this No-Bake Icebox Cake with Peach Pie Filling a try this weekend, and watch your family devour every single bite.
Print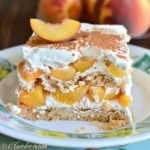
No-Bake Icebox Cake with Peach Pie Filling
- Prep Time: 30
- Total Time: 30
- Yield: 8 slices 1x
- Category: desserts
- Method: No-Bake / Refrigerating
- Cuisine: American
- Diet: Vegetarian
Description
A creamy, no-bake icebox cake layered with homemade-style peach pie filling, sweetened condensed milk, and a graham cracker crust. Perfect for a summer dessert, chilled overnight for a velvety texture and tangy flavor.
Ingredients
1 1/2 cups finely crushed graham crackers
5 tablespoons softened halal-certified butter
1 (14 oz) can sweetened condensed milk
1/2 cup alcohol-free buttermilk
4 packages (8 oz each) cream cheese, softened
8 cups canned peach pie filling (halal)
2 cups whipped cream
1/2 cup non-alcoholic Greek yogurt (for a tangy twist, optional)
Instructions
Mix crushed graham crackers and softened butter; press evenly into the bottom of a 9×13 inch pan.
In a bowl, combine condensed milk and buttermilk, then add cream cheese and Greek yogurt. Beat until smooth and creamy.
Spread the cream cheese mixture over the crust, then layer on peach pie filling.
Top with whipped cream and chill in the refrigerator for 8 hours to set.
Slice into 8-10 portions just before serving.
Notes
Chill overnight for optimal firmness
Substitute graham cracker crust with a halal-certified shortbread base
Store leftovers covered in the refrigerator up to 3 days
Nutrition
- Serving Size: 1 slice (2 oz)
- Calories: 320
- Sugar: 38g
- Sodium: 150mg
- Fat: 17g
- Saturated Fat: 8g
- Carbohydrates: 42g
- Fiber: 1g
- Protein: 6g
- Cholesterol: 40mg


