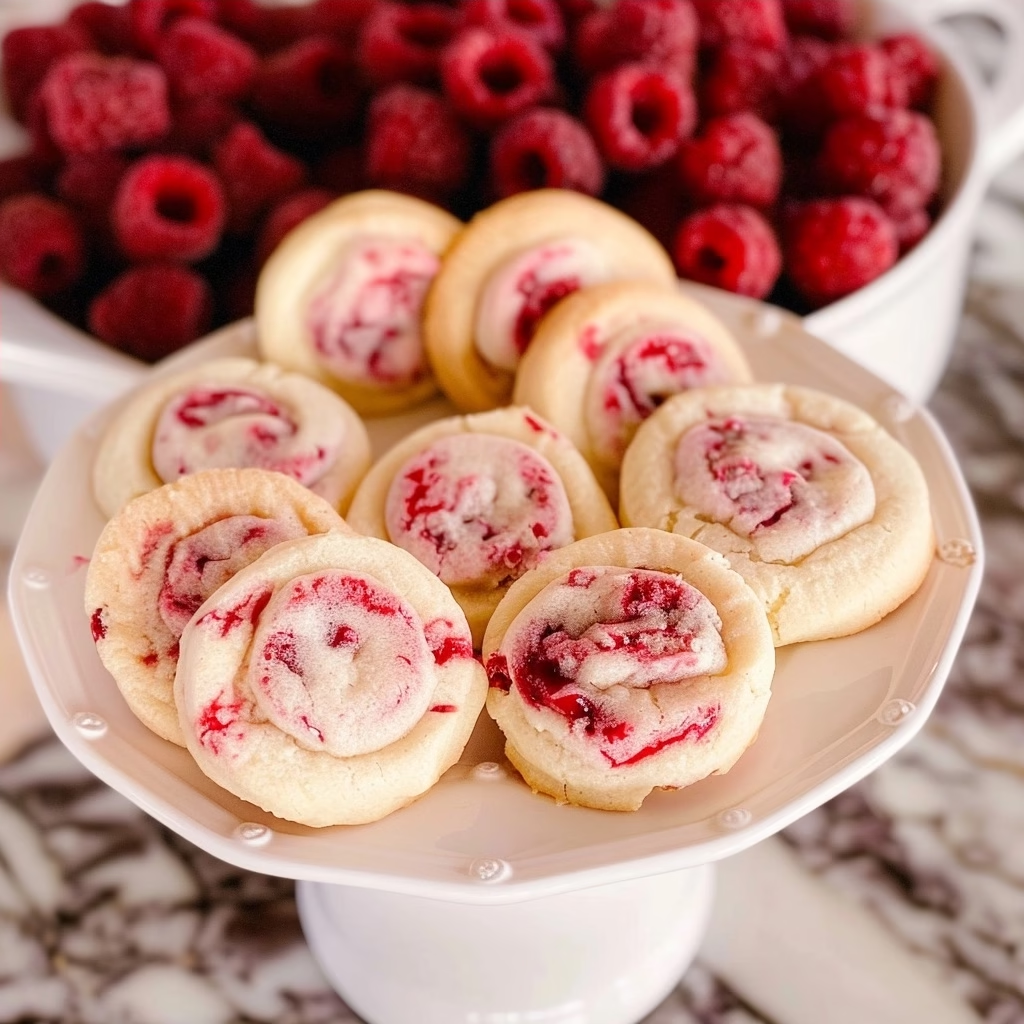
Have you ever had a moment where you just needed a tiny, sweet escape from the daily chaos? Between managing a hectic schedule, endless piles of laundry, and keeping up with the family, finding a moment of pure bliss can feel like a luxury. Enter RASPBERRY MELTAWAY COOKIES. These little bites are the absolute answer to your sweet cravings, and they literally melt in your mouth. Imagine a cloud-like, buttery shortbread cookie that vanishes the second it hits your tongue, leaving behind a rich, melt-in-your-mouth texture. Then, picture it topped with a smooth vanilla-almond glaze and a beautiful swirl of vibrant tart raspberry jam. They are everything you want in a treat: delicate, gorgeous, and surprisingly simple to throw together. Whether you are hiding in the pantry for a secret five-minute mom break or hosting a weekend brunch with your best friends, these cookies are about to become your new absolute favorite baking project.
What is Raspberry Meltaway Cookies?
At their core, these treats are an elevated version of a classic tea cookie, combining a super soft cornstarch-based dough with fruit and glaze. The magic lies entirely in the dough texture. Because we use a generous amount of cornstarch alongside the powdered sugar and butter, it prevents tough gluten from forming. This creates a crumb so tender that it practically dissolves instantly, hence the name meltaway. Unlike a traditional sugar cookie that requires heavy rolling and cutting, this dough is scooped, rolled into simple balls, and baked until just barely set. The addition of almond extract gives the base an incredible depth of flavor that pairs beautifully with the sweet vanilla glaze and the bright punch of seedless red raspberry jam swirled on top. They are sophisticated enough to look like they came from a fancy boutique bakery, but they are easy enough to whip up on a random Tuesday afternoon.
Reasons to Try RASPBERRY MELTAWAY COOKIES
If you need a few reasons to get your mixing bowl out, let us count the ways these cookies win at life. First, they are incredibly fast to make. The hands-on preparation time is minimal, making them perfect for busy moms and professionals who do not have hours to spend in the kitchen. Second, they look like an absolute masterpiece. The gorgeous toothpick-swirled jam design on top makes them look stunning on any dessert table, so you can easily impress your friends, family, or coworkers without breaking a sweat. Third, they are a total crowd-pleaser for picky eaters and sophisticated palates alike because the flavor balance is just spot on. Finally, you probably already have almost all the ingredients sitting right in your pantry and refrigerator at this exact moment.
Ingredients Needed to Make Raspberry Meltaway Cookies
Meltaway Cookies Base
-
1 cup butter, softened to room temperature (2 sticks)
-
¾ cup cornstarch
-
¾ cup powdered sugar
-
1 ½ teaspoons almond extract
-
1 to 1 ½ cups all-purpose flour (use the higher amount for high humidity or sea-level environments)
Vanilla Glaze
-
1 ½ cups powdered sugar
-
3 tablespoons butter
-
3 tablespoons milk
-
½ teaspoon vanilla extract
Fruit Swirl Top
-
2 to 3 tablespoons seedless red raspberry jam
Instructions to Make Raspberry Meltaway Cookies – Step by Step
Step 1: Creaming the Butter and Cornstarch
The journey to cookie perfection starts by combining your two chief texture-building ingredients. Grab your stand mixer or a reliable hand mixer and blend the one cup of softened butter with the three-quarters of a cup of cornstarch. You want to mix these together thoroughly until they are completely combined and smooth. This step coats the starch molecules and guarantees that ultra-soft texture later on.
Step 2: Adding Sweetness and Aromatics
Once your butter and cornstarch mixture looks uniform, it is time to add the sweet and aromatic elements. Pour in your three-quarters of a cup of powdered sugar along with the one and a half teaspoons of almond extract. Mix the whole bowl together until the texture becomes completely smooth, light, and creamy. Your kitchen should already start smelling absolutely heavenly from that almond extract.
Step 3: Incorporating the Flour and Chilling the Dough
Now, gently add your all-purpose flour to the wet mixture. Mix everything together just until the dough comes together beautifully and all the flour is fully incorporated into a soft mass. Once your dough forms, cover the bowl tightly and pop it straight into the refrigerator to chill for about ten to fifteen minutes. Chilling the dough keeps the butter firm so your cookies do not spread into giant pancakes while baking.
Step 4: Preheating and Portioning the Dough Balls
While your dough enjoys its quick chill session, go ahead and preheat your oven to 350 degrees F. Line a large baking sheet with parchment paper to keep things completely mess-free. Once the dough finishes chilling, scoop out small portions of about a half tablespoonful each. A small cookie scoop works like an absolute charm here to keep things perfectly uniform. Roll each portion gently between your palms to create a smooth ball, and lay them out on your prepared parchment sheet. Arrange them neatly four across in five rows, fitting about twenty cookies on a single sheet.
Step 5: Baking to Perfection
Slide your loaded cookie sheet into the preheated oven and bake them for exactly nine minutes. You do not want these cookies to brown on top; they should remain pale and delicate. Once the timer rings, pull them out of the oven. Immediately grab the flat bottom of a clean drinking glass and gently press down on the tops of each warm cookie to flatten them slightly. Let the flattened cookies sit on the hot pan for two minutes before transferring the parchment paper with the cookies onto a wire cooling rack.
Step 6: Whipping Up the Vanilla Glaze
While your cookie bases cool down, let us whip up that delicious, glossy topping. In a medium bowl, whisk together your one and a half cups of powdered sugar, three tablespoons of butter, three tablespoons of milk, and a half teaspoon of vanilla extract. Whisk vigorously until the glaze looks completely smooth and achieves a thick yet pourable consistency. Allow the mixture to cool down slightly so it thickens up just a bit more before you spoon it onto your treats.
Step 7: Glazing and Creating the Beautiful Raspberry Jam Swirl
After your cookies have cooled on the rack for about ten minutes, it is time for the fun, artistic part. Spoon a small dollop of your smooth vanilla glaze right onto the center of each cookie top. Next, spoon your seedless red raspberry jam into a small plastic storage bag and snip off a tiny sliver of the bottom corner to create a DIY piping bag. Pipe four to five small, neat drops of jam directly onto the wet vanilla glaze of each cookie. Immediately take a clean toothpick and gently drag it through the jam drops and the glaze in a circular motion, swirling them together into a stunning marble pattern.
What to Serve with Raspberry Meltaway Cookies
These beautiful little gems are incredibly versatile and pair wonderfully with a variety of refreshing beverages. For a classic afternoon pickup, serve them alongside a piping hot mug of Earl Grey tea or a dark roast coffee; the bitterness of the coffee beautifully cuts through the sweet almond glaze. If you are hosting a summer bridal shower or a brunch with your girlfriends, they look stunning next to a sparkling glass of iced hibiscus herbal tea or a crisp Mimosa. For the ultimate nostalgic comfort treat after a long day of running errands, nothing beats enjoying a couple of these delicate fruit-swirled treats with a tall, ice-cold glass of creamy milk.
Key Tips for Making Raspberry Meltaway Cookies
Baking can sometimes feel like a high-stakes science experiment, but keeping a few simple tricks in mind will give you flawless results every time. Pay close attention to your local weather and geographic location before you begin measuring. If you live in a highly humid climate or close to sea level, the moisture in the air changes how flour behaves in dough. Instead of sticking strictly to one cup of all-purpose flour, go ahead and use one and a half cups. To be completely safe, bake a quick test batch of just three to four cookies first to make sure they hold their beautiful shape and do not spread out too thin on the hot pan. Also, always make sure your butter is truly softened to room temperature before mixing, not melted in the microwave, as melted butter completely ruins the delicate structure of the meltaway dough.
Storage and Reheating Tips Raspberry Meltaway Cookies
Keeping your baked creations fresh and delightful is incredibly simple if you follow the right steps. Let your fully glazed and swirled cookies sit out at room temperature until the topping sets completely firm to the touch. Once they are fully dry, transfer them carefully into a single layer inside an airtight plastic container. If you need to stack them to save space, always place a sheet of parchment paper or wax paper directly between the layers to prevent the beautiful decorations from sticking together. They stay perfectly soft and delicious at room temperature for up to four days. If you want to keep them fresh for longer, you can freeze the unglazed baked cookies in a freezer-safe bag for up to two months, thawing them out and applying fresh glaze and jam right before you plan to serve them.
FAQs
Can I use regular granulated sugar instead of powdered sugar?
Using regular granulated sugar is not recommended for this specific recipe because it completely alters the final texture. Powdered sugar contains a tiny bit of cornstarch and dissolves instantly into the butter, which is exactly what gives these treats their signature delicate, melt-in-your-mouth crumb. Regular sugar will make the cookies crunchy and grainy instead of soft.
Why did my cookies spread out so flat during baking?
This usually happens for two common reasons: either your butter was too hot and melted when you mixed the dough, or your kitchen is warm and the dough needed a bit more chilling time. Make sure to chill your shaped dough balls thoroughly in the refrigerator before baking, and ensure you measured your flour correctly using the spoon-and-level method.
Can I use a different flavor of fruit jam for the swirl?
Absolutely. While seedless red raspberry jam provides that classic, tart berry flavor that looks stunning against the white glaze, you can easily swap it out for seedless strawberry, blackberry, apricot, or even passionfruit curd depending on your personal flavor preferences. Just make sure whatever option you choose is completely seedless so it pipes smoothly through your bag.
Final Thoughts
Baking a batch of homemade treats should never feel like a stressful chore, and these RASPBERRY MELTAWAY COOKIES are the ultimate reminder of how joyful and simple baking can truly be. They are the perfect little luxurious bite to brighten up a chaotic week, offering a sweet moment of peace whenever you need it most. With their cloud-like texture, sweet almond-infused glaze, and beautiful ribbons of ruby-red jam, they bring an effortless touch of elegance to your kitchen counter. So go ahead, treat yourself to a little creative kitchen therapy, gather your simple pantry ingredients, and bake a batch of these beautiful melt-in-your-mouth wonders today.
Print
Raspberry Meltaway Cookies: Your New Go-To Delight
- Prep Time: 25
- Cook Time: 15
- Total Time: 40
- Yield: 24 cookies 1x
- Category: desserts
- Method: Baking
- Cuisine: American
- Diet: Vegetarian
Description
Buttery, melt-in-your-mouth cookies filled with sweet raspberry preserves and a hint of vanilla. These soft, tender treats are perfect for breakfast or dessert!
Ingredients
2 cups all-purpose flour
1 tsp baking powder
1/4 tsp salt
1/2 cup unsalted butter, softened
3/4 cup powdered sugar
1 egg
1 tbsp vanilla extract
1/2 cup raspberry preserves
Instructions
Preheat oven to 350°F (180°C)
In a bowl, mix flour, baking powder, and salt
In another bowl, cream butter and powdered sugar until smooth
Add egg and vanilla, beat well
Gradually add dry ingredients to the wet mixture
Chill dough for 30 minutes
Roll into 1-inch balls
Place on baking sheets and flatten slightly
Refrigerate 10 minutes
Bake for 12-15 minutes until golden
Cool completely before serving
Notes
For alcohol-free raspberry preserves, check labels to avoid products with wine
Store in an airtight container at room temperature for up to 3 days
Nutrition
- Serving Size: 1 cookie
- Calories: 175
- Sugar: 14g
- Sodium: 100mg
- Fat: 8g
- Saturated Fat: 5g
- Carbohydrates: 22g
- Fiber: 0.3g
- Protein: 2g
- Cholesterol: 20mg


