No Bake Chocolate Pudding Pie with Raspberries
No Bake Chocolate Pudding Pie with Raspberries – there’s something incredibly comforting and exciting about this dessert. It’s the kind of treat that brings smiles to faces, whether it’s a special occasion or just a Tuesday evening that calls for a little something sweet. I remember the first time I tried to recreate a similar pie, feeling a bit unsure if I could pull off that smooth, rich texture without turning on the oven. Chocolate and raspberries are such a classic pairing, and when you combine them in a creamy, dreamy pie with a little unexpected pop, you just know it’s going to be a hit.
This recipe is a wonderful dance of textures and flavors. The deep, bittersweet chocolate pudding is perfectly balanced by the bright, slightly tart raspberries. And then there’s the crust – a delightful surprise with its unique popping candy inclusion. It’s a dessert that’s not just about taste, but also about a fun, memorable experience. It takes me back to lazy afternoons spent experimenting in the kitchen, sometimes with a less-than-perfect outcome, but always with a lot of love and a desire to make something delicious to share.
What is No Bake Chocolate Pudding Pie with Raspberries?
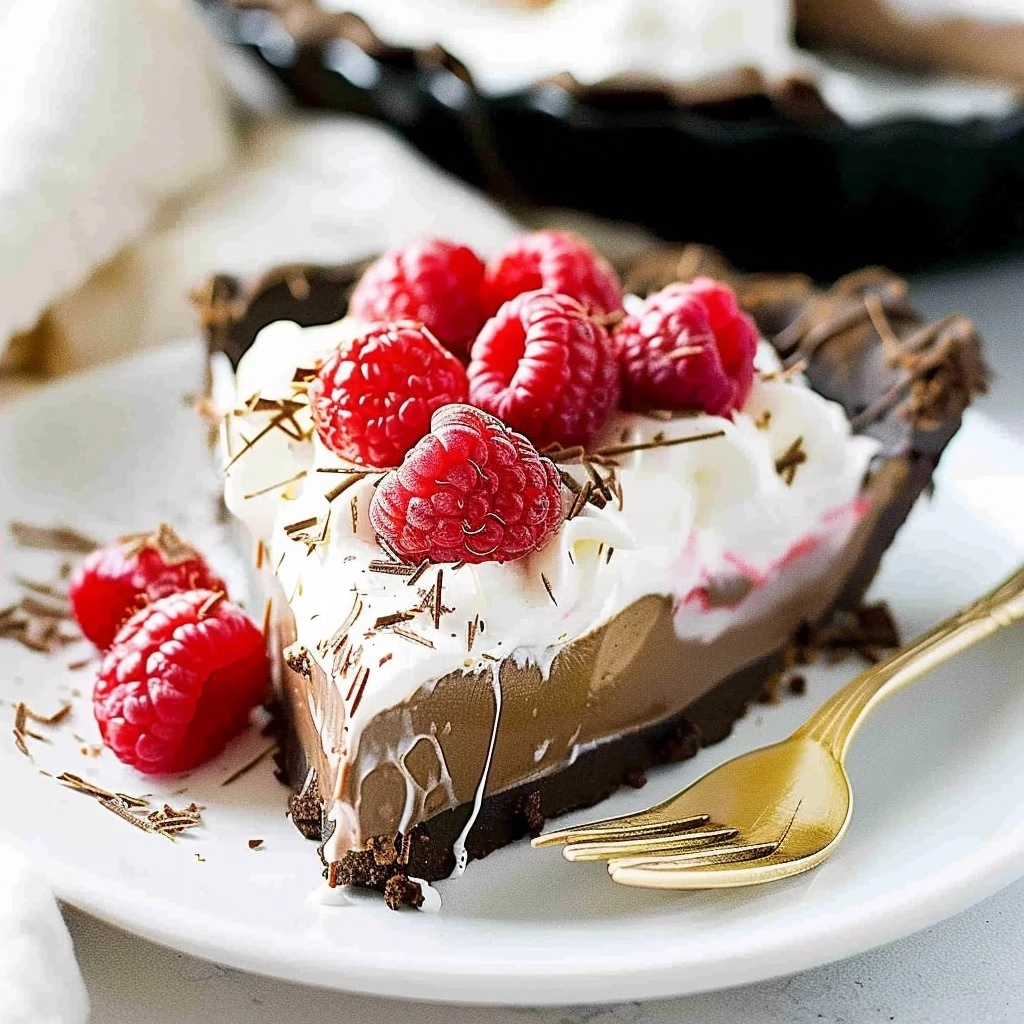
This No Bake Chocolate Pudding Pie with Raspberries is a delightful dessert that requires no baking, making it a fantastic option for warmer weather or when you simply want to avoid the oven. It features a smooth, rich, and deeply chocolatey pudding filling nestled within a specially prepared cookie crust. The magic happens with the inclusion of fresh raspberries, which add a vibrant burst of tartness to cut through the chocolate’s richness. The entire creation is crowned with a cloud of fluffy whipped cream and often decorated with even more fresh berries and chocolate shavings.
The unique characteristic of this pie, beyond its no-bake nature, is the optional inclusion of popping candy in the crust. This element adds a playful and surprising sensation with every bite, making it a fun surprise for guests, especially kids. The base is typically made from crushed chocolate sandwich cookies combined with butter and a hint of melted chocolate, forming a sturdy yet crumbly foundation. This approach simplifies the dessert-making process significantly while still delivering a truly decadent and satisfying treat that feels every bit as special as a baked pie.
Reasons to Try No Bake Chocolate Pudding Pie with Raspberries
There are so many reasons why this No Bake Chocolate Pudding Pie with Raspberries deserves a spot in your recipe repertoire. First and foremost, it’s incredibly easy to make, perfect for anyone who’s new to baking or just looking for a fuss-free dessert. The ‘no-bake’ aspect means you can whip it up without heating your kitchen, and it’s fantastic for make-ahead entertaining because it needs time to chill and set. The combination of deep chocolate pudding, bright raspberries, and that fun popping crust is absolutely divine, offering a complex flavor profile and exciting textures that will impress any palate.
This pie is wonderfully versatile. It’s ideal for birthday parties, holiday gatherings, potlucks, or simply a cozy night in. Busy home cooks will appreciate that most of the work is done ahead of time, allowing you to relax when guests arrive. Plus, the visual appeal with the vibrant raspberries and whipped cream topping makes it a showstopper. It’s a dessert that brings playful joy with the popping candy element, making it memorable and thoroughly enjoyable for all ages. It truly brings a sense of occasion without the stress.
Ingredients Needed to Make No Bake Chocolate Pudding Pie with Raspberries
Popping Cookie Crust:
* 2 tablespoons pop rocks or popping candy (strawberry flavored or unflavored works best)
* 2.5 ounces bittersweet chocolate, melted and cooled slightly
* ½ tablespoon neutral oil (like vegetable or canola)
* 30 chocolate sandwich cookies (about 2.5 sleeves, such as Oreos), finely crushed
* 5 tablespoons unsalted butter, melted
Chocolate Filling:
* 40 grams (about 1/3 cup) cornstarch
* 150 grams (about ¾ cup) granulated white sugar
* ½ teaspoon fine sea salt
* 6 large egg yolks
* 2 ½ cups half and half (or 1 ½ cups whole milk + 1 cup heavy cream)
* 2 teaspoons pure vanilla extract
* 226 grams (about 8 ounces) bittersweet chocolate, finely chopped
* 2 tablespoons unsalted butter
Whipped Cream Topping:
* 1 cup heavy cream (35% fat or higher), very cold
* ⅛ teaspoon fine sea salt
* 50 grams (about ¼ cup) granulated white sugar
* 1 teaspoon pure vanilla extract
Assembly:
* 455 grams (about 2 pints) fresh raspberries (for filling the pie and for decorating)
* Melted chocolate or shaved chocolate, for garnish (optional)
Instructions to Make No Bake Chocolate Pudding Pie with Raspberries – Step by Step
Popping Cookie Crust:
Step 1: Let’s start by preparing our unique, fun crust. In a small bowl, combine the ½ tablespoon of neutral oil with the 2.5 ounces of melted bittersweet chocolate. Stir this together until it’s smooth and glossy. Now, and this is where the surprise comes in, gently fold in the 2 tablespoons of pop rocks or popping candy. Be careful not to overmix; we want the popping candy to retain its magic for later.
Step 2: Next, take your 30 chocolate sandwich cookies and pulse them in a food processor until you have fine crumbs. If you don’t have a food processor, you can place them in a sturdy zip-top bag and crush them with a rolling pin – it’s a great stress reliever, too! Add the 5 tablespoons of melted butter to the cookie crumbs and pulse a few more times, or stir, until the crumbs are moistened and begin to clump together. The mixture should feel like wet sand.
Step 3: In a medium bowl, combine the crumbly cookie mixture with the melted chocolate and popping candy mixture you prepared earlier. Gently fold everything together with a spatula until it’s just combined. You don’t want to overwork it, as this can prematurely activate the popping candy. The goal is to evenly distribute the chocolate and candy throughout the crumbs.
Step 4: Prepare a 9-inch pie dish or a deep tart pan. You can butter it lightly, but I find lining the bottom with parchment paper is the easiest way to ensure the pie comes out cleanly. Spoon the crumb mixture into the prepared pan. Using the bottom of a measuring cup or a flat-bottomed glass, gently press the crumbs evenly into the bottom and up the sides of the pan to form your crust. Remember, pressing too firmly might cause the popping candy to start popping too soon, so keep a gentle touch.
Step 5: Once your crust is formed, carefully place it in the freezer. It needs to firm up properly, so let it chill there for at least an hour, though freezing it overnight is even better. This ensures a firm base that will hold all that delicious filling.
Chocolate Pudding Filling:
Step 6: Now, let’s get started on the luscious chocolate pudding. In a medium, heavy-bottomed saucepan (this helps prevent scorching), whisk together the 40 grams of cornstarch, 150 grams of white sugar, and ½ teaspoon of salt. Make sure there are no clumps. Then, add the 6 egg yolks and whisk them into the dry ingredients until you have a smooth, thick paste. This step is key to a silky pudding.
Step 7: Gradually whisk in the 2 ½ cups of half and half (or your milk and cream mixture) and the 2 teaspoons of vanilla extract. Continue whisking until everything is thoroughly combined and there are absolutely no lumps. It’s a good idea to pour this mixture through a fine-mesh sieve into another bowl or directly back into the rinsed saucepan to catch any hidden lumps before cooking.
Step 8: Place the saucepan over medium heat. Cook the pudding base, stirring and whisking constantly, for about 5 to 10 minutes, or until it has significantly thickened. You’ll notice it coats the back of a spoon nicely. Constant stirring is crucial here to prevent the egg yolks from scrambling and to ensure the pudding cooks evenly. If you see any small lumps forming, don’t worry; just keep whisking vigorously; they often disappear.
Step 9: Once the pudding base has reached that thick, luscious consistency, immediately remove the saucepan from the heat. Add the 226 grams of finely chopped bittersweet chocolate and the 2 tablespoons of butter to the hot pudding. Stir gently until both the chocolate and butter have completely melted and are fully incorporated, creating a smooth, glossy, and intensely chocolatey mixture. The residual heat from the pudding will do the melting.
Step 10: Allow this rich chocolate pudding base to cool down completely. This is a really important step for the final texture. As it cools, give it an occasional whisk every 15-20 minutes to prevent a skin from forming on the surface. You can speed this up by placing the saucepan in an ice bath, stirring frequently.
Whipped Cream Topping:
Step 11: This part is best done just before you’re ready to assemble and serve the pie, as whipped cream is at its best when freshly made. Take a chilled bowl and add the 1 cup of very cold heavy cream, the ⅛ teaspoon of sea salt, the 50 grams of sugar, and the 1 teaspoon of vanilla extract. Using an electric mixer on medium speed, whip the cream until you achieve stiff peaks. This means when you lift the beaters, the cream holds its shape firmly without drooping.
Step 12: Set aside about ¾ of the whipped cream. If you plan to pipe a decorative border around the pie, spoon this portion into a piping bag fitted with an open star tip. Keep the remaining whipped cream aside to spread over the top of the pie before decorating.
Assembly:
Step 13: Retrieve your frozen cookie crust from the freezer. Now, carefully arrange a single layer of fresh raspberries on the bottom of the crust. Try to place them on their sides, filling in any gaps. This layering will create a beautiful base and keep the raspberries from getting too mushy when the warm pudding is added.
Step 14: Spoon the completely cooled chocolate pudding filling over the layer of raspberries, spreading it evenly to the edges of the crust using an offset spatula or the back of a spoon. Make sure to cover all the raspberries. Reserve some of the fresh raspberries you have set aside to use for decorating the top of the pie later.
Step 15: Cover the pie loosely with plastic wrap, making sure the wrap doesn’t touch the surface of the pudding if possible. Place the pie in the refrigerator to set for at least four hours. However, for the best texture and firmness, I highly recommend letting it chill overnight. This allows the pudding to fully set and the flavors to meld beautifully.
Step 16: Just before you’re ready to serve this incredible No Bake Chocolate Pudding Pie with Raspberries, remove the plastic wrap. Spread the reserved plain whipped cream evenly over the top of the set pudding. If you prepared a piping bag, pipe a decorative border around the edges, or simply spread the whipped cream liberally as you like.
Step 17: Finally, get creative with your decorations! Arrange the reserved fresh raspberries artfully on top of the whipped cream. You can also drizzle it with a little melted chocolate or sprinkle some chocolate shavings over it for an extra touch of indulgence. Slice into your masterpiece and enjoy the delightful combination of flavors and textures!
Chef’s Tips for a Perfect Result
- For the smoothest pudding, always use a heavy-bottomed saucepan to prevent scorching and ensure even heating.
- Whisk the pudding mixture continuously while it cooks to avoid lumps and prevent the eggs from scrambling.
- If you do get lumps in your pudding, don’t panic – pour the mixture through a fine-mesh sieve before adding the chocolate to catch them.
- Ensure your chocolate and butter are fully cooled before adding them to the pudding base; adding them too hot can affect the texture.
- Allow the pudding to cool completely and whisk it occasionally to prevent skin formation before assembling the pie.
- Chill the pie for at least 4 hours, but overnight is best for the pudding to fully set and the flavors to meld.
Variations and Substitutions
Vegan Option: For a dairy-free version, use vegan chocolate sandwich cookies and plant-based butter for the crust. For the filling, substitute the egg yolks with a cornstarch slurry (increase cornstarch slightly) and use full-fat coconut milk or a rich cashew cream instead of half and half. Ensure your chopped chocolate is dairy-free. Use a dairy-free whipped topping for the crown.
Gluten-Free Alternative: Use gluten-free chocolate sandwich cookies or a gluten-free graham cracker crust. For the filling, ensure your cornstarch is gluten-free (most are) and proceed with the recipe. Serve with a gluten-free whipped topping.
Mint Chocolate Twist: Add 1 teaspoon of peppermint extract along with the vanilla extract in the chocolate filling. This will impart a refreshing minty flavor that pairs wonderfully with chocolate and raspberries.
White Chocolate Version: Use white chocolate chips in the filling and for garnish. Note that white chocolate can be sweeter, so you might want to slightly reduce the sugar in the pudding or use a darker raspberry variety to balance it.
Berry Swap: While raspberries are classic, feel free to use other berries like fresh strawberries (sliced), blueberries, or even a mix of your favorite berries for the filling and garnish. The tartness of berries is key to cutting the richness.
Crust Alternatives: If popping candy isn’t your thing, a classic Oreo crust (without the pop rocks) or a chocolate graham cracker crust works beautifully. You can omit the pop rocks and just use the cookie crumbs, melted butter, and melted chocolate mixture for the crust.
How to Serve and Pair
This No Bake Chocolate Pudding Pie with Raspberries is a star on its own, but serving it with a glass of cold milk is always a hit, especially for younger guests. For adults, a dessert wine like a ruby port or a sweet sherry can be a lovely accompaniment, though a simple black coffee is also a perfect pairing to cut through the sweetness. Presentation is key to making this pie shine. Ensure the whipped cream topping is fluffy and artfully arranged. Use the fresh raspberries and chocolate shavings to create a visually appealing topping. It’s perfect for chocolate lovers, fruit enthusiasts, and anyone who enjoys a playful dessert experience. Serve it at birthday parties, summer barbecues, holiday celebrations, or anytime you want to make a simple meal feel a little more special.
Consider serving individual slices on elegant dessert plates for a more formal touch, or serve directly from the pie dish family-style for a more casual gathering. If you’re feeling ambitious, pipe decorative borders around the edges using the whipped cream. The vibrant red of the raspberries against the dark chocolate and white cream makes for a stunning contrast that looks as good as it tastes. It’s a dessert that brings joy to the table, creating sweet memories with every slice.
Storage and Reheating
Refrigerator: Properly stored, this No Bake Chocolate Pudding Pie with Raspberries will keep well in the refrigerator for up to 3 to 4 days. The best way to store it is to cover it tightly with plastic wrap, ensuring it’s sealed to prevent it from absorbing odors from other foods. If you have any leftover whipped cream, you can keep it in a separate airtight container and add it fresh to your slice before serving. Because it’s a no-bake pie with fresh fruit, its texture is best when consumed within a few days.
Freezer: This pie is not ideal for freezing. The texture of the pudding filling can become grainy or watery upon thawing, and the fresh raspberries may turn mushy. While you could technically freeze it, it’s best enjoyed fresh or within its refrigerator shelf life.
Room Temperature: Due to the fresh raspberries and dairy in the whipped cream and pudding, it’s not safe to leave this pie at room temperature for more than 2 hours. Always refrigerate promptly after serving to maintain its quality and safety.
Reheating: Reheating is generally not necessary or recommended for this No Bake Chocolate Pudding Pie with Raspberries, as it is meant to be served chilled. If parts of it have become too firm from chilling, a very brief moment at room temperature (5-10 minutes) might help slightly soften the crust, but avoid heating it. The pops in the crust will also diminish if heated.
Nutritional Values
Per Serving (approximate):
- Calories: 607 kcal (30% DV)
- Carbohydrates: 74g (25% DV)
- Protein: 9g (18% DV)
- Fat: 46g (71% DV)
- Saturated Fat: 24g (150% DV)
- Polyunsaturated Fat: 3g
- Monounsaturated Fat: 15g
- Trans Fat: 0.4g
- Cholesterol: 188mg (63% DV)
- Sodium: 401mg (17% DV)
- Potassium: 440mg (13% DV)
- Fiber: 6g (25% DV)
- Sugar: 51g (57% DV)
- Vitamin A: 995 IU (20% DV)
- Vitamin C: 13mg (16% DV)
- Calcium: 135mg (14% DV)
- Iron: 7mg (39% DV)
Approximate values.
Frequently Asked Questions (FAQ)
Can I substitute the fresh raspberries with frozen ones?
While you can use frozen raspberries, they will release more moisture as they thaw, potentially making the crust soggy and the pudding a bit watery. If you do use them, thaw them completely and drain them very well before patting them dry with paper towels. It’s best to use fresh raspberries for this recipe for optimal texture.
How do I know when the chocolate pudding is thick enough?
The pudding is ready when it coats the back of a spoon thickly and evenly. When you run your finger through the coating on the spoon, the line should hold its shape without immediately running back together. It should also have a noticeably thicker, glossy consistency compared to when you started cooking.
My pudding has lumps, what should I do?
Lumps in pudding usually come from under-whisking or overcooking the egg yolks. If you notice lumps, you can strain the pudding mixture through a fine-mesh sieve into another bowl before it cools or once it’s cooked but still warm. Whisking vigorously after straining can also help break down small lumps.
Can I make this No Bake Chocolate Pudding Pie with Raspberries completely a day ahead?
Yes, you absolutely can! In fact, making it a day ahead is highly recommended. The chilling time allows the pudding to set firmly, and the flavors meld together beautifully. Just hold off on adding the final whipped cream topping and decorations until just before serving to keep them looking their freshest.
What’s the best way to serve this pie or customize it further?
Serve chilled slices on dessert plates. For customization, you can add a sprinkle of sea salt flakes on top to enhance the chocolate flavor, or add a swirl of caramel sauce. Some people also enjoy a dusting of cocoa powder on the whipped cream. Using different flavored pop rocks in the crust can also offer a fun twist.
CONCLUSION
This No Bake Chocolate Pudding Pie with Raspberries is a triumph of simplicity and decadence. It’s a creamy, dreamy chocolate delight with the bright counterpoint of fresh raspberries and a playful pop in its crust. I truly hope you give this recipe a try; it’s a joyful dessert that creates memorable moments. The irresistible combination of rich chocolate, tart berries, and that surprising crunch is simply unforgettable.
Print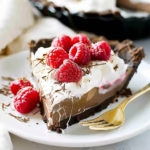
No Bake Chocolate Pudding Pie with Raspberries
- Prep Time: 25
- Total Time: 25
- Yield: 8 servings 1x
- Category: desserts
- Method: Refrigeration
- Cuisine: American
- Diet: Vegetarian
Description
A creamy no-bake pie with rich chocolate pudding, fresh raspberries, and a buttery cookie crust. Topped with whipped cream and chocolate shavings, it’s a refreshing dessert with a playful popping candy twist.
Ingredients
2 cups crushed chocolate sandwich cookies (e.g., Oreos)
1/2 cup melted butter
1/4 cup semi-sweet chocolate chips
1 (3.4 oz) package instant chocolate pudding mix
2 cups cold milk
1 cup heavy whipping cream
4–5 fresh raspberries (for topping)
1/4 cup chocolate shavings (for garnish)
1/2 cup popping candy (optional, for crust)
1/4 cup granulated sugar (for whipped cream)
Instructions
Mix crushed cookies, melted butter, and chocolate chips in a bowl until combined. Add popping candy if using. Press the mixture into a 9-inch pie dish and refrigerate for 15 minutes to set.
In a separate bowl, whisk pudding mix with milk until thickened. In another bowl, whip cream and sugar until stiff peaks form. Gently fold pudding into the whipped cream.
Pour the pudding mixture into the cooled crust. Smooth the surface and chill for 4 hours or overnight.
Top with fresh raspberries and chocolate shavings before serving.
Notes
Crust can be made 1 day ahead. For a nut-free crust, ensure all cookie bases are free from cross-contamination.
Substitute popping candy with crushed peppermint for a classic alternative.
Store leftovers in the refrigerator for up to 3 days.
Nutrition
- Serving Size: 1 slice
- Calories: 420
- Sugar: 38g
- Sodium: 210mg
- Fat: 25g
- Saturated Fat: 15g
- Carbohydrates: 52g
- Fiber: 2g
- Protein: 5g
- Cholesterol: 65mg