The Ultimate No-Bake Peanut Butter Pie Recipe You’ll Make Year-Round
No-bake peanut butter pie recipe is one of those magical creations that feels like a treat but is surprisingly simple to pull together. It’s the kind of dessert that whispers comfort and pure joy, especially when a craving for something rich and creamy strikes. I remember the first time I made one, back in my tiny apartment kitchen when I was just starting to figure out this whole cooking thing. Life felt a little chaotic then, but stepping into the kitchen and pulling off something this delicious, with so little fuss, felt like a small victory.
This isn’t just any pie; it’s a velvety smooth, melt-in-your-mouth experience that requires absolutely zero oven time. That’s right, no baking involved! It’s become my go-to for everything from impromptu weeknight gatherings to holiday dessert tables, and it always disappears faster than I can say “seconds, please.” The magic lies in its simplicity and that irresistible peanut butter flavor that just makes everyone smile.
What is No-Bake Peanut Butter Pie?
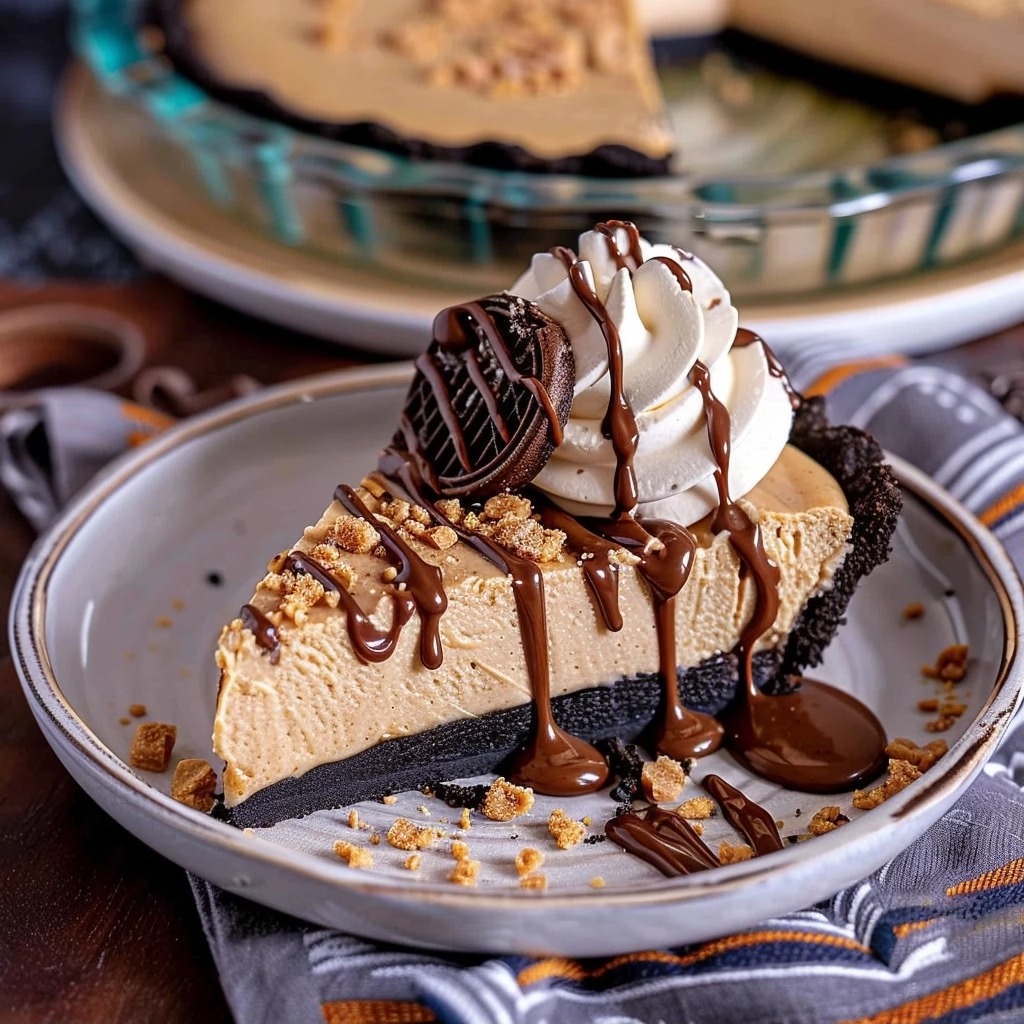
A no-bake peanut butter pie is a dessert that artfully combines a rich, creamy peanut butter filling with a pre-made or simple crumb crust, all without the need for an oven. It typically features a smooth, luscious mixture of cream cheese, peanut butter, whipped cream, and a sweetener, nestled into a crushed cookie or graham cracker base. The beauty of this dessert is its accessibility; it proves that you don’t need complex techniques or long baking times to create something truly spectacular and satisfying.
Originating from the desire for quick, delicious desserts that didn’t require turning on the stove, no-bake pies like this one have become a staple in home kitchens. They’re especially popular during warmer months, but honestly, who can resist that delightful combination of sweet, salty peanut butter and a hint of chocolate (usually from the crust)? It’s a dessert that’s both comforting and a little bit decadent, perfect for sharing with friends and family or for a quiet moment of indulgence.
Reasons to Try No-Bake Peanut Butter Pie
There are so many reasons why this no-bake peanut butter pie recipe deserves a spot in your family’s favorite dessert rotation. First and foremost, it’s incredibly easy. If you can stir and whip ingredients together, you can nail this pie. It’s the perfect recipe for beginner bakers, or for anyone who just wants a delicious dessert without the stress of baking. It’s a lifesaver when you need a crowd-pleasing dessert in a pinch, especially if your oven is already occupied with other dishes.
Beyond the ease, the flavor payoff is immense. This pie delivers that classic, beloved peanut butter taste in a luxuriously smooth texture that melts on your tongue. It’s a guaranteed hit with kids and adults alike, and you can easily customize it with your favorite toppings. Whether you’re a busy parent needing a quick treat, a student looking for an easy dorm-friendly dessert, or just someone who adores peanut butter, this recipe offers a delightful and satisfying experience every single time.
Ingredients Needed to Make No-Bake Peanut Butter Pie
For the perfect crust:
- 24 Oreo cookies (about 2 standard sleeves)
- 4 tablespoons salted butter, melted
For the luscious filling:
- 1 cup heavy whipping cream (cold)
- 8 ounces cream cheese, softened to room temperature
- ½ cup creamy peanut butter (avoid natural peanut butter that separates easily)
- 1 cup powdered sugar (sifted, if lumpy)
- 1 ½ teaspoons vanilla extract
Instructions to Make No-Bake Peanut Butter Pie – Step by Step
Step 1: Let’s get this delicious crust started by taking your Oreos and giving them a good whirl in the food processor. You want them to break down into fine, sandy crumbs. This is where the magic begins, transforming simple cookies into the perfect foundation for our pie.
Step 2: Now, with your food processor still running, slowly stream in that melted salted butter. The butter will help the crumbs bind together, creating a cohesive base. Continue pulsing until the mixture looks like wet sand – it should hold together when you squeeze a bit in your fingers.
Step 3: Pour your crumb mixture into a 9-inch pie plate. Gently press the crumbs evenly across the bottom and up the sides of the plate to form your crust. I find using the bottom of a flat measuring cup or a small glass helps to really compact the crumbs, ensuring a sturdy crust that won’t crumble when you slice into it later.
Step 4: Once your crust is perfectly pressed, carefully place the pie plate into the freezer. We’re going to let it chill and firm up for at least 30 minutes while we prepare the dreamy peanut butter filling. This chilling step is key to a crust that holds its shape.
Step 5: Now for the star of the show: the filling! Grab a large bowl and pour in your cold heavy whipping cream. Using an electric hand mixer (or a stand mixer with the whisk attachment), whip the cream until stiff peaks form. This means when you lift the beaters, the cream holds its shape and doesn’t flop over. Set this fluffy whipped cream aside for now; it’s going to add incredible lightness to our filling.
Step 6: In a separate large bowl, add your softened cream cheese. Using your electric mixer, whip the cream cheese until it’s wonderfully smooth and creamy, with no lumps in sight. Make sure your cream cheese is truly at room temperature; this makes a world of difference in achieving a silky-smooth texture without any graininess.
Step 7: Next, add the creamy peanut butter to the bowl with the whipped cream cheese. Continue to mix until it’s completely combined and wonderfully smooth. The aroma at this stage is just incredible, isn’t it? It’s that perfect peanut butter goodness that we all adore.
Step 8: Gradually add the sifted powdered sugar to the cream cheese and peanut butter mixture, a little at a time, while mixing on low speed. Add the vanilla extract with the sugar. Continue mixing until everything is well incorporated and the filling is smooth and sweet. Be sure to scrape down the sides of the bowl occasionally to ensure everything is evenly mixed.
Step 9: Now it’s time to gently fold in that reserved whipped cream. Using a spatula, carefully incorporate the whipped cream into the peanut butter mixture until there are no streaks of white or creamy filling remaining. You want to fold gently to keep the filling light and airy, maintaining that lovely fluffy texture.
Step 10: Retrieve your chilled crust from the freezer. Pour the luscious peanut butter filling into the prepared crust, spreading it evenly with your spatula. Give the top a gentle swirl or smooth it out completely, whatever your heart desires. A smooth top looks so elegant, but a few gentle swirls can be charming too!
Step 11: Cover the pie loosely with plastic wrap, making sure it doesn’t touch the surface of the filling directly if possible. Place the pie in the refrigerator and let it chill for at least 4 hours, or ideally overnight, until the filling is firm and set. This patient chilling time is crucial for the pie to reach its perfect texture.
Step 12: Once the pie is fully set, slice it into wedges. Serve it up with your favorite toppings and watch everyone’s eyes light up!
Chef’s Tips for a Perfect Result
- Ensure your cream cheese is truly at room temperature. This is crucial for a silky-smooth filling and prevents any lumps.
- Use a good quality creamy peanut butter for the best texture and flavor. Avoid natural peanut butters prone to separation, as they can make the filling oily.
- Don’t overmix the filling once the whipped cream is added. Fold gently to keep the mixture light and airy.
- Give the crust ample time to chill in the freezer. This ensures it holds its shape well when you slice the finished pie.
- For an extra chocolatey touch, sprinkle some mini chocolate chips into the filling before folding in the whipped cream.
- If you find the crust difficult to remove from the pie plate for serving, try briefly running a thin knife around the edge, or warming the bottom of the plate slightly.
Variations and Substitutions
Vegan Option: For a dairy-free treat, use vegan cream cheese and a dairy-free whipped topping alternative. Ensure your Oreo cookies are vegan, as some varieties contain non-vegan ingredients. The flavor will remain wonderfully peanut buttery.
Gluten-Free Alternative: Swap the Oreo cookies for your favorite gluten-free chocolate sandwich cookies or even crushed gluten-free graham crackers. This will create a delicious gluten-free base for the creamy peanut butter filling.
Low-Carb Version: Use a sugar-free powdered sweetener instead of powdered sugar. You can also opt for a store-bought low-carb pie crust or create your own using almond flour and butter.
Crunchy Peanut Butter: If you love a bit of texture, feel free to use crunchy peanut butter in the filling. This will add delightful little peanut pieces throughout the smooth creaminess.
Chocolate Crust Swap: For an even more decadent pie, you can use chocolate graham crackers or chocolate wafer cookies for your crust, adding another layer of chocolatey goodness.
How to Serve and Pair
This no-bake peanut butter pie is a star on its own, but it truly shines when served just right. I love to top it generously with extra whipped cream, a drizzle of hot fudge sauce, or even some chopped roasted peanuts for a delightful crunch. Mini chocolate chips or crushed Oreos also make fantastic toppings, adding visual appeal and extra flavor!
It’s the perfect centerpiece for any casual gathering, family dinner, or potluck. Pair it with a cold glass of milk for a classic combination, or a hot cup of coffee for a delightful end to a meal. For a special occasion, consider serving it alongside a scoop of vanilla bean ice cream or a few fresh berries to add a burst of freshness.
Storage and Reheating
Refrigerator: Leftover no-bake peanut butter pie should be stored in an airtight container or well-wrapped with plastic wrap in the refrigerator. It will stay delicious for up to 3-4 days, although I find it’s usually gone much sooner than that!
Freezer: This pie freezes beautifully. Wrap the entire pie or individual slices tightly in plastic wrap, then in aluminum foil. It can be stored in the freezer for up to 1-2 months. Thaw overnight in the refrigerator before serving.
Room Temperature: Due to the cream cheese and dairy content, it’s best to keep this pie refrigerated. Avoid leaving it out at room temperature for more than 2 hours to maintain its freshness and prevent spoilage.
Reheating: Reheating isn’t typically necessary as this pie is served chilled. If it has been frozen and thawed, it will be ready to eat directly from the refrigerator. If you prefer it slightly softened, you can let it sit on the counter for about 15-20 minutes before slicing.
Nutritional Values
- Calories: Approximately 766 kcal per serving
- Protein: Around 11g per serving
- Carbohydrates: About 62g per serving
- Fat: Roughly 55g per serving
- Fiber: Around 2g per serving
Approximate values.
Frequently Asked Questions (FAQ)
Can I use crunchy peanut butter instead of creamy?
Yes, you absolutely can use crunchy peanut butter. It will add a pleasant textural contrast to the smooth filling, making each bite even more interesting.
How do I know when the pie is set?
The pie is set when the filling is firm to the touch and holds its shape. It should not jiggle excessively when you gently shake the pie plate, and it should slice cleanly.
My filling is lumpy, what went wrong?
Lumps in the filling are usually due to the cream cheese not being fully softened or being overmixed after the whipped cream is added. Ensure cream cheese is at room temperature and fold the whipped cream in gently.
Can I make this pie a day ahead?
Absolutely! This no-bake peanut butter pie is ideal for making ahead. In fact, chilling it overnight allows the flavors to meld beautifully and ensures a perfect set.
What are the best toppings for no-bake peanut butter pie?
The possibilities are endless! Classic toppings include whipped cream, chocolate syrup, caramel drizzle, crushed peanuts, and mini chocolate chips. Get creative with your favorites!
CONCLUSION
This no-bake peanut butter pie recipe is a true testament to how simple ingredients can create something utterly spectacular. It’s a dessert that’s incredibly easy to make, perfect for any skill level, and always a guaranteed crowd-pleaser. If you’re looking for pure, unadulterated peanut butter bliss with minimal effort, you absolutely must give this recipe a try. The delightful balance of creamy, sweet, and nutty goodness makes it an irresistible treat you’ll crave again and again.
Print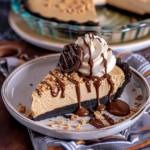
The Ultimate No-Bake Peanut Butter Pie
- Prep Time: 30
- Total Time: 480
- Yield: 8-10 slices 1x
- Category: desserts
- Method: Refrigeration
- Cuisine: American
- Diet: Vegetarian
Description
A creamy, no-bake dessert with a chocolatey graham cracker crust and a rich peanut butter filling. Perfect for any occasion, this pie requires minimal effort and delivers melt-in-your-mouth satisfaction. Great for those who want to avoid oven use or need a quick crowd-pleasing treat.
Ingredients
2 cups graham cracker crumbs
1/3 cup melted butter (unsalted, halal-certified)
3/4 cup semi-sweet chocolate chips (halal-certified)
16 oz cream cheese (room temperature, halal-certified)
1 cup peanut butter (smooth or crunchy, unsalted recommended)
1 cup powdered sugar
1 tbsp pure vanilla extract
4 cups store-bought whipped cream
Dark chocolate shavings or crushed chocolate cookies for topping (optional)
Instructions
Mix graham cracker crumbs, melted butter, and chocolate chips in a bowl until the crust holds together.
Press the crust mixture into a 9-inch pie dish and chill for 10 minutes.
In a separate bowl, beat cream cheese and peanut butter until smooth.
Gradually add powdered sugar and vanilla, mixing until creamy.
Fold in whipped cream gently just until fully incorporated.
Pour the filling into the chilled crust and smooth the top.
Cover and refrigerate for at least 4 hours until firm.
Serve chilled with chocolate shavings or toppings.
Notes
For a cookie-based crust, substitute graham crackers with 2 cups crushed plain cookies.
Adjust sugar to taste or use a sugar-free sweetener for a lighter version.
Store in the refrigerator for up to 3 days.
Nutrition
- Serving Size: 1 slice
- Calories: 400
- Sugar: 20g
- Sodium: 300mg
- Fat: 24g
- Saturated Fat: 12g
- Carbohydrates: 35g
- Fiber: 1g
- Protein: 7g
- Cholesterol: 40mg