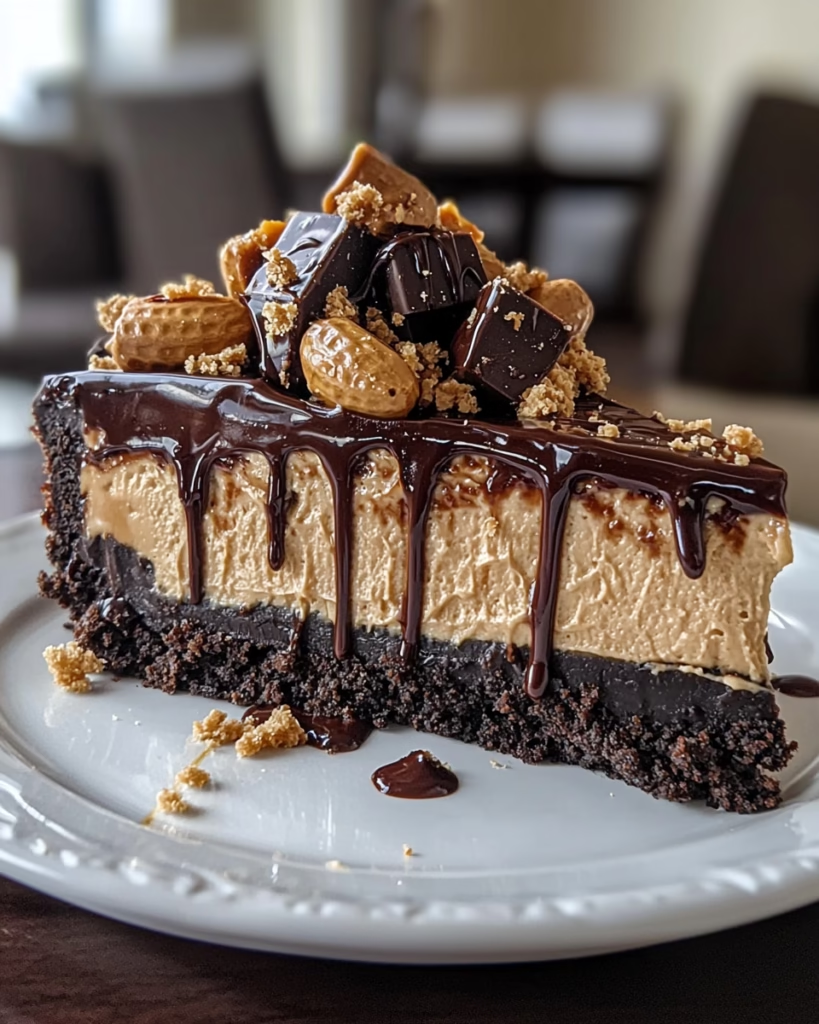
Chocolate Peanut Butter Cheesecake is the ultimate dessert for anyone who craves the marriage of velvety chocolate and nutty peanut butter. Whether you’re a fan of classic cheesecakes or looking to try something new, this dessert escapes into a dreamy world of flavor. With a buttery Oreo crust, a dense yet smooth filling, and a glossy chocolate ganache draped over the top, every slice promises a comforting indulgence. Best of all, the combination of textures—crunchy, creamy, and melt-in-your-mouth—makes it a crowd-pleaser for family gatherings or cozy dessert nights. The Chocolate Peanut Butter Cheesecake, as we know it today, blends American dessert traditions with inventive layering, turning humble ingredients into an unforgettable treat.
What is Chocolate Peanut Butter Cheesecake?
At its core, this dessert combines two beloved classics: the richness of New York-style cheesecake and the bold, earthy sweetness of peanut butter. The base of crushed Oreo cookies mixed with melted butter creates a sturdy foundation, while the filling layers the tangy cream cheese with peanut butter’s toasted complexity. Micro miniature chocolate chips are folded in for bursts of sweetness, creating a swirl of chocolate and nuttiness that sings in every bite. The crowning glory—a silky milk chocolate ganache not only adds a lustrous finish but also a contrast with its cool, smooth texture against the warm, dense filling. Though its origins echo classic American desserts, the addition of peanut butter gives it a modern, Southern twist, reflecting a love for handheld candy bars like Reese’s that have shaped American dessert culture.
What makes this cheesecake special is how it plays with contrasts: buttery crust, dense filling, glossy topping, and the crunch of crushed peanuts and Reese’s cups for garnish. The result is a dessert that feels both familiar and exciting, perfect for anyone who loves to experiment in the kitchen or impress guests with a show-stopping finale to a meal.
Reasons to Try Chocolate Peanut Butter Cheesecake
For busy home cooks, this recipe might seem like a labor of love, but it’s actually built for efficiency. It requires just three components (your crust, filling, and ganache) that come together with minimal effort. The cheesecake also keeps well for days, making it ideal for served at weekend brunches or weeknight dessert cravings. Beginners will appreciate the clear, step-by-step instructions and forgiving technique—I myself learned to make my first cheesecake by trial and error after a recipe failed when I skipped the water bath, leaving a lopsided crumble. Every detail in this guide helps you avoid that pitfall and achieve a professional finish.
This recipe is a testament to how simple ingredients can create something extraordinary. It’s perfect for those who enjoy hosting (as one cheesecake serves 8–10 people) or impressing friends with something sweet yet refined. Even vegetarians can enjoy it worry-free, as no animal products beyond dairy are used. It also allows for creativity—swap traditional Oreos for gluten-free cookies or melt dark chocolate in the ganache for a bolder flavor. And let’s not forget the joy of seeing a room light up when someone takes their first bite of the ganache drizzled atop the finished dessert.
Ingredients Needed to Make Chocolate Peanut Butter Cheesecake
For Oreo Crust:
2 cups Oreo crumbs
1/4 cup unsalted butter, melted (use a compact stick for easier measuring)
Peanut Butter Cheesecake Filling:
32 oz. cream cheese, softened (2 full 8-ounce blocks chilled until just pliable)
1 and 1/3 cups granulated sugar (breaking the measurement into 2/3 cup + 1/2 cup helps with mixing)
4 large eggs (separate into room-temperature yolk and white for a smoother texture)
1 cup smooth peanut butter (the jar should give slightly when pressed for optimal consistency)
2 tsp. pure vanilla extract (a high-quality brand prevents bitter aftertaste)
1/3 cup heavy cream (adds lightness to counterbalance richness)
1 1/4 cups miniature chocolate chips (store-bought is fine, but melt just before folding in)
For Milk Chocolate Ganache:
1/2 cup heavy cream (preferably ultra-pasteurized for smooth results)
1 1/2 cups milk chocolate chips (or 9.5 oz. finely chopped milk chocolate for a more artisanal feel)
For Garnish:
Chopped Reese’s cups (pre-chop in a food processor for even distribution)
Crushed roasted peanuts (the more golden-hued, the better for deep flavor)
Instructions to Make Chocolate Peanut Butter Cheesecake – Step by Step
Step 1: Prepare your springform pan by coating it with nonstick cooking spray. Line the bottom with parchment paper to ensure easy slicing later. Wrap the pan with two layers of aluminum foil, bringing the foil up the sides—a crucial step to prevent water from seeping in during baking. This water bath (bain-marie) technique ensures even heat circulation, preventing cracks and achieving a center that stays gently jiggly. While wrapping the pan, I often use a large piece of foil as a single wrap and then a second smaller piece around the bottom to double-up the protection.
Step 2: For the crust, roughly crush the Oreo cookies in a ziplock bag using a rolling pin. Combine the crumbs with melted butter in a medium bowl, then press the mixture firmly into the bottom of the prepared springform pan. I like to use the flat side of a measuring cup for even compaction—press and rotate until it’s dense like a cookie crust. Refrigerate the crust for 15–20 minutes to firm up while you preheat the oven to 350°F. Chilling the crust helps it hold its shape during baking and prevents it from becoming gummy in the heat.
Step 3: Beat the softened cream cheese with the sugar in a stand mixer fitted with a paddle attachment. I start on medium speed to avoid splatters, then gradually increase until the mixture is fluffy and smooth—about 2–3 minutes. Pause to scrape down the bowl’s sides with a rubber spatula to ensure even blending. Once smooth, mix in the peanut butter, heavy cream, and vanilla. The filling should resemble thick whipped cream but hold its shape when spooned—this texture matters when layering the chocolate chips in the next step.
Step 4: With the mixer on low, add the eggs one at a time, beating just until fully incorporated after each addition. Overmixing can trap air bubbles, leading to cracks on the surface. After the eggs, gently fold in the miniature chocolate chips using a spatula. This folding process takes care to preserve the delicate air bubbles from the mixing, but I often do it in a circular motion for efficiency. Pour the filling directly onto the chilled crust and smooth it out with an offset spatula.
Step 5: Place the springform pan inside a large roasting pan. This dual-pan setup creates the water bath essential for a creamy center. Pour hot boiling water into the roasting pan until it reaches halfway up the springform’s sides (typically 1 ½-inches deep). This water bath stabilizes the heat, ensuring the edges set fully while the center remains silky. Bake for 55–70 minutes, until the edges look set but the center still has a slight wobble. My personal trick is to gently tap the pan: a fully cooked cheesecake will vibrate minimally across the surface, while an undercooked one will wiggle like jello.
Step 6: Let the cheesecake cool in the pan on a wire rack for 1–2 hours, then carefully transfer it to the refrigerator. Chilling is crucial for a firm structure—refrigerate for at least 5 hours or overnight. During this time, the ganache should be chilling in the refrigerator in preparation. When ready to serve, the cold ganache will drizzle like warm fudge over the chilled cake without melting it prematurely.
Step 7: For the ganache, bring the heavy cream to a boil in a small saucepan over medium heat, stirring occasionally. Pour the hot cream over half the chocolate chips in a heatproof bowl and let sit for a minute before stirring. I use a zig-zag motion to swirl the cream into the chocolate until it becomes smooth and glossy. Add the remaining chocolate chips and stir until fully melted. Be quick around this step—the heat from the cream can overcook the chocolate if left too long.
Step 8: Spread the ganache evenly over the chilled cheesecake using a spatula. Top with crushed peanuts and chopped Reese’s candies for texture and aesthetics. Chill the cheesecake for another 30–60 minutes to let the ganache set before slicing. For easier cutting, warm your knife tip in hot water and dry it between slices—this prevents drag and messy photo-perfect slices.
Chef’s Tips for a Perfect Result
- Use a water bath (double-checked with foil wrapping) to prevent cracks and ensure even baking.
- Cool the cheesecake entirely before refrigerating to avoid condensation that can create a gummy top.
- Chill the ganache in the refrigerator for 20 minutes before drizzling to maintain its shape on the cake.
- Room-temperature eggs incorporate better into the cream cheese, creating a smoother texture.
- Buy two aluminum roasting pans: one for the cake and one for the water. This ensures you can focus on accurate water depth without rushing.
- For a denser slice, allow the cake to set overnight in the fridge before topping with ganache.
Variations and Substitutions
- Vegan Option: Replace cream cheese with vegan cream cheese and use coconut cream instead of heavy cream. The ganache will still set if you use vegan chocolate with a high cocoa butter content.
- Gluten-Free Alternative: Swap Oreo crumbs with crushed gluten-free cookies (look for certified brands like Gluten Free Crisps). Ensure any store-bought ganache uses gluten-free chocolate chips.
- Low-Sugar Version: Use sugar-free chocolate blocks and substitute granulated sugar with a 1:1 sugar-free powdered sweetener. Note that texture might become slightly denser.
- Budget Swap: If chocolate ganache seems indulgent, replace it with a peanut butter frosting (butter + powdered sugar + a drizzle of chocolate syrup). It’s equally delicious and highlights the peanut butter star.
- Make It More Nuts: Sprinkle chopped hazelnuts or macadamia nuts into the crust alongside the Oreo crumbs for a layered crunch.
How to Serve and Pair
Plate the cheesecake in individual slices for a restaurant-quality touch—or serve it as a whole, sliced into 8 portions in a decorative serving dish. Pair it with freshly brewed dark roast coffee or a buttery Chardonnay to cut through the richness. For a breakfast twist, pair it with chilled milk instead of coffee, serving as a dessert for dinner and a breakfast for morning leftovers. As for presentation, a dusting of cocoa powder or caramel drizzle can elevate the visual appeal if you’re hosting a brunch.
Storage and Reheating
Refrigerator: Store the cheesecake in an airtight container for up to 5 days. Press a layer of plastic wrap directly onto the ganache to prevent a crust from forming.
Freezer: Wrap the cake tightly in two layers of plastic wrap, then freeze for up to 3 months. Thaw it overnight in the refrigerator before serving to avoid condensation on the surface.
Room Temperature: If planning to eat within 2 hours, leave it uncovered for optimal texture—after that, it’s best to refrigerate as the ganache may start to soften.
Reheating: Gently warm individual slices in the microwave for 10–15 seconds or in a 200°F oven for 5 minutes. To avoid dryness, reheat with a damp paper towel draped over the slice to retain moisture and preserve creaminess.
Nutritional Values
- Calories: 450 per serving
- Protein: 7g per serving
- Carbohydrates: 45g per serving
- Fat: 30g per serving
- Fiber: 2g per serving
*Nutritional values are approximations and can vary with ingredient brands and portion sizes.
Frequently Asked Questions
Can I substitute a different type of crust?
Yes! Crushed gingersnaps or shortbread cookies work well, though reduce the butter to ⅓ cup. The Oreo crust is key for its moisture-resistance during baking and peanut butter-complementing sweetness.
How do I know when the cheesecake is fully baked?
The edges should no longer jiggle, and the center should have a slight wobble similar to a cooked egg yolk. Tap the pan gently—other underbaked centers will ripple more broadly than a properly baked surface.
My cheesecake has cracks on top. Can it be fixed?
Cracks are common with temperature fluctuations. To hide them, apply a thin layer of ganache or melted chocolate glaze over the surface. The visual impact transforms a less-than-perfect finish into an elegant artistic void.
Can I make this recipe in advance?
Absolutely. Bake and chill the crust-covered filling completely for up to 2 days before adding the ganache. This allows the cake to firm up fully, making the ganache step easier and guaranteeing even coverage.
What if I don’t have a springform pan?
Use a 9-inch round cake tin with a removable bottom or a regular 9-inch deep dish pie pan. Ensure it’s well wrapped in foil to handle the water bath carefully, as standard pie pans may not withstand the steam pressure.
Conclusion
Chocolate Peanut Butter Cheesecake is more than a dessert—it’s a story of contrasts and comfort. The Oreo crust’s buttery stability grounds the swirl of creamy, nutty, and chocolate layers, while the ganache’s gloss adds a final flourish of luxury. Whether you share it with friends or savor a slice in quiet joy, this cheesecake shines with bold flavors that linger. And when the first forkful of peanut butter meets the silken ganache, you’ll know it’s worth every step of the process.
Print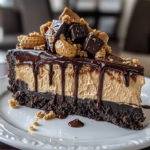
Chocolate Peanut Butter Cheesecake
- Prep Time: 15
- Cook Time: 45
- Total Time: 60
- Yield: 1 cheesecake (10-12 servings) 1x
- Category: desserts
- Method: Baking
- Cuisine: American
- Diet: Vegetarian
Description
A rich dessert combining velvety chocolate, nutty peanut butter, and a buttery Oreo crust. The dense filling is topped with smooth milk chocolate ganache for a luxurious contrast in texture and flavor.
Ingredients
24 Oreo cookies, crushed
1/2 cup unsalted butter, melted (for crust)
16 oz cream cheese, softened
2 large eggs
3/4 cup granulated sugar
1/4 cup all-purpose flour
1/2 cup smooth peanut butter
1/2 cup chocolate chips (for filling)
1 cup milk chocolate pieces
4 tbsp heavy cream (for ganache)
Optional: Crushed peanuts and Reese’s cups for garnish
Instructions
Preheat oven to 325°F (170°C). Press the crushed Oreo cookies and melted butter into the bottom of a 9-inch springform pan.
In a bowl, beat cream cheese and sugar until smooth. Add eggs, flour, and peanut butter; mix until fully combined.
Fold in chocolate chips for marbled effect.
Pour filling over crust and smooth the top.
Bake for 45 minutes, then let cool completely at room temperature.
To make ganache, gently heat milk chocolate with heavy cream until smooth, then pour over the cooled cheesecake.
Chill in the refrigerator for at least 4 hours before serving.
Notes
Use a water bath (baking the cheesecake in a roasting pan filled with hot water) to prevent cracks. Refrigerate leftovers for up to 5 days. Garnish with crushed peanuts and crumbled Reese’s cups just before serving for added texture.
Nutrition
- Serving Size: 1 serving (slice)
- Calories: 450
- Sugar: 25g
- Sodium: 150mg
- Fat: 25g
- Saturated Fat: 12g
- Carbohydrates: 35g
- Fiber: 1g
- Protein: 10g
- Cholesterol: 50mg