Decadent Chocolate Hazelnut Pear Cake: A Cozy Autumn Treat
Chocolate Hazelnut Pear Cake is a wonderfully comforting bake, perfect for those cooler days when you just want something warm, rich, and deeply satisfying. It’s the kind of cake that fills your kitchen with the most amazing aroma, making everyone gather around, eager for a slice. This recipe brings together the earthy richness of hazelnuts and dark chocolate with the sweet, soft texture of ripe pears, all brought together with a touch of warming spice. It’s a bit of a special occasion cake, but honestly, it’s too delicious not to make any time you need a little lift.
Whenever I bake this cake, it reminds me of those simple joys – sharing a cup of tea, a good book, and a slice of something homemade. It’s a bake that doesn’t ask for perfection, it just asks for a bit of love and a willingness to let the ingredients shine. The combination of chocolate and hazelnut is classic for a reason, and pairing it with the gentle sweetness of pears elevates it into something truly special. It’s a recipe that feels both a little bit fancy and wonderfully down-to-earth, just like the best kinds of comfort food should be.
What is Chocolate Hazelnut Pear Cake?
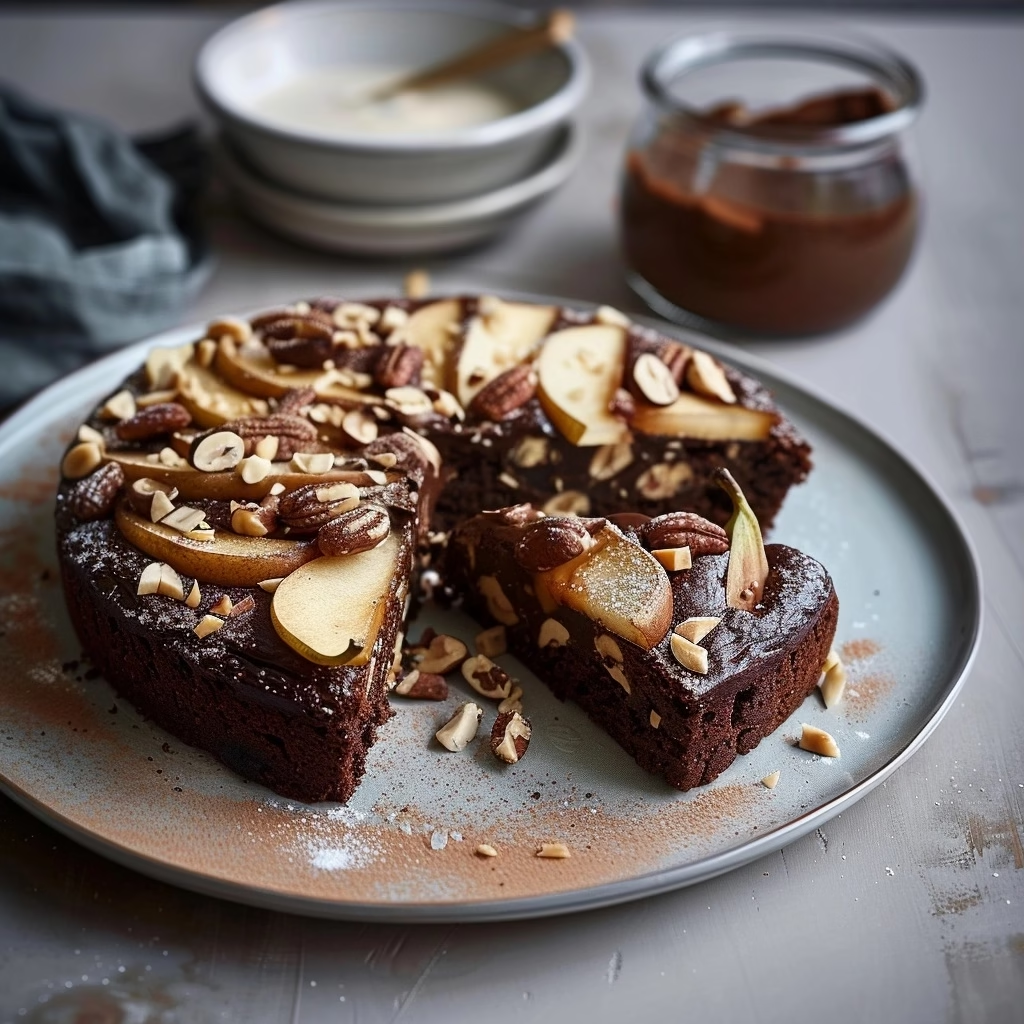
This Chocolate Hazelnut Pear Cake is a moist, tender cake that beautifully combines the deep, satisfying flavor of chocolate with the nutty warmth of toasted hazelnuts. The star of the show, alongside these iconic flavors, is the luscious pear. When baked, pears become incredibly soft and lend a natural sweetness and a wonderful texture to the cake. It’s not a light, airy cake, but rather one with a comforting, dense crumb, brought to life by the combination of classic chocolate and hazelnut, enhanced by a hint of spice like cardamom.
While this specific recipe is a modern creation, the marriage of chocolate, nuts, and fruit is a long-standing tradition in many baking cultures. Think of rich chocolate tortes studded with nuts, or fruit tarts topped with a buttery crumble. This cake takes those beloved elements and melds them into one harmonious dessert. The use of gluten-free flour and oil makes it wonderfully moist and accessible, proving that sometimes, a little bit of baking magic can happen with simple, wholesome ingredients.
Reasons to Try Chocolate Hazelnut Pear Cake
There are so many reasons to pull out your mixing bowls and give this Chocolate Hazelnut Pear Cake a try. First and foremost, the flavor combination is simply divine. The deep cocoa notes from the chocolate and the toasty, slightly sweet flavor of hazelnuts create an irresistible base, and the soft, baked pears add a delicate fruitiness that perfectly complements it. It’s a symphony of tastes and textures that feels both sophisticated and incredibly comforting, making it a guaranteed crowd-pleaser, whether for a special gathering or just a cozy afternoon treat.
Beyond the amazing taste, this cake is surprisingly approachable for home bakers. It uses straightforward ingredients and a simple mixing method, making it perfect for those who might be newer to baking or just looking for a reliably delicious recipe without much fuss. The result is a cake that looks beautiful, thanks to the pear slices on top, and tastes like you’ve spent hours in the kitchen. It’s a fantastic option for anyone wanting to impress without the stress, making it an ideal choice for busy weeknights, weekend brunches, or impromptu gatherings with friends.
Ingredients Needed to Make Chocolate Hazelnut Pear Cake
Here’s what you’ll need to create this delightful Chocolate Hazelnut Pear Cake. Gathering your ingredients is always the first step that makes me feel like I’m really getting into the baking spirit!
- 1½ cups Bob’s Red Mill Gluten Free 1-to-1 Baking Flour (or your favorite all-purpose gluten-free blend)
- ⅓ cup unsweetened cocoa powder
- 1 teaspoon baking powder
- ½ teaspoon baking soda
- ½ teaspoon salt
- ½ teaspoon ground cardamom (you can increase this to 1 teaspoon if you love a more pronounced spiced flavor)
- 2 tablespoons ground hazelnuts (you can easily make this by pulsing whole hazelnuts in a food processor until finely ground)
- ¾ cup maple syrup (for a rich, natural sweetness)
- ⅔ cup cold water
- ⅓ cup neutral oil (like coconut oil melted, or a light olive oil or avocado oil)
- 1 teaspoon vanilla extract
- 1 teaspoon apple cider vinegar (this helps activate the baking soda for a tender crumb)
- 2 small pears (peeled and cored; half finely chopped and the other half thinly sliced for topping – peeling is optional but gives a smoother texture)
- ½ cup chopped hazelnuts (for sprinkling on top and adding a delightful crunch)
Instructions to Make Chocolate Hazelnut Pear Cake – Step by Step
Let’s get this beautiful cake into the oven! Baking is always one of my favorite ways to bring warmth and comfort into the home, and this cake is no exception. It makes the whole kitchen smell so wonderful.
Step 1: Begin by preparing your oven and cake pan. Preheat your oven to 350°F (175°C). Then, for the best release and to prevent any sticking, I like to grease a 9-inch springform cake pan thoroughly and line the bottom and sides with parchment paper. Having both grease and parchment ensures your beautiful cake comes out cleanly every time.
Step 2: In a large mixing bowl, it’s time to bring together all those lovely dry ingredients. Whisk together the gluten-free flour, unsweetened cocoa powder, baking powder, the finely ground hazelnuts, baking soda, salt, and the ground cardamom. Giving them a good whisk ensures everything is evenly distributed, which is key for a consistent texture throughout your cake.
Step 3: Now, let’s whisk together the wet ingredients in a separate bowl. Combine the maple syrup, cold water, your chosen neutral oil, vanilla extract, and the apple cider vinegar. Whisk them until they are well combined. This simple mixture will bring moisture and richness to our cake batter.
Step 4: It’s time to unite the wet and dry ingredients. Pour the wet mixture into the bowl with the dry ingredients. Stir everything together gently until you have a smooth batter, being careful not to overmix – just combine until no dry streaks remain. Overmixing can lead to a tougher cake, and we want ours to be tender.
Step 5: Gently fold the finely chopped pears into the cake batter. Distribute them evenly throughout the mixture. Then, carefully pour the delicious batter into your prepared springform pan. Smooth the top just a little with your spatula. For a beautiful presentation and extra hazelnut charm, arrange the thinly sliced pear halves over the surface of the batter, and then sprinkle the chopped hazelnuts generously on top of everything.
Step 6: Now for the magic part: baking! Carefully transfer the cake pan onto a baking sheet (this catches any potential drips and makes it easier to handle). Bake in the preheated oven for approximately 45 minutes. You’ll know it’s perfectly done when the cake is set and springs back lightly when gently touched. An inserted toothpick should also come out with moist crumbs, but not wet batter.
Step 7: Allow the cake to cool in the springform pan on a wire rack for about 10-15 minutes. This resting period is important as it lets the cake firm up a bit before you release it. Once it’s had a chance to cool slightly, carefully release the sides of the springform pan. Gently slide the cake off the base onto the wire rack to cool completely. Waiting for it to cool entirely before slicing is the hardest part, but it ensures clean slices and the best texture.
Chef’s Tips for a Perfect Result
- Ensure your pears are ripe but still firm enough to hold their shape when baked; overly soft pears can make the cake too wet.
- Don’t overmix the batter once the wet and dry ingredients are combined; this is crucial for a tender gluten-free cake.
- Using a springform pan is highly recommended for easy removal of this beautifully topped cake.
- The apple cider vinegar is important for activating the baking soda, so don’t skip it, even though its flavor bakes out completely.
- To evenly distribute the chopped pears, lightly flour them before folding them into the batter to prevent them from sinking.
- For an extra depth of flavor, you can toast the chopped hazelnuts briefly before adding them to the top of the cake.
Variations and Substitutions
While this recipe is wonderful as is, it’s also quite adaptable. Baking is all about making things work for you and your pantry!
Vegan Option
This recipe is already naturally vegan, as it uses oil instead of butter and maple syrup instead of honey!
Gluten-Free Alternative
The recipe specifically calls for Bob’s Red Mill Gluten Free 1-to-1 Baking Flour, which is a reliable blend. If you use a different gluten-free flour blend, ensure it contains a binder like xanthan gum for best results.
Spice Swap
If cardamom isn’t your favorite, feel free to substitute it with an equal amount of cinnamon or a blend of cinnamon and nutmeg for a different warm spice profile.
Fruit Alternatives
While pears are traditional here, you could experiment with diced apples or even a cup of berries (like raspberries or blueberries) folded into the batter for a different fruity twist.
How to Serve and Pair
This Chocolate Hazelnut Pear Cake is a versatile dessert that shines in many ways. For a truly comforting experience, serve it slightly warm with a dollop of freshly whipped cream or a scoop of vanilla bean ice cream. A dusting of powdered sugar or a light drizzle of extra maple syrup can also add a lovely finishing touch. It’s perfect for any occasion, from a cozy Sunday brunch with family to a sophisticated dessert after a dinner party with friends. The rich flavors also pair wonderfully with a warm cup of herbal tea or a good quality coffee.
Storage and Reheating
Keeping this cake fresh is simple, ensuring you can enjoy its deliciousness for a few days.
Refrigerator
Store any leftover cake in an airtight container in the refrigerator for up to 3-4 days. The denser texture of this cake holds up well when chilled.
Freezer
For longer storage, wrap individual slices or the whole cake tightly in plastic wrap, then in foil, and freeze for up to 2-3 months. Thaw in the refrigerator overnight before bringing to room temperature.
Room Temperature
Briefly at room temperature for a few hours is fine if it’s not too warm, but for best freshness, refrigeration is recommended, especially if it has creamy toppings.
Reheating
To reheat, gently warm slices in a low oven (around 300°F or 150°C) for about 5-10 minutes, or until warmed through. You can also gently warm it in a microwave for short intervals, though this can sometimes affect the texture.
Nutritional Values
Here’s an approximate nutritional breakdown per slice:
- Calories: ~300-350 kcal
- Protein: ~4-6 g
- Carbohydrates: ~45-55 g
- Fat: ~15-20 g
- Fiber: ~3-5 g
Approximate values.
Frequently Asked Questions (FAQ)
What’s the best pear to use for this chocolate hazelnut cake recipe?
For this cake, ripe but firm pears like Bosc, Anjou, or Bartlett work wonderfully. They offer a good balance of sweetness and texture that holds up well during baking without becoming too mushy.
How do I know when my chocolate hazelnut pear cake is perfectly baked?
The cake is ready when the edges are pulling away slightly from the pan and the center springs back gently when lightly pressed. A toothpick inserted into the center should come out with moist crumbs attached, not wet batter.
My cake came out dry, what might have gone wrong?
A dry cake can result from overbaking or too much flour. Ensure you measure your flour accurately and bake only until the toothpick test is met for moist crumbs, not completely clean.
Can I prepare this chocolate hazelnut pear cake batter ahead of time?
You can prepare the dry ingredients and wet ingredients separately a day in advance and store them covered in the refrigerator. Combine and bake only when ready, as the leavening agents work best when fresh.
How can I customize this cake for a special occasion?
For a special touch, consider adding a chocolate ganache or a cream cheese frosting. A sprinkle of edible gold dust or a few candied hazelnuts can also elevate its presentation for parties.
CONCLUSION
This Chocolate Hazelnut Pear Cake is a truly delightful creation, offering a perfect balance of rich chocolate, nutty hazelnut, and sweet pear. It’s a comforting and elegant bake that brings a touch of homemade magic to any occasion. You absolutely must try this recipe; the irresistible combination of deep cocoa and toasted nuts with tender fruit is simply divine.
Print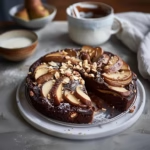
Decadent Chocolate Hazelnut Pear Cake: A Cozy Autumn Treat
- Prep Time: 30
- Cook Time: 35
- Total Time: 65
- Yield: 8 slices 1x
- Category: desserts
- Method: Baking
- Cuisine: American
- Diet: Vegetarian
Description
A rich, moist cake blending dark chocolate, toasted hazelnuts, and ripe pears with warming spices. Gluten-free and made with wholesome ingredients like oil. Perfect for cozy autumn afternoons or special gatherings.
Ingredients
1 1/2 cups gluten-free flour
1/2 cup unsweetened cocoa powder
1 tsp baking powder
1/2 tsp salt
3/4 cup light brown sugar
1/4 cup granulated sugar
1/2 cup oil (neutral, like safflower)
2 large eggs, at room temperature
1 tsp vanilla extract
1 1/2 cups chopped toasted hazelnuts (halal-certified)
2 very ripe pears, peeled and chopped
1/2 tsp ground cardamom
1/4 tsp ground cinnamon
1/2 cup milk (non-dairy or dairy, halal-certified)
1/2 cup dark chocolate chips (alcohol-free)
Instructions
Preheat oven to 375°F (190°C)
Line a 9-inch round cake pan with parchment paper
In a bowl, mix gluten-free flour, cocoa powder, baking powder, salt, and sugars until combined
Whisk oil, eggs, vanilla, cardamom, and cinnamon until smooth
Gradually add wet ingredients to dry, mixing until just combined
Fold in chopped pears and hazelnuts
Pour batter into prepared pan and smooth surface
Pour remaining 1/2 cup milk over the top
Add chocolate chips and hazelnuts to the cake top
Bake 30-35 minutes until a toothpick inserted comes out clean
Let cool 10 minutes before slicing
Notes
Toast hazelnuts in a dry skillet until fragrant
Use pears at peak ripeness for optimal moisture and sweetness
Optional: sprinkle toasted hazelnut halves on top before baking
Store cake covered at room temperature for 2-3 days
Nutrition
- Serving Size: 1 slice
- Calories: 420
- Sugar: 28g
- Sodium: 180mg
- Fat: 22g
- Saturated Fat: 12g
- Carbohydrates: 45g
- Fiber: 3g
- Protein: 5g
- Cholesterol: 65mg