Easy No Bake Pumpkin Pie is exactly the kind of dessert that saves the day when you are short on time but still want to deliver something truly special to the table. I remember the first time I attempted a traditional custard-based pumpkin pie, I ended up with a slightly cracked center and a lot of nerves while waiting for it to cool. This recipe removes all the stress, replacing tedious oven monitoring with a simple, creamy, and chilled delight that everyone is going to love.
This recipe is perfect for busy fall gatherings or those moments when you realize you need a crowd-pleaser on the double. By using pantry staples and a little help from store-bought graham cracker crusts, you end up with two gorgeous pies that look like they came straight from a gourmet bakery. It is comfort in every single bite, and the best part is knowing you can have it prepped and ready for the fridge in about ten minutes.
What is Easy No Bake Pumpkin Pie?
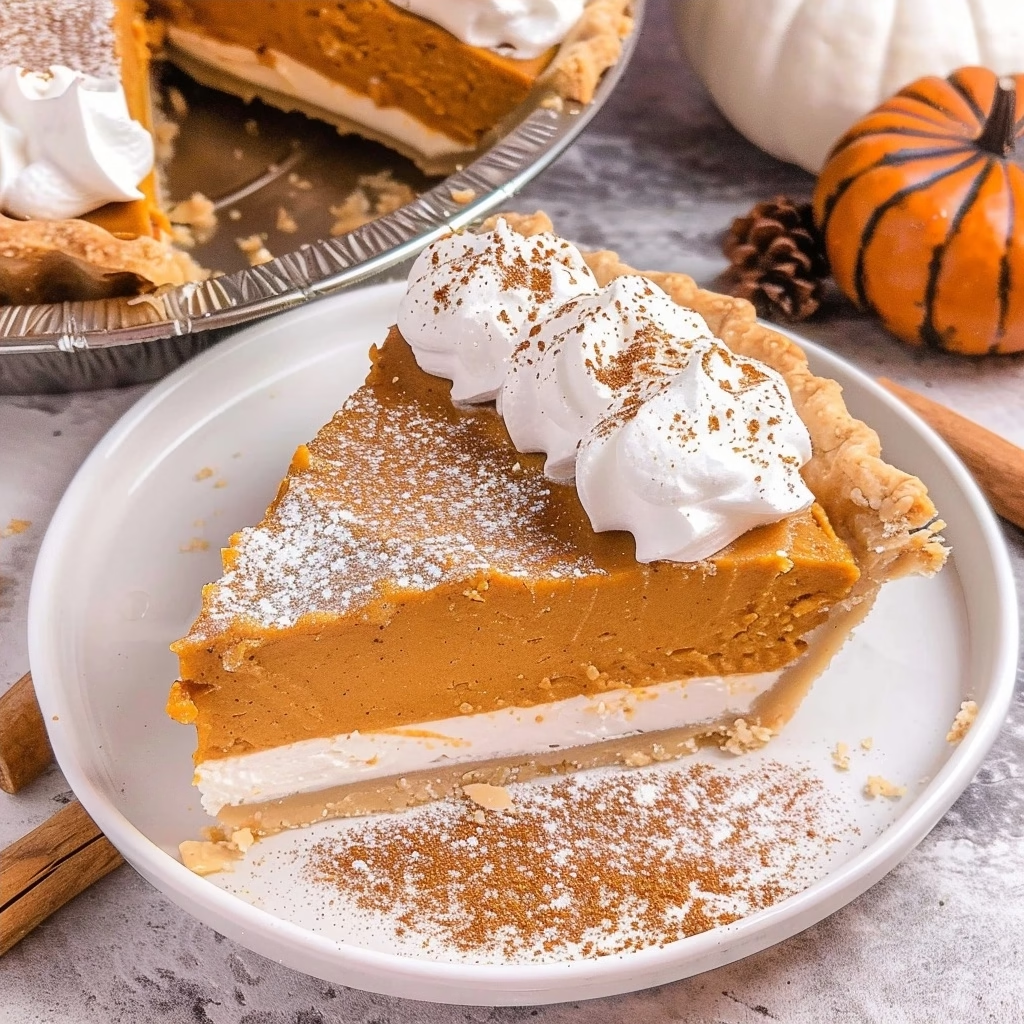
This Easy No Bake Pumpkin Pie is a modern, fuss-free riff on the classic autumn dessert. Instead of tempering eggs or worrying about a soggy pastry bottom, this version relies on a rich, mousse-like texture created by blending cream cheese with smooth pumpkin puree and spices. It is distinctly creamy rather than dense, which makes it feel like an indulgent pumpkin cheesecake mousse inside a crunchy, buttery graham cracker shell.
The layers are what really set this dish apart. You get a delightful foundation of sweetened cream cheese, followed by a spiced pumpkin mixture, and finished with a billowy cloud of whipped topping. Because it is a no-bake recipe, the flavors stay bright and fresh without the caramelization that happens in a hot oven. It has become a staple in my kitchen because it serves a crowd effortlessly without taking up valuable oven space during a holiday meal.
Reasons to Try Easy No Bake Pumpkin Pie
One of the biggest advantages of this recipe is the time-saving factor. Since there is no baking required, you do not have to worry about the pie cracking or the crust getting burnt. It is essentially foolproof, which makes it a fantastic project to tackle even if you are just starting your journey in the kitchen. If you have ever felt nervous about making desserts for a large gathering, this recipe will restore your confidence instantly.
Beyond the ease of preparation, the flavor profile is incredibly balanced. You get all the warmth of autumn spices like cinnamon, nutmeg, and ginger, but without the heaviness of a traditional dense pie. It is light, refreshing, and incredibly easy to slice and serve. Whether you are hosting a neighborhood potluck or just want a cozy treat for your family, this recipe is guaranteed to be a hit with both kids and adults.
Ingredients Needed to Make Easy No Bake Pumpkin Pie
- 16 ounces frozen whipped topping, defrosted (divided for the base and topping)
- 8 ounces cream cheese, softened to room temperature (makes it easier to blend)
- 1/2 cup granulated white sugar (provides the perfect amount of sweetness)
- 2 pre-made store-bought graham cracker crusts
- 3.4 ounces instant vanilla pudding mix
- 3/4 cup milk
- 15 ounces canned pumpkin puree
- 1 teaspoon pumpkin pie spice
- 1 teaspoon ground cinnamon
- 1/2 teaspoon ground nutmeg
- 1/2 teaspoon pure vanilla extract
- 1/8 teaspoon coarse kosher salt
Instructions to Make Easy No Bake Pumpkin Pie – Step by Step
Step 1: Start by preparing your base layer. In a large mixing bowl, combine 8 ounces of the defrosted whipped topping, the softened cream cheese, and the granulated sugar. Using a hand mixer on medium speed, blend everything until the mixture is smooth and completely free of lumps. You want this layer to be light and aerated, so ensure the cream cheese is truly at room temperature before you start.
Step 2: Once your first mixture is combined, divide it evenly between the two store-bought graham cracker crusts. Use a small spatula or the back of a spoon to create an even layer at the bottom of each crust. Pop these into the refrigerator while you work on the pumpkin layer to keep everything chilled and firm.
Step 3: In a separate large bowl, whisk together the instant vanilla pudding mix and the milk. Keep stirring quickly until the mixture begins to thicken into a pudding consistency. This provides the structural body that makes the pie hold its shape so beautifully when you slice it later.
Step 4: Now it is time to bring in the autumn flavors. Add the canned pumpkin puree, pumpkin pie spice, cinnamon, nutmeg, vanilla extract, and kosher salt to the pudding mixture. Fold everything together until you have a smooth, uniform orange filling that smells like everything cozy about fall.
Step 5: Carefully remove your crusts from the refrigerator and spoon the pumpkin mixture directly on top of the cream cheese layer. Spread it gently so you don’t swirl the colors too much, as you want to maintain that lovely layered appearance. Finally, dollop the remaining whipped topping over the top of each pie to create those beautiful, fluffy peaks.
Step 6: Place your finished pies back into the refrigerator to chill for at least one hour. This step is non-negotiable, as it allows the pudding and cream cheese to set properly. Just before serving, lightly dust the tops with a little extra cinnamon or a sprinkle of nutmeg for a professional, inviting finish.
Chef’s Tips for a Perfect Result
- Ensure your cream cheese is soft: If it is cold, it will remain lumpy, which affects the smoothness of your pie.
- Use full-fat cream cheese: The higher fat content provides the stability and rich mouthfeel that defines a great no-bake pie.
- Don’t over-mix: Once the pumpkin mixture is combined with the pudding, stop mixing to ensure the airy texture of the whipped topping isn’t lost.
- Chill long enough: While one hour is the minimum, letting the pies chill for three or four hours often results in a cleaner, more perfect slice.
Variations and Substitutions
- Lower Sugar Version: Swap the granulated sugar for a high-quality sugar substitute and ensure your instant pudding is the sugar-free variety to keep the carb count lower.
- Gluten-Free Alternative: Purchase gluten-free store-bought graham cracker crusts or make your own by pulsing gluten-free ginger snaps with melted butter in a food processor.
- Texture Boost: Add a half-cup of toasted pecans to the top of the whipped cream right before serving for a surprising and delicious crunch.
How to Serve and Pair
This dessert is best served chilled straight from the refrigerator. Because it is so light and creamy, it pairs wonderfully alongside a hot cup of spiced chai or a dark roast coffee, which helps cut through the sweetness. Serve it on small dessert plates with an extra garnish of whipped cream and a cinnamon stick for a beautiful, rustic presentation.
Storage and Reheating
Refrigerator: Use the plastic lids that generally come with pre-made crusts to cover the pies tightly. They will keep well in the refrigerator for up to three days, though they often taste freshest within the first 48 hours.
Freezer: You can absolutely freeze these pies for up to two months. Wrap them tightly in plastic wrap and then a layer of aluminum foil to prevent freezer burn. Thaw them overnight in the refrigerator before you plan to serve.
Reheating: This is a cold dessert, so it should not be reheated. Simply keep it refrigerated until the very moment you are ready to plate and serve to maintain the perfect texture.
Nutritional Values
- Calories: 280
- Protein: 3g
- Carbohydrates: 32g
- Fat: 14g
- Fiber: 2g
Approximate values.
Frequently Asked Questions (FAQ)
Can I use homemade pumpkin puree instead of canned?
Yes, you can use homemade puree, but you must drain it through cheesecloth for several hours to remove excess moisture. If the puree is too watery, your pie will not set correctly and could become runny.
How do I know when the pie is fully set?
You will know the pie is set when the edges hold their shape firmly and the center no longer jiggles when you gently shake the pan. If you feel it needs more time, give it another thirty minutes in the fridge.
Why is my filling clumpy?
Lumpy filling is almost always due to the cream cheese not being at room temperature before mixing. Always set your cream cheese out on the counter at least an hour before you plan to start your preparation.
Can I make this pie more than one day in advance?
Yes, you can prepare this pie up to two days in advance for the best texture. If you store it for longer than that, the moisture from the pumpkin may start to soften the crust slightly, though it will still taste delicious.
What is the best way to garnish this pie?
Freshly grated nutmeg is the absolute best way to finish this dish because the aroma is incomparable to pre-ground spices. You can also add a few toasted pumpkin seeds for an appealing contrast in texture.
Conclusion
Making an Easy No Bake Pumpkin Pie is the ultimate kitchen hack for anyone who loves the flavors of the harvest without the stress of traditional baking. With its cloud-like layers and perfectly spiced pumpkin filling, this dessert is sure to become a requested favorite at every gathering. I genuinely hope this recipe brings a little extra warmth and joy to your table, just as it has to mine so many times. Give it a try, and enjoy the effortless indulgence of a homemade treat that hits the spot every single time.
Print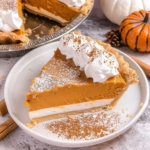
Easy No Bake Pumpkin Pie
- Prep Time: 15
- Total Time: 255
- Yield: 16 servings 1x
- Category: desserts
- Method: No-Bake
- Cuisine: American
- Diet: Vegetarian
Description
Indulge in this fuss-free, creamy, and delightful no-bake pumpkin pie that captures the essence of autumn in every bite. By combining rich cream cheese with smooth pumpkin puree and aromatic spices, this recipe creates a decadent mousse-like texture nestled within a crunchy graham cracker crust. Perfect for busy gatherings, this foolproof dessert saves time and oven space while delivering a professional, bakery-quality treat that both kids and adults will absolutely love.
Ingredients
8 ounces cream cheese, softened
15 ounces pumpkin puree (canned, not pie filling)
1/2 cup granulated sugar
1 teaspoon ground cinnamon
1/2 teaspoon ground nutmeg
1/4 teaspoon ground ginger
16 ounces frozen whipped topping, defrosted (divided)
2 store-bought graham cracker crusts (9-inch)
Instructions
In a large mixing bowl, beat the softened cream cheese and granulated sugar until smooth and creamy.
Add the pumpkin puree, cinnamon, nutmeg, and ginger to the cream cheese mixture and blend until well combined.
Fold in 8 ounces (half) of the whipped topping into the pumpkin mixture until light and airy.
Divide the pumpkin mixture evenly between the two graham cracker crusts, spreading it to the edges with a spatula.
Top each pie with the remaining 8 ounces of whipped topping.
Refrigerate for at least 4 hours, or until set, before slicing and serving.
Notes
Keep the pies refrigerated until you are ready to serve to maintain the firm, mousse-like texture. You can garnish with extra cinnamon, toasted pecans, or a drizzle of caramel syrup for an extra decorative touch. Leftovers should be covered and stored in the refrigerator for up to 3 days.
Nutrition
- Serving Size: 1 slice
- Calories: 280
- Sugar: 22g
- Sodium: 210mg
- Fat: 14g
- Saturated Fat: 8g
- Carbohydrates: 35g
- Fiber: 2g
- Protein: 3g
- Cholesterol: 30mg