French pear tart recipe – it sounds so elegant, doesn’t it? For a long time, I thought making something like this was reserved for fancy patisseries or pastry chefs with years of training. My own kitchen adventures started humbly, often with more enthusiasm than expertise, and plenty of flour-dusted mishaps along the way. It’s funny, sometimes the most intimidating recipes are the ones that, once you break them down, become surprisingly achievable. This French pear tart recipe proved that to me; it’s a testament to patience and a little bit of love, turning simple ingredients into something truly special that feels like a celebration.
There’s a certain magic in transforming humble fruit into a show-stopping dessert. The way the pears soften and caramelize, the sweet embrace of the fig glaze, all nestled in a buttery, crisp crust – it’s a combination that just sings. It reminds me of cozy evenings, or special weekend gatherings, where the aroma wafting from the oven is the signal that good things are coming. This French pear tart recipe brings that elevated feeling right into your own home, no matter where your cooking journey began.
What is a French Pear Tart Recipe?
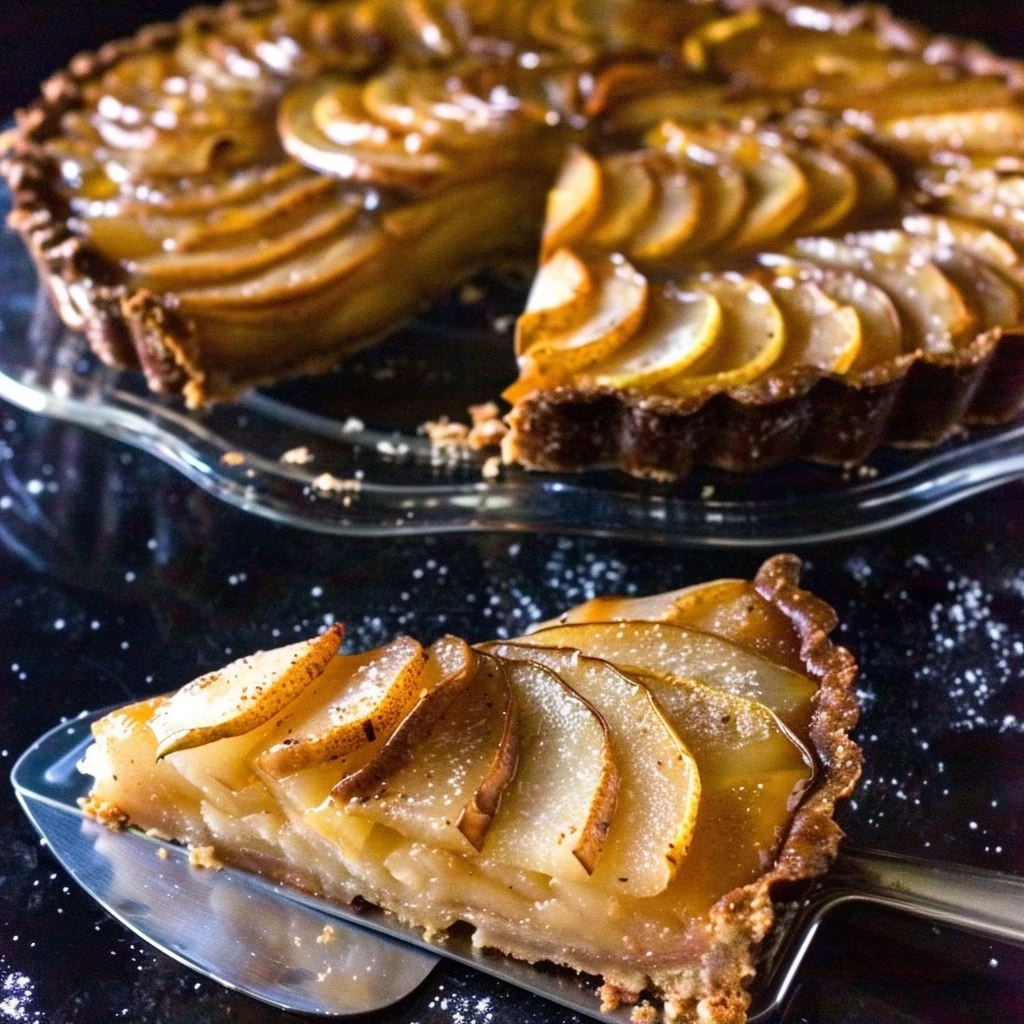
At its heart, a French pear tart recipe is a beautiful celebration of seasonal fruit, showcasing tender pears atop a sweet, buttery crust, often enhanced with a rich glaze. While many tarts feature intricate patterns or elaborate fillings, this particular French pear tart recipe leans into simplicity and elegance. It’s designed to let the natural sweetness and delicate texture of the pears shine through, enhanced by a warm, slightly tangy fig preserve glaze that adds depth and a beautiful glossy finish.
The origins of fruit tarts are as old as baking itself, with French patisseries perfecting the art over centuries. This recipe, specifically, plays with textures and flavors in a way that feels both rustic and refined. We’re not aiming for fussy decoration here; instead, the beauty lies in the layered pear slices and the simple, yet impactful, fig glaze that drizzles over the top. It’s a dish that speaks of French countryside charm, perfect for any occasion where you want to impress without the stress.
Reasons to Try this French Pear Tart Recipe
There are so many reasons to pull out your apron and give this French pear tart recipe a go! Firstly, the taste is simply divine – a perfect balance of sweet, slightly tart, buttery, and tender. The combination of plump, cooked pears with the rich fig glaze and flaky crust creates a flavor profile that’s both comforting and sophisticated. It’s the kind of dessert that makes people close their eyes in delight with the first bite, a sure sign of a recipe well-loved.
Beyond the incredible flavor, this recipe is surprisingly approachable for home cooks. Even if your baking experience is limited to a few brave attempts, you’ll find the steps manageable and rewarding. It’s ideal for those moments when you want to create something memorable for friends or family, or even just as a special treat for yourself after a long week. Imagine the sense of accomplishment as you pull this golden, glistening tart from the oven – it’s pure joy, and it’s yours to create!
Ingredients Needed to Make this French Pear Tart Recipe
Crust
- 1 1/2 cups all-purpose flour
- 5 tablespoons granulated sugar
- 1/2 teaspoon salt
- 12 tablespoons unsalted butter (melted)
Filling
- 8 large ripe pears, washed and prepared as directed
- 3 tablespoons unsalted butter
- 1 tablespoon water
- 3/4 cup fig preserves
- 1/4 teaspoon salt
Instructions to Make this French Pear Tart Recipe – Step by Step
Step 1: Let’s get our oven ready for this beautiful French pear tart recipe. Position one oven rack in the middle of the oven, and move a second rack to the top slot. We’ll preheat the oven to 350 degrees Fahrenheit (175 degrees Celsius). This setup helps ensure our tart bakes evenly and gets that perfect golden crust.
Step 2: In a medium bowl, we’ll combine the dry ingredients for our crust: the all-purpose flour, granulated sugar, and salt. Give them a quick whisk to ensure they’re well blended. Then, pour in your melted unsalted butter. Now, using your hands or a fork, mix everything together until it forms a dough that looks like coarse crumbs. It should start to hold together when you squeeze it.
Step 3: Carefully transfer this crumbly dough into a 9-inch tart pan that has a removable bottom. This type of pan makes it so much easier to get the tart out later without breaking it. Using your fingers, press the dough down evenly across the bottom and up the sides of the pan. You want to create a nice, even layer for our filling. Once pressed in, place the tart pan on the middle rack of your preheated oven and bake for about 30 minutes. Keep an eye on it; you’re looking for that lovely golden brown color. Once it’s golden, carefully remove the crust from the oven and set it aside to cool a bit. Don’t turn off the oven! We’ll need it again.
Step 4: While our crust is cooling, we’ll prepare our luscious fig glaze for the French pear tart. Take your fig preserves and gently heat them in the microwave for about 40 seconds to make them more pourable. Then, press the warmed preserves through a fine-mesh strainer into a small bowl. This step is key to getting a smooth glaze by separating the liquid from any larger fruit chunks. We’ll set this smooth fig liquid aside.
Step 5: Now, it’s time to prepare our pears. Take five of your prepared large pears and carefully slice them into about 1/2-inch thick slices, making sure to discard the core from each. In a large skillet, preferably cast iron for that even heat distribution, melt 1 tablespoon of your unsalted butter over medium heat. Add the pear slices and 1 tablespoon of water. Cover the skillet and let them cook gently for about 3 minutes, just until they start to become slightly tender. Remove these softened pear slices from the skillet onto a large platter and let them cool down.
Step 6: Take your remaining three pears and prepare them the same way – slice them into about 1/2-inch thick pieces, discarding the cores. Now, melt the remaining 2 tablespoons of butter in that same skillet you used earlier. Add these newly sliced pears to the skillet, along with the reserved fig chunks you strained out earlier, and a pinch of salt. Cook this mixture on medium heat, covered, for about ten minutes. Stir occasionally as they cook until these pears are very tender, almost falling apart.
Step 7: Once the pears and fig chunks in the skillet are wonderfully tender, it’s time to create our rich pear-fig base. Use a potato masher to mash these cooked pears and fig pieces together directly in the skillet until you have a lovely, rustic puree. Continue to cook this mixture for another 5 to 7 minutes, stirring now and then, until the puree reduces and thickens nicely. This concentrated flavor will be the base of our tart.
Step 8: Gently spoon this thickened pear-fig puree onto the cooled tart crust. Use the back of a spoon or a spatula to spread it out evenly, creating a smooth, inviting layer for our pear arrangement. This forms the flavorful foundation of our French pear tart.
Step 9: Now for the artistic part! Take the cooled, pre-sliced pear slices from Step 5. Begin arranging them on top of the pear-fig puree in beautiful, layered circles. Start from the outer edge of the tart and work your way inwards, overlapping the slices slightly to create a stunning visual effect. This arrangement makes the tart as lovely to look at as it is to eat.
Step 10: Carefully place the assembled tart back into the 350-degree F (175-degree C) oven, this time on the middle rack. Bake for another 30 minutes, allowing the flavors to meld and the pears to soften further within the tart structure.
Step 11: While the tart is in its final bake, warm up the strained fig liquid you set aside in Step 4. Just give it about 20 seconds in the microwave to become nicely warm and fluid again. This will be our finishing glaze.
Step 12: Once the tart is done and the crust is perfectly golden and the pears are tender, carefully remove it from the oven. Immediately, use a pastry brush to evenly apply the warmed fig liquid over the surface of the pears. This glaze will add a beautiful sheen and an extra layer of sweetness.
Step 13: For the final touch of caramelization, return the tart to the oven. This time, move it to the top rack. Broil it very briefly – and I mean very briefly! You need to watch it like a hawk to prevent burning. The goal is just to get those pears to develop a gorgeous caramelized look and a delightful depth of flavor.
Step 14: Now comes the hardest part: waiting! Carefully remove the tart from the oven and let it cool on a wire rack for at least 1.5 hours. This resting period is crucial for the tart to set properly, making it easier to slice and serve cleanly.
Step 15: Finally, it’s time to unveil your masterpiece. To remove the outer ring of the tart pan, place the bottom of the pan on top of a wide can of food (like a large soup can). Gently hold the ring part of the pan and carefully slide it downwards. Your beautiful French pear tart will be free!
Step 16: Slice your French pear tart into eight delightful wedges and serve. It’s a perfect dessert that truly shines. Enjoy the fruits of your labor!
Chef’s Tips for a Perfect French Pear Tart Recipe
- Choose the Right Pears: Opt for pears that are ripe but still firm, such as Bosc or Anjou. They hold their shape well when cooked.
- Don’t Overcook the Pears Initially: Slicing and pre-cooking the pears briefly helps them soften evenly without turning mushy in the final bake.
- Smooth Glaze is Key: Straining the fig preserves is essential for a smooth, professional-looking glaze that distributes easily.
- Watch the Broiler Closely: The broiling step adds beautiful caramelization, but it can go from perfect to burnt in seconds. Stay attentive!
- Allow Ample Cooling Time: Resist the urge to slice into the tart immediately. Cooling allows the filling to set, preventing a messy slice.
- Use a Tart Pan with a Removable Bottom: This makes releasing the tart so much easier and ensures a beautiful presentation.
Variations and Substitutions
Vegan Option
For a delicious vegan French pear tart, use a plant-based butter substitute for both the crust and the filling. Ensure your fig preserves are also vegan-friendly. The pears and flour are naturally vegan.
Gluten-Free Alternative
Substitute the all-purpose flour with a good quality gluten-free all-purpose baking blend containing xanthan gum for the crust. Ensure all other ingredients are certified gluten-free.
Different Fruit Fillings
While pears are classic, feel free to experiment! Apples, peaches, or even a mix of berries could be used. Adjust cooking times as needed based on the fruit’s moisture content and tenderness.
Spice it Up
Add a pinch of cinnamon, nutmeg, or cardamom to the pear-fig puree mixture for an extra layer of warmth and spice. It pairs beautifully with the sweet pears.
Nutty Addition
Consider adding a sprinkle of finely chopped almonds or walnuts to the crust before baking, or mix some into the pear-fig puree for added texture and nutty flavor.
How to Serve and Pair
This French pear tart is a showstopper on its own after a lovely dinner. For an extra touch of indulgence, serve a warm slice with a dollop of freshly whipped cream or a scoop of vanilla bean ice cream. A small spoonful of crème fraîche also complements the sweetness beautifully. This tart is perfect for any occasion, from a cozy family dessert to a more formal holiday gathering or a special brunch.
Consider pairing this exquisite tart with a delicate dessert wine or, for a non-alcoholic option, a sparkling cider or a good quality black tea. The fruity and slightly spiced notes of the tart will pair wonderfully with these beverages.
Storage and Reheating
Refrigerator
Store any leftover French pear tart in an airtight container in the refrigerator for up to 3-4 days. The crust may soften slightly over time but the flavors will remain delicious.
Freezer
While you can freeze the tart, it’s best done before the broiling step to preserve the texture of the pears. Wrap cooled, un-broiled tart tightly in plastic wrap and then in foil. Freeze for up to 2 months. Thaw in the refrigerator overnight before proceeding with the broiling step.
Room Temperature
It’s generally best to store this tart in the refrigerator due to the fruit filling. However, if serving within a few hours, it can be left at cool room temperature.
Reheating
To reheat individual slices, place them on a baking sheet in a preheated oven at 300 degrees F (150 degrees C) for about 8-10 minutes, or until warmed through. This helps to crisp up the crust again. Avoid using the microwave for reheating if you want to maintain a crisp crust.
Nutritional Values
- Calories: Approx. 350-400 per serving
- Protein: Approx. 3-4g per serving
- Carbohydrates: Approx. 50-60g per serving
- Fat: Approx. 18-22g per serving
- Fiber: Approx. 4-5g per serving
Approximate values.
Frequently Asked Questions (FAQ)
Can I use different fruit in this tart recipe?
Yes, you can absolutely substitute the pears with other firm fruits like apples or firm peaches. Be prepared to adjust cooking times slightly based on the fruit’s water content and how quickly it tenderizes.
How will I know when my French pear tart is perfectly baked?
The crust should be a beautiful golden brown, and the filling should be bubbly and set. The pears arranged on top should look tender and slightly caramelized after the broiling step.
My crust is crumbling, what went wrong?
If your crust is too crumbly, it might be that there wasn’t enough butter or liquid, or it was over-baked. Ensure your butter is properly melted and that you’ve pressed the dough firmly into the tart pan.
Can I prepare parts of this tart ahead of time?
Yes, you can bake the tart crust a day in advance and store it at room temperature. The pear-fig puree can also be made and refrigerated a day ahead.
What’s the best way to serve and customize this tart?
Serve it warm or at room temperature with whipped cream or ice cream. You can add a sprinkle of cinnamon or nutmeg to the filling for extra flavor, or garnish with a few fresh mint leaves.
CONCLUSION
This French pear tart recipe is a delightful testament to how simple ingredients can create something truly spectacular. It’s a forgiving recipe that delivers an elegant dessert, perfect for sharing with loved ones or for a quiet moment of personal indulgence. The irresistible combination of sweet, tender pears and rich fig glaze makes this tart an unforgettable treat.
Print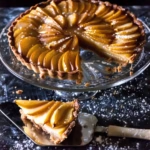
French Pear Tart Recipe
- Prep Time: 30
- Cook Time: 45
- Total Time: 75
- Yield: one 12-inch tart, serves 6 to 8 1x
- Category: desserts
- Method: Baking
- Cuisine: French
- Diet: Vegetarian
Description
An elegant yet approachable French pear tart featuring caramelized pears on a buttery crust and topped with a rich fig glaze. This dessert is rustic, refined, and perfect for any special occasion.
Ingredients
1 1/2 cups all-purpose flour
1/2 cup cold unsalted butter, cubed
3 to 4 ripe pears
2 tablespoons honey or brown sugar
1 teaspoon vanilla extract
1 teaspoon cinnamon
1/4 teaspoon ground nutmeg
2 tablespoons unsalted butter
1/4 cup honey or fig jam (alcohol-free)
1 teaspoon lemon juice
1 egg wash (egg + 1 tablespoon milk)
Sugar for dusting
Instructions
Preheat oven to 375°F (190°C)
In a mixing bowl, combine flour and a pinch of salt
Work in cold butter cubes using a pastry cutter or fork until the mixture resembles coarse crumbs
Gather dough into a ball, flatten slightly, wrap in plastic, and chill for 30 minutes
Roll out dough on a floured surface into a 12-inch circle
Transfer to a parchment-lined baking sheet
Dimple the dough all over with a fork
Bake for 12 minutes or until lightly golden
In a large skillet, melt butter and sauté pear slices with honey, cinnamon, nutmeg, and vanilla until tender and caramelized
Arrange pear slices decoratively on the pre-baked crust
Bake for another 15-20 minutes or until pears are golden and crust is crisp
Meanwhile, whisk together fig jam or honey with lemon juice to make the glaze
Remove tart from oven, brush with glaze while warm, and let cool
Brush cooled tart with egg wash and dust with sugar before serving
Notes
Use Bartlett, Bosc, or Anjou pears for the best results.
Ensure the crust is baked before adding the filling to avoid sogginess.
Store leftover tart in an airtight container for up to 2 days.
Nutrition
- Serving Size: 1 slice (1/6 of tart)
- Calories: 220
- Sugar: 18g
- Sodium: 80mg
- Fat: 8g
- Saturated Fat: 5g
- Carbohydrates: 30g
- Fiber: 2g
- Protein: 3g
- Cholesterol: 20mg