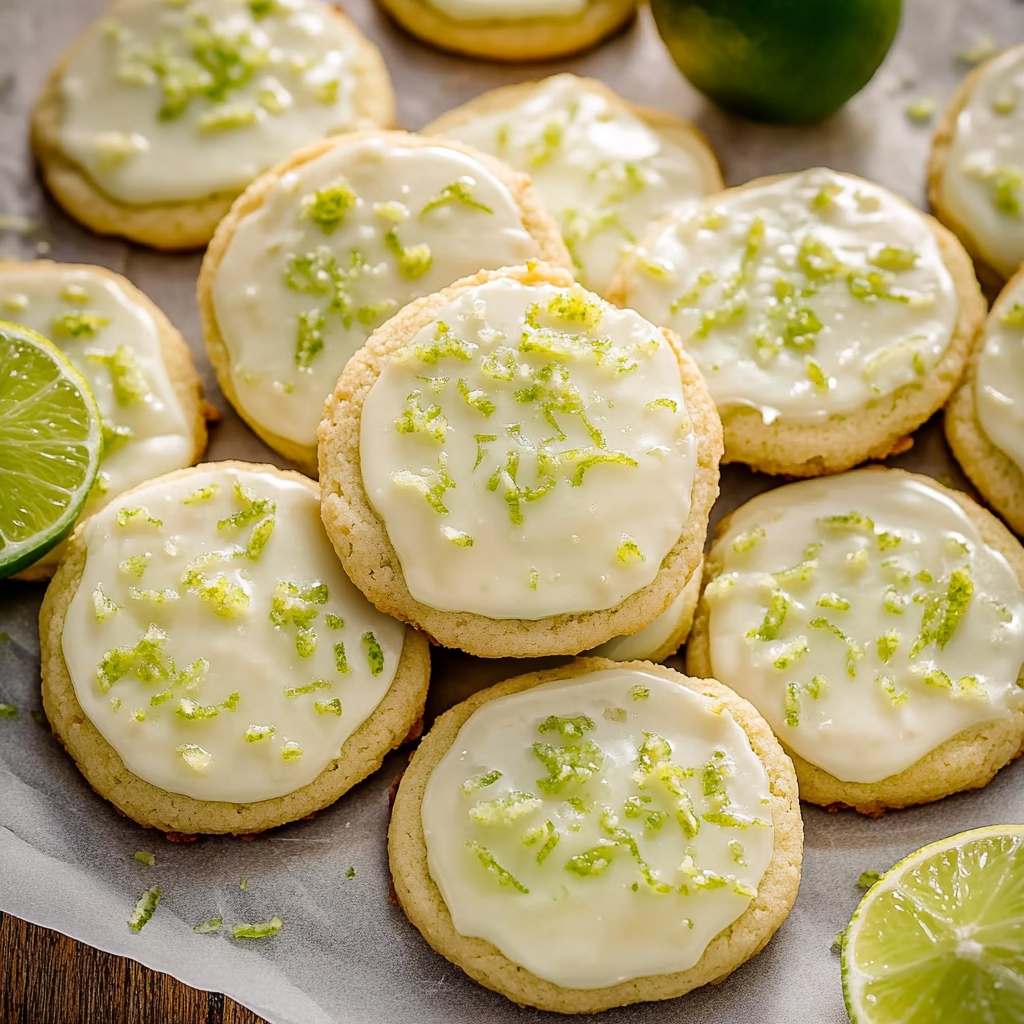
Irresistible Key Lime Cookies with Tangy Glaze
Move over pie, these soft and chewy Key Lime Cookies are so refreshing and delicious. The perfect texture cookie iced with a key lime glaze–these simple cookies are every lime lover’s dream come true! Only 10 minutes to prepare the cookie dough!
Imagine a cookie that captures the essence of a warm, sunny day. That’s exactly what these Key Lime Cookies do. They are little bursts of sunshine, perfectly tart and sweet, with a soft texture that just melts in your mouth. I remember the first time I tried making these, I was looking for something a bit different than the usual chocolate chip or sugar cookies. I wanted a flavor that was bright and a little unexpected, and these Key Lime Cookies delivered precisely that. Plus, the added bonus is that the dough comes together so quickly, it feels like a real treat you can whip up on a whim.
What is Key Lime Cookies?
Key lime cookies are a delightful twist on traditional cookie recipes. They are characterized by their vibrant, zesty flavor derived from the essential ingredient: key lime. Unlike the Persian limes commonly found in supermarkets, key limes are smaller, more tart, and possess a uniquely floral aroma that makes them a sought-after ingredient for desserts. These cookies typically aim for a soft and chewy texture, providing a tender bite that beautifully contrasts with the bright, tangy kick of the lime.
The magic of key lime cookies often lies in their balance. The tartness of the lime is expertly mellowed by the sweetness of the cookie base and often a simple, luscious glaze, creating a harmonious flavor profile. They are a celebration of citrus in cookie form, offering a refreshing departure from richer, heavier baked goods. Originating from the sunny climes where key limes thrive, these cookies have become a beloved treat, especially popular in regions that appreciate the distinct charm of this particular citrus.
Reasons to Try Key Lime Cookies
If you’re a fan of citrus flavors or simply looking to add a bit of brightness to your baking repertoire, these key lime cookies are an absolute must-try. They offer a wonderful balance of sweet and tart that is incredibly refreshing, making them perfect for any occasion, from a casual afternoon snack to a special gathering. The texture is wonderfully soft and chewy, providing that satisfying bite that cookie lovers crave, without being overly rich or heavy.
Beyond their delightful taste and texture, these cookies are surprisingly easy to make, making them ideal for bakers of all skill levels, even those just starting out. The dough comes together in minutes, and the baking process is straightforward. They are particularly fantastic for summer picnics, holiday cookie exchanges, or anytime you want a little taste of sunshine. Imagine the smiles when you bring out a plate of these beautifully glazed, zesty treats – they’re sure to be a hit!
Ingredients Needed to Make Key Lime Cookies
- ½ cup unsalted butter (113g), softened to room temperature
- 1 large egg, room temperature
- ¾ cup granulated sugar (150g)
- ¼ cup packed light brown sugar (50g)
- 1 teaspoon vanilla extract
- 2-3 teaspoons finely grated key lime zest (from about 2-3 key limes)
- 1 ¾ cups all-purpose flour (219g)
- ½ teaspoon baking soda
- ½ teaspoon salt
For the Key Lime Glaze:
- 1 cup powdered sugar
- 1 tablespoon key lime juice (freshly squeezed is best)
- 1-2 tablespoons milk (or water, adjust for consistency)
- ¼ teaspoon vanilla extract
- ½ teaspoon finely grated key lime zest
- Pinch of salt (optional, to enhance flavor)
Instructions to Make Key Lime Cookies – Step by Step
Step 1: Prepare Your Baking Station and Dry Ingredients. First things first, let’s get your oven ready to bake these little gems. Preheat your oven to 350°F (175°C). While the oven heats up, grab a small bowl and whisk together the flour, baking soda, and salt. This simple step ensures that your leavening agents and salt are evenly distributed throughout the cookie dough, which is key to achieving the right texture and rise. Once they’re well combined, set this bowl aside for now.
Step 2: Cream the Butter and Sugars. In a separate, larger mixing bowl, combine the softened unsalted butter with both the granulated sugar and the light brown sugar. Using an electric mixer on medium-high speed, beat these ingredients together for about 1 to 2 minutes. You’re looking for a light and fluffy texture – this process, often called creaming, incorporates air into the dough, which contributes significantly to the final cookie’s tender crumb and delicate structure. It’s a crucial step for that melt-in-your-mouth quality.
Step 3: Incorporate Wet Ingredients and Zest. Now, it’s time to add the binder and flavor enhancers. Add the room-temperature large egg and the vanilla extract to the creamed butter and sugar mixture. Beat again until everything is just combined and smooth. Next, stir in your finely grated key lime zest. This is where that wonderful bright, aromatic flavor really starts to come into play, infusing the dough with its signature citrusy essence. Make sure to get that zest right into the mixture; it’s packed with flavor.
Step 4: Combine Wet and Dry Ingredients to Form Dough. Gradually add the dry flour mixture to the wet ingredients. Begin by adding about one-third of the flour mixture and beat on low speed until it’s just incorporated. Continue this process, adding the flour in two more additions, mixing only until a soft cookie dough begins to form. Be careful not to overmix at this stage; overmixing can develop the gluten in the flour too much, leading to tougher cookies. You want a dough that comes together nicely without being too sticky.
Step 5: Shape and Arrange the Cookies. Once your dough is ready, it’s time to give your cookies their shape. Gently roll the dough into 1 ½ inch balls. I find that using your hands to roll them into smooth, uniform balls helps ensure even baking and a pretty presentation. Arrange these dough balls on a cookie sheet that has been lined with parchment paper. Leave a little space between each ball to allow for spreading during baking; about 2 inches apart should do the trick.
Step 6: Bake the Cookies to Perfection. Place the prepared cookie sheets into your preheated 350°F (175°C) oven. Bake for approximately 8 to 10 minutes. You’ll want to pull them out when the edges are just beginning to set but the centers still look a little soft and puffy. They might not look fully done, but they will continue to cook slightly as they cool on the baking sheet. This is the secret to achieving that wonderfully soft and chewy texture without any dryness.
Step 7: Cool the Cookies and Prepare the Glaze. Let the baked cookies sit on the cookie sheet for about 2 to 3 minutes after removing them from the oven. This allows them to firm up just enough so they don’t fall apart. Then, carefully transfer the cookies to a wire cooling rack to cool completely. While they’re cooling, whip up the key lime glaze: in a medium bowl, whisk together the powdered sugar, key lime juice, milk (start with 1 tablespoon and add more if needed), vanilla extract, key lime zest, and optional pinch of salt until you have a smooth, drizzle-able consistency.
Step 8: Glaze and Serve Your Delicious Cookies. Once the cookies are entirely cool—and this is important, otherwise the glaze will melt right off—it’s time for the final touch. You can either dip the tops of the cooled cookies into the glaze, letting any excess drip back into the bowl, or use a knife or spoon to spread the glaze over the top of each cookie. Let the glaze set for a few minutes at room temperature. Once the glaze has hardened slightly, your incredibly refreshing Key Lime Cookies are ready to be enjoyed!
Chef’s Tips for a Perfect Result
- Ensure your butter and egg are genuinely at room temperature; this is critical for proper creaming and a tender cookie texture.
- Don’t skip zesting the key limes; the zest contains the essential oils that provide the intense, aromatic lime flavor.
- Resist the urge to overmix the dough once the flour is added, as this can lead to tough cookies.
- Bake just until the edges are set; the centers will firm up as they cool, ensuring a chewy, not cakey, consistency.
- Allow cookies to cool completely before glazing to prevent the glaze from melting and becoming a sticky mess.
- Adjust the glaze consistency with more powdered sugar for a thicker glaze or more key lime juice/milk for a thinner one, aiming for easy drizzling or spreading.
Variations and Substitutions
- Gluten-Free Alternative: For a gluten-free version, swap the all-purpose flour with a good quality 1:1 gluten-free baking flour blend. Ensure the blend contains xanthan gum for proper structure. The texture might be slightly different, but the flavor will remain wonderfully tart.
- Lemon Lime Twist: If you can’t find key limes or want a slightly different citrus note, you can substitute regular lime juice and zest, or even a blend of lime and lemon. The flavor will be less floral and more straightforwardly tart, but still delicious.
- White Chocolate Drizzle: For an extra touch of sweetness and decadence, melt some white chocolate and drizzle it over the glazed cookies. This complements the tartness of the lime beautifully.
- Lime Sugar Cookies: For a crispier cookie, reduce the baking time slightly and omit the glaze. You can also add a bit more sugar to the dough for a sweeter, crunchier cookie that’s lovely on its own.
- Vegan Option: To make these vegan, replace the butter with vegan butter sticks, and the egg with a flax egg (1 tablespoon ground flaxseed mixed with 3 tablespoons water, let sit for 5 minutes). For the glaze, use plant-based milk.
How to Serve and Pair
These Key Lime Cookies are delightful on their own, but they also pair wonderfully with a variety of beverages and desserts. Serve them chilled with a tall glass of cold milk, iced tea, or a refreshing sparkling water. For a more dessert-like experience, they are fantastic alongside a scoop of vanilla bean ice cream or a light, lemon-flavored sorbet. They make a perfect light ending to a summer barbecue or a welcomed addition to any potluck dessert spread. Their vibrant flavor also makes them a wonderful treat to have with your morning coffee or afternoon tea.
Storage and Reheating
Refrigerator
Store leftover Key Lime Cookies in an airtight container in the refrigerator for up to 5 days. The cool temperature helps the glaze set firmly and prevents the cookies from becoming too soft. They tend to retain their freshness and tangy flavor best when kept chilled.
Freezer
Un-glazed cookie dough balls can be frozen on a baking sheet until solid, then transferred to a freezer-safe bag for up to 3 months. Bake from frozen, adding a minute or two to the baking time. For iced cookies, freezing is not recommended as the glaze can crack or become gummy.
Room Temperature
Once the glaze has completely set, these cookies can be stored in an airtight container at room temperature for up to 3-4 days. Avoid stacking them too high if they are heavily glazed, as this can cause them to stick together. A single layer or light layering with parchment paper between layers is ideal.
Reheating
These cookies are best served at room temperature or slightly chilled. Reheating is generally not recommended as it can cause the cookies to dry out or the glaze to melt. If you prefer them slightly warm, a few seconds in a very low oven or microwave might be attempted, but proceed with caution to avoid affecting their delicate texture.
Nutritional Values
- Calories: Approximately 123 kcal per cookie
- Carbohydrates: Approximately 21g per cookie
- Protein: Approximately 1g per cookie
- Fat: Approximately 4g per cookie
- Saturated Fat: Approximately 3g per cookie
- Fiber: Approximately 1g per cookie
- Sugar: Approximately 13g per cookie
Nutrition information is automatically calculated and serves as an approximation.
Frequently Asked Questions (FAQ)
Can I use regular limes instead of key limes?
Yes, you can substitute regular lime juice and zest for key limes if they are unavailable. The flavor will be a bit more straightforwardly tart and less floral, but still very refreshing and enjoyable in this recipe.
How can I tell when my key lime cookies are perfectly baked?
Your key lime cookies are done when the edges appear set and lightly golden, but the centers still look soft and slightly puffy. They will continue to bake slightly on the hot baking sheet, achieving that ideal chewy texture.
My cookies spread too much, what went wrong?
Cookies spreading too much can happen if the butter was too soft or melted, or if the dough was overmixed after adding the flour. Ensure your butter is softened but not greasy, and mix the dough only until just combined.
Can I make the cookie dough ahead of time?
Absolutely! You can prepare the cookie dough and chill it in the refrigerator for up to 2 days, or freeze it for up to 3 months. This is a great way to have fresh cookies ready whenever the craving strikes.
What is the best way to serve or customize these key lime cookies?
For a simple, elegant presentation, serve them as is with their glaze. You can also add a sprinkle of finely chopped candied lime peel for extra zest, or a drizzle of white chocolate for a sweet contrast.
CONCLUSION
These Key Lime Cookies are a truly delightful baked treat, bursting with bright, zesty flavor and a wonderfully soft, chewy texture. They’re simple to make and sure to become a new favorite, offering a refreshing taste of sunshine in every bite. Give them a try and experience that irresistible tangy sweetness that makes them so incredibly special!
Print
Irresistible Key Lime Cookies with Tangy Glaze
- Prep Time: 10 minutes
- Cook Time: 9 minutes
- Total Time: 30 minutes
- Yield: 24 cookies 1x
- Category: Dessert
- Method: Baking
- Cuisine: American
- Diet: Vegetarian
Description
These soft and chewy Key Lime Cookies are bursting with refreshing citrus flavor and topped with a sweet key lime glaze for the ultimate lime lover’s treat.
Ingredients
For the Cookies:
- ½ cup unsalted butter, softened
- 1 large egg, room temperature
- ¾ cup sugar
- ¼ cup light brown sugar
- 1 teaspoon vanilla extract
- 2–3 teaspoons key lime zest
- 1 ¾ cups flour
- ½ teaspoon baking soda
- ½ teaspoon salt
For the Key Lime Glaze:
- 1 cup powdered sugar
- 1 tablespoon key lime juice
- 1–2 tablespoons milk
- ¼ teaspoon vanilla extract
- ½ teaspoon key lime zest
- Pinch of salt, optional
Instructions
1. Preheat the oven to 350°F and line baking sheets with parchment paper.
2. In a small bowl, whisk together the flour, baking soda, and salt.
3. In a separate mixing bowl, beat the butter, granulated sugar, and brown sugar together until light and fluffy.
4. Add the egg and vanilla extract and mix until combined.
5. Mix in the key lime zest.
6. Gradually add the dry ingredients, mixing until a soft dough forms.
7. Roll the dough into 1½-inch balls and place them on the prepared baking sheets.
8. Bake for 8-10 minutes until the cookies are set but still soft and pale.
9. Allow the cookies to cool on the baking sheet for 2-3 minutes before transferring to a cooling rack.
10. In a bowl, whisk together the powdered sugar, key lime juice, milk, vanilla extract, key lime zest, and optional salt until smooth.
11. Allow the glaze to sit for several minutes, then dip the cooled cookies or spread the glaze over the tops.
12. Let the glaze set completely before serving.
Notes
Make sure the butter is properly softened for the best cookie texture.
Do not overbake the cookies; they should remain soft and slightly puffy when removed from the oven.
Rolling the dough into smooth balls creates a prettier finished cookie.
Adjust the glaze consistency by adding more milk for a thinner glaze or more powdered sugar for a thicker glaze.
Store cookies in an airtight container for 4-5 days.
Nutrition
- Serving Size: 1 cookie
- Calories: 123
- Sugar: 13g
- Sodium: 76mg
- Fat: 4g
- Saturated Fat: 3g
- Unsaturated Fat: 2g
- Trans Fat: 1g
- Carbohydrates: 21g
- Fiber: 1g
- Protein: 1g
- Cholesterol: 17mg


