No-bake cherry cheesecake is truly a delightful creation that brings together the simple joy of a classic cheesecake with the vibrant, sweet tang of cherries. It’s the kind of dessert that feels special enough for company but is wonderfully straightforward to make on a weeknight when a sweet craving strikes. This recipe, born from a desire for a fuss-free yet show-stopping treat, has become a staple in my kitchen, much like the warm aroma of baking bread used to fill my childhood home.
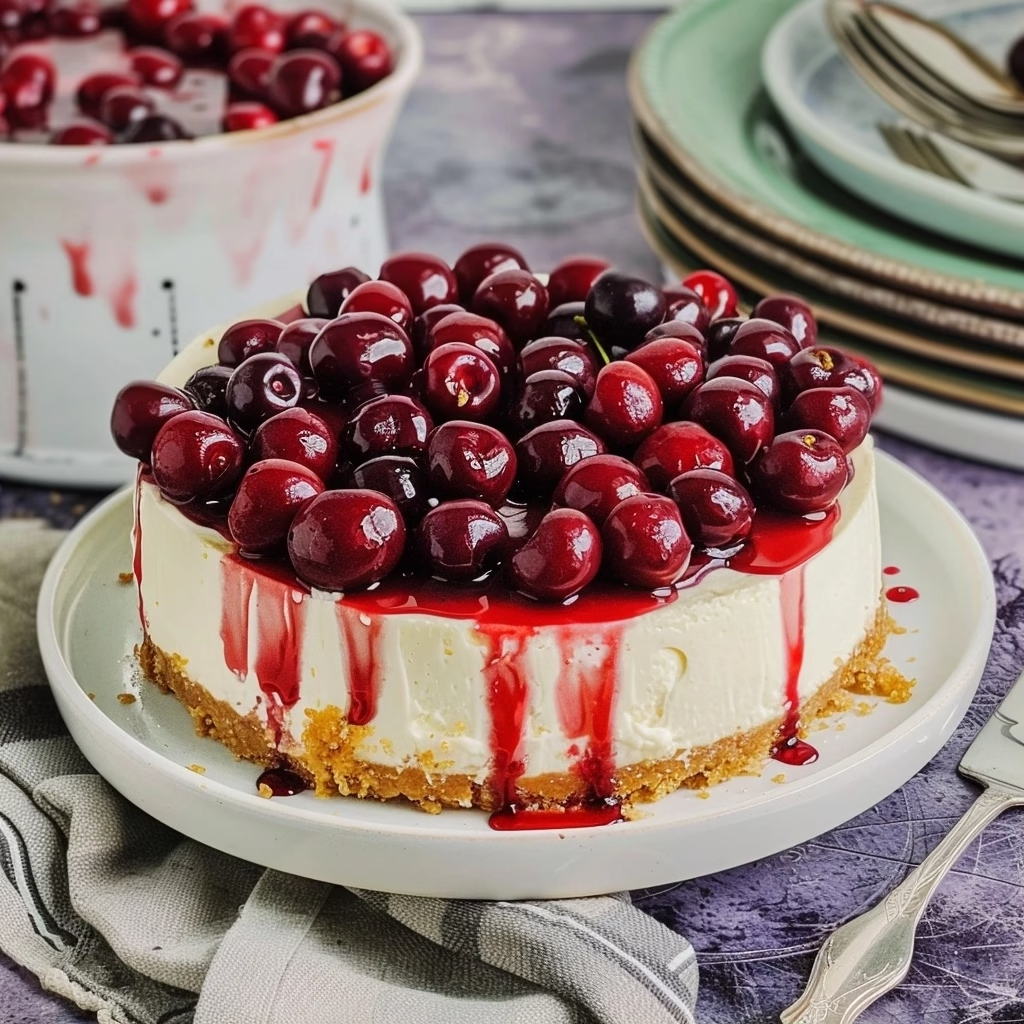
With a foundation of buttery graham cracker crumbs and a cloud-like cream cheese filling, all crowned with a glistening cherry topping, this no-bake cherry cheesecake is pure comfort. It’s a dessert that doesn’t demand oven time, making it perfect for warm days or when your oven is already occupied. The beauty of a no-bake dessert is its inherent simplicity, allowing the fresh flavors to shine without the complexities of baking.
What is No-Bake Cherry Cheesecake?
At its heart, a no-bake cherry cheesecake is a chilled dessert that captures the essence of traditional cheesecake without any baking involved. It typically features a crust made from crushed cookies or graham crackers, pressed into a pan and chilled. The filling is a rich, creamy blend often made with cream cheese, sugar, and cream, set through refrigeration rather than heat. The star of this particular version is the luscious cherry topping, transforming it into a delightful, fruity indulgence.
The magic of this no-bake cherry cheesecake lies in its effortless elegance. It’s inspired by the desire for that classic cheesecake experience – creamy, tangy, and satisfying – but made accessible for any home cook, regardless of their baking experience. We’re talking about a dessert that’s as forgiving as it is delicious, proving that spectacular results don’t always require hours in front of a hot oven. It’s a testament to how simple, quality ingredients can come together to create something truly special.
Reasons to Try No-Bake Cherry Cheesecake
There are so many wonderful reasons to fall in love with this no-bake cherry cheesecake. Foremost, it’s incredibly easy to make! The steps are straightforward and forgiving, making it an ideal project for beginner bakers or anyone who wants a sweet success without the stress. Plus, it’s a fantastic time-saver. You can whip it up in under 30 minutes of active time, and then let the refrigerator do the rest.
This cheesecake is also wonderfully versatile. Whether you’re hosting a summer barbecue, need a last-minute dessert for a potluck, or simply want to treat yourself after a long day, it fits the bill perfectly. It appeals to a wide range of palates, from kids who love its sweet, fruity flavor to adults who appreciate its sophisticated texture and taste. It’s the kind of dessert that brings smiles to faces and creates those cozy, shared moments around the table.
Ingredients Needed to Make No-Bake Cherry Cheesecake
Here’s what you’ll need to bring this delightful no-bake cherry cheesecake to life.
- 2 & ⅓ cups (250gms) Graham cracker crumbs (about 15-20 full crackers)
- 1 stick (½ cup/ 115gms) unsalted butter, melted
- 2 x 8 ounce tubs (450gms total) full fat cream cheese, softened to room temperature
- ½ cup (110gms) white sugar
- 1 & ½ teaspoons vanilla essence
- 1 tablespoon fresh lemon juice
- 1 cup (250mls) thickened cream (heavy cream), cold
- For the cherry topping:
- 1 teaspoon tapioca starch
- 1 & ½ tablespoons granulated white sugar
- 2 teaspoons fresh lemon juice
- 2 tablespoons water
- 4 cups (1 & 1.3 lbs/600gms) fresh cherries, pitted (or frozen, thawed)
Instructions to Make No-Bake Cherry Cheesecake – Step by Step
To make the cheesecake base:
Step 1:
Begin by preparing your springform tin. Gently line the bottom and sides of a 7-inch by 2.5-inch springform cake tin with parchment paper or food-safe acetate. This lining helps ensure your cheesecake releases cleanly later, which is always a satisfying step.
Step 2:
Next, let’s create that all-important base. Break your graham crackers into smaller pieces and blitz them in a food processor until you have fine crumbs. If you don’t have a food processor, you can place them in a sturdy zip-top bag and crush them with a rolling pin – it’s a fun, therapeutic task!
Step 3:
Melt your unsalted butter. You can pop it in a microwave-safe bowl for about a minute or two, or melt it gently in a small saucepan on the stove. Once melted, pour this liquid gold over your graham cracker crumbs. Mix everything together until the crumbs are evenly moistened and resemble fine, damp sand.
Step 4:
Now, carefully pour these buttery crumbs into your prepared springform tin. Gently press the crumbs down to form an even layer across the bottom. Be mindful not to press too firmly, as this can result in a base that’s quite hard; a light, firm press is all you need. This base will then chill in the refrigerator for at least one hour, or even up to overnight, allowing it to set.
To make the cheesecake filling:
Step 5:
Ensure your cream cheese is nicely softened to room temperature. This is crucial for a smooth, lump-free filling. Briefly beat the softened cream cheese with your electric beaters or stand mixer until it’s nice and smooth.
Step 6:
To the softened cream cheese, add the white sugar, vanilla essence, and fresh lemon juice. Beat on a low speed until everything is just combined and you can no longer feel any grainy sugar between your fingers. We want it smooth and creamy!
Step 7:
In a separate, clean bowl, whip the cold thickened cream until you achieve firm peaks. This means when you lift the beaters, the cream holds its shape. Gently fold this whipped cream into the cream cheese mixture. Be careful not to overmix; we want to keep that lovely airy texture from the whipped cream.
Step 8:
Spoon the luscious cheesecake filling onto the chilled graham cracker base in your springform tin. Gently spread it out evenly using a spatula, making sure the top is smooth. Cover the tin and chill this in the refrigerator for at least four hours, or ideally, overnight, until it’s firm and set.
To make the cherry topping:
Step 9:
Place a small bowl in your freezer to chill. This will be useful for testing the topping’s consistency later on. If you’re using fresh cherries, now is the time to remove their pits. If you are using frozen cherries, be sure to thaw them completely first.
Step 10:
Decide how you’d like your cherries. You can leave them whole for a prettier presentation, or cut them in half for easier eating. Both options are delicious and have their own charm!
Step 11:
In a small saucepan, combine the tapioca starch, granulated white sugar, fresh lemon juice, and water. Whisk these ingredients together until they are well combined and there are no lumps of starch.
Step 12:
Add your prepared cherries (whole or halved) to the saucepan. Stir everything together gently to coat the cherries with the liquid mixture. Heat this mixture over medium heat, stirring frequently, for about five minutes. You’ll notice the sauce will start as an opaque, milky color and then gradually turn dark and glossy as it thickens.
Step 13:
To test if the topping is thick enough, carefully take a small spoonful and tip it onto the edge of your chilled bowl from the freezer. It should cool and thicken sufficiently to drip slowly. If it still seems too liquid, continue to cook it down for a few more minutes, stirring constantly, and then retest. Once it reaches the desired consistency, remove the saucepan from the heat.
Step 14:
Allow the cherry topping to cool completely. Once it has reached room temperature, cover it and chill it in the refrigerator until you’re ready to assemble and serve the cheesecake. This chilling helps the flavors meld and ensures it’s the perfect cool contrast to the creamy cheesecake.
To assemble the cheesecake:
Step 15:
This step is best done just before serving to ensure everything looks its freshest. Carefully remove the chilled cheesecake from the springform pan. Gently peel away the parchment paper or acetate from the sides. You can use a spatula to smooth the sides of the cheesecake if needed, creating a clean finish.
Step 16:
Using a large, sharp knife, carefully slide it between the cheesecake base and the parchment paper at the bottom of the tin. This step helps to cleanly separate the base. Then, gently transfer your beautiful cheesecake to a serving plate or board.
Step 17:
Finally, the grand reveal! Just before you’re ready to slice and serve, generously pour the luscious, chilled cherry sauce over the top of the cheesecake. The vibrant red sauce cascading over the creamy white surface is always a delightful sight. And there you have it – your stunning No-Bake Cherry Cheesecake is ready to be enjoyed!
Chef’s Tips for a Perfect Result
- Make sure your cream cheese is truly at room temperature; this is the most critical step for a smooth, no-lump filling. Cold cream cheese will result in a lumpy texture that’s hard to fix.
- Chill the cheesecake base for at least one hour. This allows it to firm up properly, preventing it from crumbling too much when you slice into the finished dessert.
- Whip the cream to firm peaks separately. Folding it in gently preserves the airiness, which is key to that light, fluffy cheesecake texture.
- Test the cherry topping’s thickness on a chilled bowl to accurately gauge its final consistency once cooled. This prevents a watery or overly stiff sauce.
- For the smoothest sides on your cheesecake, run a spatula under hot water, wipe it dry, and then gently smooth the sides before serving.
- Add the cherry topping just before serving. This keeps the base of the cheesecake from becoming soggy and preserves the visual appeal of the glossy sauce.
Variations and Substitutions
- Vegan Option: For the crust, use vegan butter and vegan graham crackers or digestive biscuits. For the filling, opt for a good quality vegan cream cheese and a plant-based whipping cream (like coconut cream or soy-based). The result will be a slightly different texture but equally delicious.
- Gluten-Free Alternative: Use gluten-free graham crackers or crumbly gluten-free cookies for the base. Ensure your cream cheese and other ingredients are naturally gluten-free. This makes the dessert accessible for those with gluten sensitivities.
- Low-Carb Version: Swap the graham crackers for almond flour mixed with a little melted butter and a sugar substitute (like erythritol). Use a sugar-free sweetener for the filling and cherry topping. Adjust sweetness to taste, as sugar substitutes can vary.
- Budget Swap: If graham crackers are expensive or unavailable, consider using vanilla wafers or shortbread cookies for the base. For the topping, if fresh cherries are out of season or costly, a good quality canned or frozen cherry pie filling can be used, though adjust sugar to your preference.
- Berry Burst: Instead of cherries, try this recipe with mixed berries, raspberries, or even blueberries for a different fruity twist. Adjust sugar based on the sweetness of the berries.
How to Serve and Pair
This no-bake cherry cheesecake is a showstopper on its own, but serving it with a few thoughtful touches can elevate it even further. Presentation is key, and a simple sprinkle of fresh mint leaves or a few extra fresh cherries on top adds a pop of color and freshness. For a truly elegant touch, a swirl of lightly sweetened whipped cream on the side or a drizzle of the cherry sauce over the plate can make it feel restaurant-worthy.
It pairs beautifully with a cup of hot coffee or a soothing herbal tea. For a more celebratory feel, a chilled glass of sparkling cider or a light, fruity rosé (if you partake) complements the sweetness of the cheesecake without overpowering it. This dessert is perfect for any occasion, from casual family dinners and birthday celebrations to holiday gatherings and summer picnics. It’s a crowd-pleaser that’s always a hit.
Storage and Reheating
Refrigerator
If you have any leftover no-bake cherry cheesecake, store it in an airtight container in the refrigerator. It will keep well for up to 3 days. For best results, only add the cherry topping to individual slices as you serve them, to prevent the crust from becoming too soggy. If the whole cake is topped, ensure it’s well-covered to protect it.
Freezer
Without the cherry sauce on top, the cheesecake freezes beautifully. Wrap the entire cheesecake, or individual slices, tightly in plastic wrap followed by a layer of aluminum foil. It can be stored in the freezer for up to 2 months. For optimal taste and texture, consume within a month. The cherry topping can also be frozen separately in ice cube trays for easy, portioned servings.
Room Temperature
It’s best to keep this no-bake cheesecake chilled. Avoid leaving it at room temperature for extended periods, especially in warm weather, as the cream cheese filling can soften and spoil. If serving, take it out of the refrigerator about 15-20 minutes beforehand to take the chill off slightly, making it easier to slice.
Reheating
This no-bake cheesecake is designed to be served chilled and does not require reheating. Attempting to reheat it would compromise its texture and consistency, as the filling is not baked. Enjoy it cold or slightly softened from refrigeration.
Nutritional Values
- Calories: 364 kcal
- Protein: 5g
- Carbohydrates: 55g
- Fat: 14g
- Fiber: 2g
Approximate values. Nutritional information is an estimate based on an online database. The nutritional content of ingredients may vary by brand. If you require accurate nutritional information, you should calculate this based on the specific brands and products you are using.
Frequently Asked Questions (FAQ)
Can I substitute the type of cracker for the no-bake cherry cheesecake base?
Yes, you can certainly substitute the graham crackers. Vanilla wafers, digestive biscuits, or even crushed shortbread cookies will work well, offering a slightly different but delicious flavor profile for your crust.
How do I know when my no-bake cherry cheesecake is properly set?
Your no-bake cheesecake is set when the filling is firm to the touch and holds its shape. It should not jiggle excessively when the pan is lightly tapped. Chilling it for at least 4 hours, or overnight, usually ensures it’s perfectly set.
My cheesecake filling is lumpy, what went wrong?
Lumps in the cheesecake filling most commonly occur when the cream cheese is too cold. Always ensure your cream cheese is fully softened to room temperature before beating it. Chipped chocolate or large clumps of cream cheese can be worked out by beating longer or gently pressing through a sieve if necessary.
Can I make this no-bake cherry cheesecake completely ahead of time?
Absolutely! This no-bake cherry cheesecake is perfect for making ahead. It’s best to prepare the entire cheesecake, including chilling the filling, the day before you plan to serve it. Add the cherry topping just before serving for the best presentation.
What are the best ways to customize or serve this no-bake cherry cheesecake?
Beyond the cherry topping, you can customize your cheesecake with fresh berries, a chocolate drizzle, or a dollop of whipped cream. For serving, slice it using a warm, wet knife for clean cuts and consider garnishing each slice with fresh mint.
Conclusion
This no-bake cherry cheesecake truly is a wonder of simplicity and flavor. It’s incredibly creamy, delightfully tangy, and crowned with a gorgeous cherry topping that sings of summer. If you’re looking for an effortless yet impressive dessert that is sure to become a go-to favorite, give this recipe a try. The perfect balance of sweet and tart with that signature creamy texture makes it utterly irresistible.
Print
No-Bake Cherry Cheesecake: Easy & Creamy Dream
- Prep Time: 30
- Total Time: 320
- Yield: 8 servings 1x
- Category: desserts
- Method: No-Bake
- Cuisine: American
- Diet: Vegetarian
Description
A creamy no-bake cheesecake with a buttery graham cracker crust, luscious cream cheese filling, and tangy cherry topping. Perfect for summer or any time you crave a sweet, stress-free dessert.
Ingredients
1 1/2 cups graham cracker crumbs
1/3 cup melted butter
4 packages (8 oz each) cream cheese, softened
2 cups powdered sugar
1 cup heavy cream
2 tablespoons cherry extract (optional)
1 (24 oz) jar maraschino cherries with juice
1 cup cherry pie filling (no alcohol)
Instructions
Mix graham cracker crumbs and melted butter until blended. Press into a 9-inch springform pan; refrigerate 15 minutes.
In a bowl, beat cream cheese and powdered sugar until smooth. Fold in heavy cream and cherry extract until fluffy.
Spread half the cream cheese mixture into the crust. Top with cherries and juice, then spread remaining cream cheese mixture over the top.
Garnish with cherry pie filling. Chill at least 4 hours or overnight before serving.
Notes
Chill at least 4 hours for best results.
Use a non-alcoholic cherry extract if available.
Cover and refrigerate for up to 3 days.
Optional: Add chopped pistachios or almonds to the crust for extra texture.
Nutrition
- Serving Size: 1 slice (1/8 of 9-inch cake)
- Calories: 520
- Sugar: 55g
- Sodium: 350mg
- Fat: 39g
- Saturated Fat: 23g
- Carbohydrates: 42g
- Fiber: 1g
- Protein: 6g
- Cholesterol: 130mg


