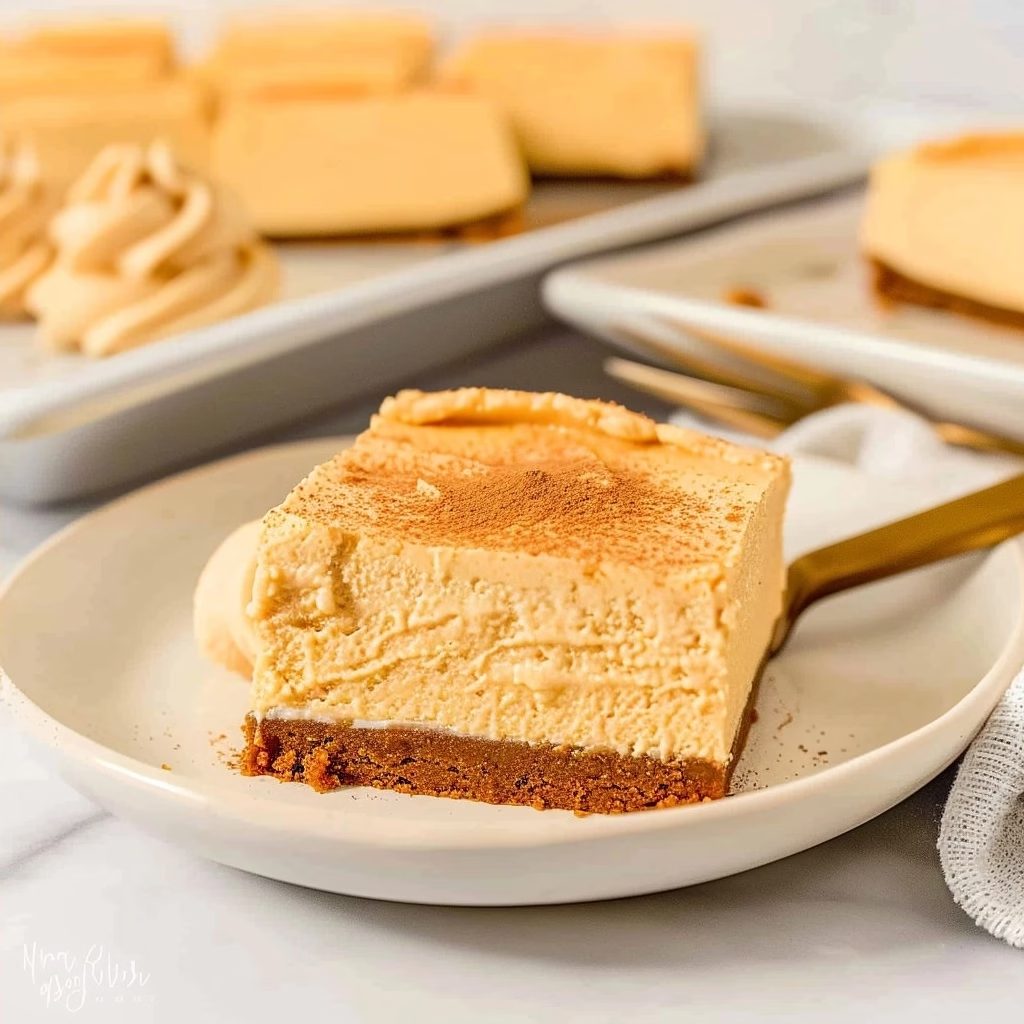
This fall season will not be complete without these no-bake pumpkin cheesecake bars! These mouse-like bars have the perfect pumpkin flavor and a crunchy gingersnap cookie crust, making it the perfect Thanksgiving dessert. The best part is that this recipe is completely no-bake, leaving you plenty of oven space for the rest of your holiday recipes!
I remember my first few Thanksgivings trying to host, and my oven felt like a battlefield. There were pies, casseroles, and all sorts of roasted goodness fighting for space, and I often wished I had a few more tricks up my sleeve. That’s where simple, no-bake recipes like these no-bake pumpkin cheesecake bars come in handy. They’re a creamy, dreamy addition that doesn’t add to the oven-time chaos. These bars truly capture the essence of autumn in every bite, with that comforting pumpkin spice aroma filling the air as they chill.
What is No-Bake Pumpkin Cheesecake Bars?
No-bake pumpkin cheesecake bars are a delightful dessert that brings together the creamy tang of cheesecake with the warm, spiced flavors of pumpkin, all without the need for an oven. They typically feature a buttery, spiced cookie crust, often made from gingersnaps or graham crackers, topped with a luscious, pourable pumpkin-spiced cream cheese filling. Because they are no-bake, they offer a lighter, more mousse-like texture compared to traditional baked cheesecakes, making them incredibly easy to prepare.
This dessert is a celebration of fall flavors in its simplest form. It’s the kind of recipe that comes together so easily, you might wonder if it’s truly going to work, but then you’re rewarded with pure deliciousness. The magic lies in the simplicity of the ingredients and the chilling process, which sets the creamy filling to perfection. It’s a testament to how wonderful desserts can be when you let good ingredients and a little patience do the work.
Reasons to Try No-Bake Pumpkin Cheesecake Bars
There are so many reasons why these no-bake pumpkin cheesecake bars should be on your dessert radar, especially as the cooler months arrive. First and foremost, they are incredibly simple to make. If you’ve ever felt intimidated by baking cheesecakes, this is your go-to solution. The lack of baking means no cracked tops or water baths – just simple mixing and chilling. This makes them a lifesaver for busy home cooks or anyone looking for an effortless yet impressive dessert option.
Beyond the ease, the flavor is absolutely irresistible. The combination of creamy, rich cream cheese, sweet pumpkin, and warm spices like cinnamon and allspice is classic fall comfort. They’re perfect for potlucks, holiday gatherings, or even just a cozy night in with friends. The fact that they’re made in bars also makes them wonderfully portable and easy to serve, eliminating the need for slicing a whole cake at a busy event. Plus, no oven use is a huge bonus during the holidays!
Ingredients Needed to Make No-Bake Pumpkin Cheesecake Bars
For the Gingersnap Crust:
-
2 cups gingersnap cookie crumbs (about 25-30 cookies)
-
6 tablespoons butter, melted
-
¼ cup brown sugar (packed)
For the Pumpkin Cheesecake Filling:
-
1 ½ cups heavy cream (very cold)
-
2 eight-ounce blocks cream cheese, softened
-
½ cup brown sugar (packed)
-
½ cup white sugar
-
1 cup pumpkin purée (not pumpkin pie filling)
-
½ teaspoon ground cinnamon
-
¼ teaspoon ground allspice
Instructions to Make No-Bake Pumpkin Cheesecake Bars – Step by Step
Step 1:
Let’s start by creating that perfect, crunchy gingersnap crust. In a food processor, add your gingersnap cookies and give them a whirl until they’re transformed into fine crumbs. If you don’t have a food processor, you can place the cookies in a sturdy zip-top bag and crush them with a rolling pin – it’s a great stress reliever! Once you have your crumbs, transfer them to a medium mixing bowl. Add your melted butter and the ¼ cup of brown sugar to the crumbs. Stir everything together with a fork until it all looks like wet sand; this signifies that the butter has evenly coated the crumbs, ready to be pressed.
Step 2:
Now, let’s prepare the pan for our crust. Line a 13×9 inch baking dish with parchment paper, making sure there are some overhangs on the sides. These parchment ‘handles’ will be incredibly helpful later when you want to lift the whole cheesecake out of the pan. Gently pour the gingersnap crumb mixture into the prepared dish. Using the bottom of a measuring cup or your clean hands, press the crumbs down firmly and evenly across the bottom of the dish to create a solid, compact crust. Pop this into the refrigerator while you whip up the dreamy filling.
Step 3:
Time for the luscious filling! In the bowl of your stand mixer fitted with the whisk attachment, pour in the very cold heavy cream. Beat on medium-high speed until stiff peaks form. This usually takes about 5 minutes, and you’ll know it’s ready when you can lift the whisk and the cream holds its shape without wilting. Carefully scrape the whipped cream into a separate bowl and set it aside. Give your mixer bowl a quick wipe down.
Step 4:
Switch to the paddle attachment on your stand mixer. Add the softened cream cheese to the bowl and beat it on medium speed until it’s perfectly smooth and creamy, with no lumps in sight. This might take a minute or two. Next, add the pumpkin purée, both the brown sugar and white sugar, the cinnamon, and the allspice. Scrape down the sides and the bottom of the bowl with a spatula a couple of times during this process to ensure every bit of cream cheese and pumpkin is incorporated and evenly mixed. You want a consistently smooth pumpkin mixture.
Step 5:
Now, gently fold the reserved whipped cream into the pumpkin and cream cheese mixture. Use a rubber spatula and a light hand – you want to keep as much air in the whipped cream as possible to maintain that airy, mousse-like texture. Fold until just combined; a few streaks of whipped cream are okay. Overmixing can deflate the filling. Once it’s beautifully combined and has a lovely, smooth texture, carefully scrape this glorious filling onto your chilled gingersnap crust. Use your spatula to spread it out into a smooth, even layer right to the edges.
Step 6:
The hardest part is waiting! Cover the baking dish loosely with plastic wrap or foil, being careful not to let it touch the surface of the filling. Place the dish in the refrigerator and let it chill for at least 6 to 8 hours. For the best texture and firmness, I often let mine chill overnight, especially if I’m making it ahead for a party. This extended chilling time allows the flavors to meld beautifully and the cheesecake filling to set up properly.
Step 7:
Once the cheesecake bars are fully chilled and firm, it’s time to serve them! Carefully run a butter knife around the edges of the dish to loosen the cheesecake bars. This step helps ensure they lift out cleanly. Grab the parchment paper overhangs and gently lift the entire cheesecake from the baking dish onto a cutting board. For the cleanest cuts, wipe your knife with a damp paper towel between each slice. Slice the cheesecake into 20 bars. You can serve them as is, or with a dollop of extra whipped cream, a sprinkle of cinnamon, or even a drizzle of caramel sauce.
Chef’s Tips for a Perfect Result
-
Make sure your cream cheese is truly softened to room temperature; it’s crucial for a lump-free filling.
-
Use cold heavy cream; this is essential for achieving stiff peaks when whipping.
-
Do not use pumpkin pie filling; always use plain pumpkin purée for the best flavor control.
-
Chill for the full recommended time, or even longer, to ensure the bars are set and easy to cut cleanly.
-
For the cleanest cuts, use a large, sharp knife and wipe it clean with a damp cloth between each slice.
-
Don’t overmix the whipped cream into the cream cheese mixture; gentle folding is key for a light and airy texture.
Variations and Substitutions
-
Gluten-Free Alternative: Swap the gingersnap cookies for gluten-free gingersnaps or gluten-free graham crackers for the crust. The texture may vary slightly depending on the brand used.
-
Spice Level Adjustment: Feel free to adjust the cinnamon and allspice to your preference. You can also add a pinch of nutmeg or ground ginger for a deeper spice profile.
-
Different Crust: Instead of gingersnaps, you can use graham cracker crumbs, shortbread cookie crumbs, or even crushed pretzels for a salty-sweet contrast. Adjust the brown sugar in the crust if your cookies are already very sweet.
-
Topping Ideas: Drizzle with caramel sauce, chocolate ganache, or serve with a dollop of whipped cream and a sprinkle of cinnamon or chopped pecans.
-
Individual Servings: Press the crust into the bottom of mini muffin liners or small ramekins for individual no-bake pumpkin cheesecake cups. Adjust chilling time as needed for smaller portions.
How to Serve and Pair
These no-bake pumpkin cheesecake bars are delightful served chilled, straight from the refrigerator. For an extra touch of indulgence, a simple dollop of fresh whipped cream on top makes them feel extra special, almost like a mini parfait. A light dusting of cinnamon or nutmeg right before serving adds a beautiful visual appeal and enhances the autumnal aroma. They are also wonderful with a drizzle of warm caramel sauce or a few toasted pecans for added crunch.
These bars pair beautifully with a warm cup of coffee, a steaming mug of spiced apple cider, or a creamy chai latte – perfect accompaniments for a cozy fall treat. They’re ideal for Thanksgiving dessert tables, Christmas potlucks, Halloween parties, or any casual fall gathering. They also make a fantastic make-ahead dessert for busy weeknight treats when you need something sweet without the fuss.
Storage and Reheating
Refrigerator
Store leftover no-bake pumpkin cheesecake bars in an airtight container in the refrigerator for up to 3-4 days. Ensure they are well-covered to prevent them from absorbing other odors from the fridge. Chilling them actually makes them taste even better as the flavors meld.
Freezer
These bars freeze quite well! Wrap them tightly, first in plastic wrap, then in a layer of foil or place them in a freezer-safe container. They can be stored in the freezer for up to 1-2 months. Thaw them overnight in the refrigerator before serving.
Room Temperature
It’s best to keep these bars refrigerated. They are designed to be eaten cold, and leaving them at room temperature for extended periods could affect their texture and safety, especially because of the cream cheese. Limit time at room temperature to no more than a couple of hours.
Reheating
Reheating is not typically necessary or recommended for no-bake cheesecake bars, as they are best served chilled. If they have been frozen and thawed, they should be ready to eat. If you prefer them slightly less firm, you can let them sit at room temperature for about 15-20 minutes before serving, but avoid any actual heating methods.
Nutritional Values
-
Calories: ~250-300 per bar
-
Protein: ~3-4g
-
Carbohydrates: ~25-30g
-
Fat: ~15-20g
-
Fiber: ~1-2g
Approximate values.
Frequently Asked Questions (FAQ)
Can I substitute the gingersnap cookies for another type of cookie in the crust?
Yes, you can absolutely use other cookies like graham crackers, shortbread, or even vanilla wafers for the crust. Just be mindful that the flavor profile will change slightly, and you might need to adjust the amount of sugar added to the crust depending on the sweetness of the new cookie.
How do I know when my no-bake pumpkin cheesecake bars are done chilling?
Your bars are ready when the center feels firm to the touch and doesn’t give way easily when gently pressed. The edges should also appear set. If they still feel soft or jiggly, they need more time in the refrigerator; overnight chilling is often the most reliable way to ensure they are perfectly set.
My cheesecake filling is a bit lumpy, what went wrong?
Lumpiness usually occurs if the cream cheese wasn’t softened enough before mixing. Ensure your cream cheese is at room temperature. If it’s only slightly lumpy, you can try gently folding in the whipped cream, but if it’s very lumpy, it might be best to re-beat the cream cheese briefly before proceeding.
Can I make these bars a day or two in advance?
Absolutely! These no-bake pumpkin cheesecake bars are perfect for making ahead. In fact, they benefit from extra chilling time. You can prepare them up to 2-3 days in advance and store them covered in the refrigerator until ready to serve.
What are the best toppings for no-bake pumpkin cheesecake bars?
The sky’s the limit! Classic toppings include a swirl of whipped cream and a sprinkle of cinnamon or nutmeg. Caramel sauce, chocolate ganache, candied pecans, or even a few fresh cranberries can add beautiful color and flavor. They’re very forgiving and great for personal customization.
CONCLUSION
These no-bake pumpkin cheesecake bars are a wonderfully creamy, spiced, and incredibly easy dessert that captures the heart of autumn. They’re the perfect treat for busy hosts or anyone craving a comforting, no-fuss fall indulgence. The irresistible combination of velvety pumpkin cheesecake and a gingersnap crust makes them an absolute seasonal must-try.
Print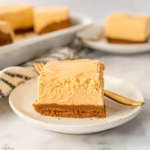
No-Bake Pumpkin Cheesecake Bars
- Prep Time: 15
- Total Time: 15
- Yield: 24 bars 1x
- Category: desserts
- Method: No-Bake
- Cuisine: American
- Diet: Vegetarian
Description
These no-bake bars feature a spiced pumpkin-cream cheese filling atop a gingersnap crust, requiring no baking. Perfect for holidays or cozy gatherings, they deliver comforting fall flavors with a mousse-like texture.
Ingredients
1 1/2 cups crushed gingersnaps (about 20 cookies)
1/4 cup (0.5 sticks) melted butter
16 oz (454g) cream cheese, softened
1/2 cup pumpkin puree
3/4 cup granulated sugar
1 large egg
1 tsp pure vanilla extract
1 tsp pumpkin pie spice
Pinch of salt
Instructions
Crush gingersnaps into fine crumbs using a food processor
Mix with melted butter until blended
Press crust into a 9×13-inch parchment-lined pan
In a large bowl, beat cream cheese until smooth
Add pumpkin puree, sugar, egg, vanilla extract, pumpkin spice, and salt
Spread filling evenly over crust
Chill for at least 1 hour before slicing into bars
Notes
Use halal/non-alcoholic vanilla extract if required
Arrange parchment or acetate for easy slicing
Store covered in refrigerator up to 3 days
Nutrition
- Serving Size: 1 bar
- Calories: 225
- Sugar: 18g
- Sodium: 150mg
- Fat: 12g
- Saturated Fat: 7g
- Carbohydrates: 25g
- Fiber: 1g
- Protein: 3g
- Cholesterol: 35mg