Peanut Butter Cookie Bars are a delightful twist on the classic cookie, transforming those beloved flavors into a perfectly portioned, bar form that’s ideal for sharing (or not!). Imagine a thick, buttery peanut butter cookie base, studded with generous amounts of melty chocolate chips, all baked into a convenient bar. It’s the kind of dessert that feels like a warm hug, conjuring up cozy kitchen memories and the simple joy of a homemade sweet treat.
This recipe aims to capture that perfect chewy texture and rich peanut butter goodness in every bite, making it an instant hit for bake sales, family gatherings, or just a quiet afternoon with a cup of tea. Baking them in a pan means less fuss than individual cookies, and the results are consistently spectacular. It’s a recipe so wonderfully straightforward, it makes you feel like you’ve unearthed a delicious secret.
What is Peanut Butter Cookie Bars?
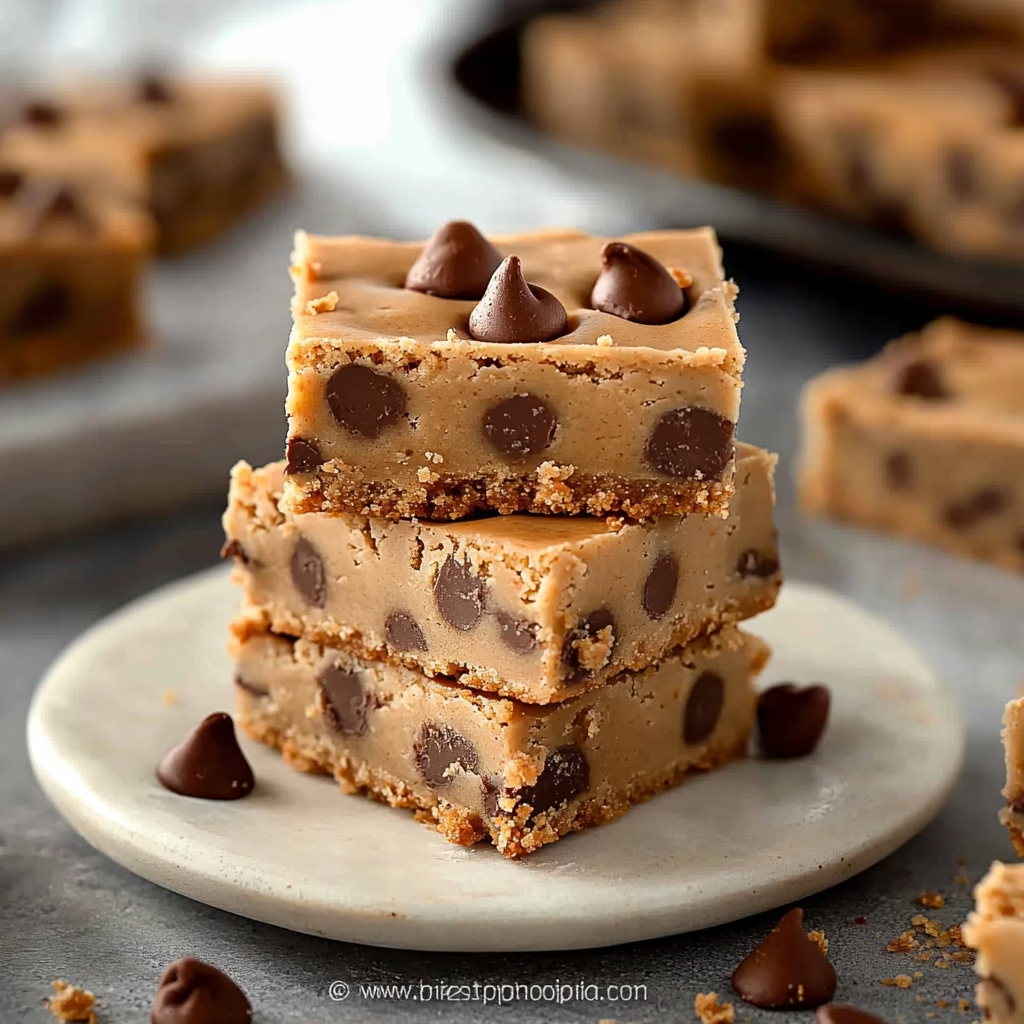
Peanut Butter Cookie Bars are essentially a thick, chewy peanut butter cookie dough baked flat in a rectangular pan, usually a 9×13-inch size, and often loaded with chocolate chips. Think of them as a slab of your favorite peanut butter cookie, simplified for easier baking and serving. They combine the irresistible salty-sweet flavor of peanut butter with the comforting sweetness of sugar and the richness of butter, all held together in a perfectly chewy, melt-in-your-mouth format.
While individual peanut butter cookies have been a staple for generations, the bar version offers a modern convenience without sacrificing any of that classic taste. They are a testament to how simple ingredients can create something so profoundly satisfying. The beauty of these bars lies in their humble origins, evolving from a beloved cookie into an even more accessible and shareable dessert. They’re perfect for anyone who loves the taste of peanut butter and chocolate, presented in a format that’s practically begging to be dipped into a cold glass of milk.
Reasons to Try Peanut Butter Cookie Bars
If you’re looking for a dessert that’s both incredibly delicious and wonderfully easy to whip up, these Peanut Butter Cookie Bars are an absolute winner. They deliver all the comforting, craveable flavors of peanut butter cookies but in a format that’s much simpler to prepare. You skip the scooping and shaping of individual cookies, which means less time in the kitchen and more time enjoying that amazing aroma filling your home. Plus, imagine the satisfaction of slicing into a pan of perfectly baked bars!
These bars are incredibly versatile, making them perfect for a wide range of occasions and cooks. They’re ideal for beginners because the steps are forgiving and hard to mess up, and they’re a lifesaver for busy families or anyone needing a quick, crowd-pleasing treat for potlucks, parties, or after-school snacks. The combination of chewy texture, rich peanut butter, and melty chocolate is a classic for a reason, appealing to almost everyone. They truly are a delightful way to bring a little bit of extra sweetness and comfort into your day.
Ingredients Needed to Make Peanut Butter Cookie Bars
- 1 cup unsalted butter (softened to room temperature)
- 1 cup creamy peanut butter
- 1½ cups light brown sugar (tightly packed)
- ½ cup granulated sugar
- 1 large egg + 1 large egg yolk (for richness and binding)
- 2 teaspoons vanilla extract
- 2¾ cups all-purpose flour
- 1 teaspoon cornstarch (for extra tenderness)
- ½ teaspoon baking powder
- ¼ teaspoon salt
- 2 tablespoons milk
- 2 cups chocolate chips (semisweet or milk chocolate, your preference!)
Instructions to Make Peanut Butter Cookie Bars – Step by Step
Step 1: Begin by preparing your baking pan. Preheat your oven to 350°F (175°C). For the easiest removal and cleanup, line a 9×13-inch baking pan with parchment paper, allowing some overhang on the sides to create a helpful sling. If you don’t have parchment, a light greasing and flouring of the pan will also work well.
Step 2: In a large mixing bowl, combine the softened unsalted butter, creamy peanut butter, light brown sugar, and granulated sugar. Use a hand mixer (or a stand mixer with the paddle attachment) to cream these ingredients together until the mixture is light, fluffy, and well-blended. This step is crucial for developing that wonderful tender texture in your cookie bars.
Step 3: Next, introduce the wet ingredients for binding and flavor. Add the large egg, the extra egg yolk, and the vanilla extract to the creamed mixture. Beat again until everything is thoroughly combined and smooth. The egg yolk adds an extra layer of richness and chewiness that you’ll really appreciate in the final bars.
Step 4: In a separate medium bowl, whisk together the all-purpose flour, cornstarch, baking powder, and salt. Whisking these dry ingredients together ensures they are evenly distributed, which is key to a consistent rise and texture throughout your bars without any pockets of leavening agents.
Step 5: Gradually add the dry ingredient mixture to the wet ingredient mixture in the large bowl. Mix on low speed or by hand until just combined. It’s important not to overmix here; stop as soon as you no longer see streaks of flour. Overmixing can develop the gluten in the flour too much, leading to tougher bars.
Step 6: Stir in the milk. This adds a touch of moisture and helps bring the dough together. Mix again only until it’s just incorporated. The dough should be thick and somewhat stiff, but pliable enough to spread.
Step 7: Now for the fun part! Gently fold in the chocolate chips using a spatula or wooden spoon. Distribute them evenly throughout the dough. If you want some extra chocolatey pockets on top, reserve a small handful of chips to press into the dough later.
Step 8: Transfer the cookie dough batter into your prepared 9×13-inch baking pan. Use a spatula or the back of a spoon to spread the dough evenly into all corners of the pan. Press it down firmly and smoothly, ensuring an even layer for consistent baking. This is where pressing firmly into the corners really helps.
Step 9: Bake the bars in the preheated oven for 35 to 40 minutes. You’ll know they’re ready when the edges begin to turn a lovely golden brown, and a toothpick inserted into the center comes out with either a few moist crumbs attached or is mostly clean. Avoid overbaking; a few moist crumbs are perfect for that chewy texture we’re aiming for.
Step 10: Once baked, remove the pan from the oven and let the Peanut Butter Cookie Bars cool completely in the pan on a wire rack. This cooling period is vital for the bars to set properly, allowing them to be sliced cleanly. Rushing this step can lead to crumbly or messy bars.
Chef’s Tips for a Perfect Result
- Use a parchment paper sling in your pan. This makes lifting the entire block of bars out for cutting so much easier and cleaner.
- Measure your flour correctly by spooning it into the measuring cup and leveling it off with a straight edge. Scooping directly from the bag can pack too much flour, leading to dry bars.
- Don’t overmix the dough once the flour is added. Mix only until just combined to ensure a tender, chewy texture.
- Press the dough firmly into the pan and especially into the corners. This prevents uneven baking and ensures tidy edges.
- For extra moist crumbs, remove the bars when a toothpick has a few moist crumbs. They will continue to set as they cool.
- Allow the bars to cool down completely before cutting. Chilling them in the refrigerator for about 30 minutes before slicing yields the cleanest cuts.
Variations and Substitutions
Chocolate Chip Variations: If you’re not a fan of semi-sweet, feel free to use milk chocolate, dark chocolate, or even white chocolate chips. For a richer experience, try mini chocolate chips, chocolate chunks, or even a mix of different chocolate types!
Nut Butter Swaps: While peanut butter is the star, you can substitute other nut or seed butters. Almond butter, cashew butter, or sunflower seed butter (for a nut-free option) can all be used, though they might offer slightly different flavors and textures.
Add-Ins: Get creative! Consider adding chopped peanuts for extra crunch, mini pretzels for a sweet and salty kick, or even a swirl of jam on top of the batter before baking for a fruity surprise.
Gluten-Free Alternative: To make these gluten-free, you can typically substitute a good quality gluten-free all-purpose flour blend that contains xanthan gum. The texture might vary slightly, becoming a bit more cake-like or crumbly depending on the blend.
Vegan Option: For a vegan version, ensure your peanut butter and chocolate chips are dairy-free. You can replace the egg with an egg replacer suitable for baking (like a flax egg or commercial replacer) and the butter with a vegan butter substitute. The milk can be swapped for a plant-based milk like almond or soy milk.
How to Serve and Pair
These Peanut Butter Cookie Bars are wonderfully versatile and can be served in so many delightful ways. They are perfect on their own, of course, perhaps cut into generous squares. For an extra special treat, serve them slightly warm with a scoop of vanilla bean ice cream – the contrast of warm cookie and cold ice cream is simply divine. A dollop of whipped cream is also a lovely addition, adding a light, airy sweetness.
These bars pair beautifully with a tall, cold glass of milk, a classic combination that brings back childhood memories. Coffee or tea also complement the rich peanut butter flavor wonderfully, making them ideal for a morning treat, an afternoon pick-me-up, or an after-dinner dessert. They are fantastic for any casual gathering, bake sale, potluck, or even just an impromptu family movie night. Cut them into smaller, bite-sized squares for easy party favors or larger, more indulgent portions for dessert!
Storage and Reheating
Refrigerator: Store cooled Peanut Butter Cookie Bars in an airtight container in the refrigerator for up to 5 days. The cool environment helps maintain their texture and prevents them from becoming too soft, especially if they have a lot of chocolate chips.
Freezer: For longer storage, wrap the cooled bars tightly in plastic wrap, then place them in a freezer-safe bag or container. They will keep well in the freezer for up to 3 months. Thaw them at room temperature or in the refrigerator.
Room Temperature: If you plan to eat them within 2-3 days and your climate is not too warm, you can store them at room temperature in an airtight container. However, be mindful of the chocolate chips melting if your kitchen is warm.
Reheating: To enjoy them warm, you can gently reheat a bar or two. The best method is in a toaster oven or conventional oven at a low temperature (around 250°F or 120°C) for about 5-10 minutes, just until warmed through and the chocolate chips are slightly gooey. You can also reheat briefly in the microwave, but be careful not to overheat, as they can become tough or dry out quickly.
Nutritional Values
- Calories: 333
- Protein: 5g
- Carbohydrates: 41g
- Fat: 17g
- Fiber: 1g
Approximate values.
Frequently Asked Questions (FAQ)
Can I substitute the creamy peanut butter for crunchy in these bars?
Yes, you can absolutely substitute crunchy peanut butter for creamy. It will add a delightful extra texture to your peanut butter cookie bars. Just be aware that the crunchy bits might slightly alter how evenly the dough spreads in the pan.
How do I know when my peanut butter cookie bars are perfectly baked?
Your bars are perfectly baked when the edges are just starting to turn golden brown, and a toothpick inserted into the center comes out with a few moist crumbs attached. Avoid overbaking, as this will result in dry, hard bars rather than the desired chewy texture.
Why are my cookie bars crumbly after cooling?
Crumbly cookie bars often result from overbaking, too much flour, or not enough fat or moisture. Ensure you measure your flour accurately, don’t bake them too long, and let them cool completely before attempting to cut and move them.
Can I prepare the dough for peanut butter cookie bars the day before baking?
Yes, you can prepare the dough in advance and refrigerate it overnight. For best results, let the dough sit at room temperature for about 20-30 minutes before spreading it into the pan to make it easier to work with.
What are the best ways to customize or serve these bars?
You can customize these bars by adding different mix-ins like nuts, toffee bits, or white chocolate chips. For serving, they are excellent on their own, warmed with ice cream, or even crumbled over yogurt for a delightful snack.
CONCLUSION
These Peanut Butter Cookie Bars are the ultimate comfort dessert, offering that perfect balance of chewy texture and rich peanut butter flavor in every bite. They are incredibly easy to make, making them a foolproof treat for any home baker. Give them a try and discover why this simple, crowd-pleasing bar will quickly become your go-to favorite for its irresistible, nostalgic taste.


