Strawberry shortcake icebox cake is a show-stopping dessert that perfectly captures the essence of summer. This recipe takes all the beloved flavors of classic strawberry shortcake – sweet berries, creamy filling, and a subtle cookie crunch – and transforms them into an effortless, no-bake wonder. It’s the kind of treat that makes everyone smile, bringing those warm, sunny feelings right into your kitchen, no matter the season.
I remember the first time I attempted an icebox cake. It felt like a culinary magic trick – transforming simple ingredients into a dessert that looked and tasted so impressive, all without turning on the oven. This strawberry shortcake version is a testament to that magic. It’s got a luscious berry cream filling, soft vanilla cookies that meld into cake-like layers, and is topped with fluffy whipped cream and a delightful crumble. It’s designed to satisfy any sweet tooth and is surprisingly easy to pull together, making it a go-to for gatherings or just a special treat at home.
What is Strawberry Shortcake Icebox Cake?
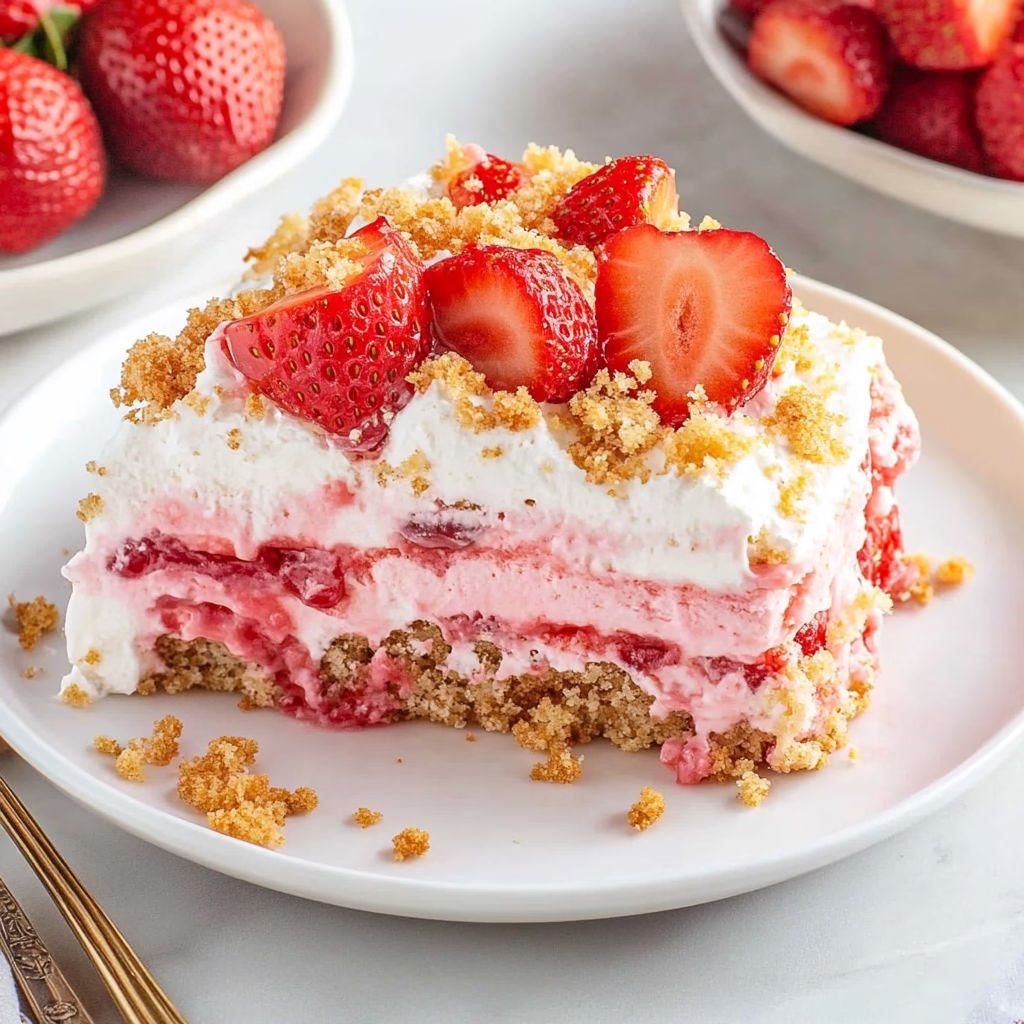
At its heart, a strawberry shortcake icebox cake is a no-bake dessert that layers creamy, fruity fillings with cookies or cake, allowing the moisture to soften the cookies into a tender texture over time. Think of it as a chilled cake that relies on patience rather than heat. It’s inspired by the classic American strawberry shortcake, which features biscuits or sponge cake, fresh strawberries, and whipped cream.
This particular icebox cake combines crushed vanilla sandwich cookies, freeze-dried strawberries, and butter for a delicious crumble topping, a creamy strawberry cream cheese filling made with cream cheese, powdered sugar, preserves, and extract, and layers of vanilla wafers and fresh strawberries. The magic happens in the refrigerator, where the cookies absorb moisture from the filling, transforming into a soft, cake-like consistency that’s incredibly satisfying.
Reasons to Try Strawberry Shortcake Icebox Cake
One of the biggest reasons to dive into this strawberry shortcake icebox cake is its sheer simplicity. It requires no baking, which means less fuss, less cleanup, and a wonderfully cool dessert perfect for warmer days. You get all the delightful flavors of a traditional strawberry shortcake, but with a unique, irresistible texture that only an icebox cake can provide.
This recipe is a dream for anyone who loves impressive desserts but finds themselves short on time or oven space. It’s fantastic for beginner bakers because it’s so forgiving, and it’s a guaranteed crowd-pleaser for potlucks, parties, or any family get-together. Imagine the happy faces when you present this beautiful, layered creation! It’s also incredibly versatile, allowing for easy substitutions and flavor tweaks to suit your preferences.
Ingredients Needed to Make Strawberry Shortcake Icebox Cake
For this delightful no-bake treat, you’ll gather a few key players that come together beautifully:
- 2 cups crushed vanilla sandwich cookies (about 20 cookies, like Golden Oreos)
- 6 tablespoons unsalted butter (melted and cooled)
- 6 tablespoons crushed freeze-dried strawberries (for intense berry flavor!)
- 3 cups heavy cream (very cold is essential for whipping)
- 1½ cups powdered sugar (for sweetness and stability in the whipped cream)
- 1 teaspoon vanilla extract (enhances all the flavors)
- 16 ounces cream cheese (softened to room temperature for a smooth filling)
- ½ cup granulated sugar (sweetens the cream cheese mixture)
- 1 cup strawberry preserves (adds a lovely fruity swirl and binds the filling)
- 1 teaspoon strawberry extract (boosts that berry essence)
- 11 ounces vanilla wafer cookies (around 42-44 wafers, for the cake layers)
- 1 pound fresh strawberries (rinsed and sliced about ¼-inch thick)
Instructions to Make Strawberry Shortcake Icebox Cake – Step by Step
Step 1: Prepare the Strawberry Shortcake Crumble Topping.
To start this delicious adventure, we’ll make the topping that gives our icebox cake a beautiful finish and a hint of crunch. Grab your vanilla sandwich cookies and carefully crush them. You can do this in a food processor until they’re fine crumbs, or place them in a zip-top bag and use a rolling pin for a bit of kitchen therapy! Divide these crumbs evenly into two small bowls, so you have about 1 cup in each. Now, in one of those bowls, add the crushed freeze-dried strawberries – they pack such a wonderful, concentrated strawberry flavor – along with 3 tablespoons of the melted and cooled unsalted butter. Give that a good stir until it’s nicely combined. To the second bowl of cookie crumbs, stir in the remaining 3 tablespoons of melted butter until every crumb is coated. Combine both bowls of cookie crumbs together – the plain buttered ones and the strawberry-infused ones. This mixture will be our delightful crumble topping, so set it aside for now while we move on to the creamy layers.
Step 2: Create the Fluffy Whipped Cream.
Next, let’s whip up some airy, cloud-like cream. Make sure your heavy cream is very cold; it’s the secret to achieving good volume. Pour the 3 cups of cold heavy cream into a large mixing bowl. Using a handheld electric mixer, start beating the cream on low speed for about a minute. Then, gradually increase the speed to high and continue beating for another 2 to 3 minutes. You’re looking for soft peaks to form – meaning when you lift the beaters, the cream forms a little peak that gently curls over. Now, add the 1½ cups of powdered sugar and the 1 teaspoon of vanilla extract. Keep beating on high speed until stiff peaks form. This means the peaks will stand straight up when you lift the beaters. Be careful not to overbeat, or you’ll end up with butter! This fluffy whipped cream is precious, so set it aside. We’ll use half of it later for the filling and the other half for the topping.
Step 3: Make the Luscious Strawberry Cream Cheese Filling.
Now for that irresistible creamy layer! In another large mixing bowl, combine the 16 ounces of room temperature cream cheese with the ½ cup of granulated sugar. Using your handheld mixer on medium speed, beat these together for about 2 minutes. It’s so important that the cream cheese is at room temperature; this ensures a super smooth, lump-free filling. You want it to be wonderfully fluffy and smooth. Next, add the 1 cup of strawberry preserves and the 1 teaspoon of strawberry extract to the cream cheese mixture. Beat these in for another 2 to 3 minutes. The preserves will add beautiful swirls of flavor and color, and the extract intensifies that lovely strawberry taste. You should have a gorgeously creamy, pinkish mixture that smells divine.
Step 4: Lighten the Filling with Whipped Cream.
We’re going to make our strawberry cream cheese filling light and airy by folding in some of that delicious whipped cream. Take about half of the whipped cream you made earlier and gently add it to the strawberry cream cheese mixture. Using a rubber spatula, fold the whipped cream into the cream cheese mixture. This means gently lifting from the bottom and folding over the top, rotating the bowl as you go. Continue until no streaks of whipped cream remain and you have a beautifully light and fluffy strawberry cheesecake filling. Don’t overmix; we want to keep all that airiness! The other half of the whipped cream is reserved for the top layer.
Step 5: Assemble the Icebox Cake Layers.
It’s time to bring all these wonderful components together in a 9×13 inch glass baking dish. Start by spreading half of the lovely strawberry cream cheese filling evenly across the bottom of the dish. Next, arrange a single, solid layer of vanilla wafer cookies over the filling. You’ll need about 42 to 44 cookies, which is roughly half of your package. Try to cover the filling completely for the best texture. Now, carefully place the sliced fresh strawberries over the vanilla wafer cookies in a single layer. Gently spread the remaining strawberry cream cheese filling evenly over the fresh strawberry layer. Be delicate here so you don’t disturb the pretty strawberry slices too much. Top this filling layer with the remaining half box of vanilla wafer cookies, again creating a single, solid layer.
Step 6: Add the Final Toppings.
We’re almost there! Now, take the reserved half of your homemade whipped cream and spread it evenly over the top layer of vanilla wafer cookies. Make sure you get it all the way to the edges to create a pristine white canvas. Finally, sprinkle the strawberry shortcake cookie crumble that we made in the first step evenly over the top of the whipped cream. This adds a lovely texture contrast and a beautiful visual finish. It looks so inviting!
Step 7: Chill to Perfection.
The most crucial step for an icebox cake is allowing it time to chill. Cover the baking dish tightly with plastic wrap or foil. Place the strawberry shortcake icebox cake in the refrigerator for at least 4 to 6 hours. For the very best texture, where the cookies are perfectly softened and melded into the creamy layers, I like to chill mine overnight. This chilling time is what transforms this dessert from a simple stack of ingredients into a cohesive, cake-like wonder. Once chilled, it’s ready to be sliced and served!
Chef’s Tips for a Perfect Result
- Room Temperature Cream Cheese is Key: Always ensure your cream cheese is truly at room temperature. This prevents any lumps and ensures a wonderfully smooth, velvety filling that blends perfectly with the other ingredients.
- Don’t Overwhip the Cream: Watch your heavy cream closely when whipping. Stopping at stiff peaks means it will hold its shape without becoming grainy or turning into butter, which is essential for both the filling and the topping.
- The Chilling Time Matters: While 4-6 hours is the minimum, chilling overnight truly allows the vanilla wafers to soften beautifully, creating that signature cake-like consistency that makes this icebox cake so magical.
- Adjust Sweetness with Preserves: If your strawberry preserves are very sweet or very tart, you might want to slightly adjust the amount of powdered sugar in the whipped cream or granulated sugar in the cream cheese filling to balance the flavors perfectly.
- Use Good Quality Preserves: The strawberry preserves add a significant flavor component. Opt for a good quality brand or even homemade preserves for the best taste and texture in your filling.
- Don’t Skip the Freeze-Dried Strawberries: These little powerhouses deliver an intense, bright strawberry flavor to the crumble topping that fresh or frozen strawberries can’t quite replicate. They are worth seeking out!
Variations and Substitutions
This recipe is wonderful as is, but it’s also a fantastic base for a little creativity! Here are some ways you can make it your own:
- Vegan Option: Use vegan cream cheese and a dairy-free heavy whipping cream alternative. For the cookies, ensure they are vegan-friendly (many sandwich cookies are, but always check labels!). You might need to adjust sweetness and chilling time slightly as vegan alternatives can behave differently.
- Gluten-Free Alternative: Substitute gluten-free vanilla wafer cookies. There are several good options available, and they should still soften nicely in the filling. Ensure your vanilla sandwich cookies for the crumble are also gluten-free.
- Berry Medley: While strawberry is the star, feel free to add other fresh berries like raspberries or blueberries between the layers or mixed into the filling for a mixed-berry shortcake icebox cake experience.
- Lemon Zest Boost: Add the zest of one lemon to the cream cheese mixture. This brightens the overall flavor and adds a lovely subtle tang that complements the sweet strawberries beautifully.
- Cookie Swap: If you can’t find vanilla wafers, shortbread cookies or even graham crackers (though they’ll have a different flavor profile) can work in a pinch for the layers. For the crumble, graham cracker crumbs or even finely chopped shortbread can be used.
How to Serve and Pair
Serving this Strawberry Shortcake Icebox Cake is pure joy. Since it’s fully chilled and set, it slices beautifully. I love to serve individual portions in bowls or on small dessert plates. For an extra touch of elegance, you can spoon a little extra fresh whipped cream on top of each slice, or garnish with a few fresh strawberry slices and a sprinkle of that reserved crumble topping. It’s especially pretty if you save a few whole strawberries or half strawberries to artfully place on top. This cake is a celebration in itself, perfect for summer picnics, birthday parties, holidays like Memorial Day or the Fourth of July, or simply as a delightful end to a weeknight dinner when you want to feel a little fancy.
When it comes to pairings, this icebox cake shines on its own! However, it can be lovely alongside a cool glass of iced tea, lemonade, or a refreshing sparkling water. For a more indulgent pairing, a light, fruit-forward dessert wine can complement its sweetness, but honestly, its flavors are so complete, it truly needs no accompaniment.
Storage and Reheating
Refrigerator:
This icebox cake is designed to be stored in the refrigerator. Keep it covered tightly with plastic wrap or aluminum foil. It will stay delicious for up to 3-4 days. The longer it sits, the softer the cookies will become, which many people prefer. Just ensure it’s well-sealed to prevent it from absorbing other fridge odors.
Freezer:
While this icebox cake is best enjoyed fresh, you can freeze it for longer storage. It’s a little trickier because of the creamy texture. It’s best to freeze it before the final layer of crumble topping is added, or add it after thawing. Wrap the entire cake tightly in plastic wrap, then in a layer of aluminum foil, or place it in a freezer-safe airtight container. It should last for about 1-2 months. Thaw it slowly in the refrigerator for at least 24-48 hours before serving to allow the textures to meld properly.
Room Temperature:
It’s best to avoid leaving this icebox cake at room temperature for extended periods, especially if using dairy. For optimal safety and texture, consume it within 2 hours if left out. It doesn’t require precise temperature control for serving, but it’s a refrigerator dessert at its core.
Reheating:
This icebox cake is a no-bake dessert and does not require reheating. It is meant to be served chilled. If you have a frozen portion that you’re thawing in the refrigerator, simply let it come to temperature naturally. Adding heat would melt the creamy layers and ruin the intended texture.
Nutritional Values
- Calories: Approximately 450-550 per serving (varies based on exact ingredients and serving size)
- Protein: Around 4-6g
- Carbohydrates: About 50-65g
- Fat: Approximately 25-35g
- Fiber: About 1-2g
Approximate values.
Frequently Asked Questions (FAQ)
Can I substitute graham crackers for vanilla wafers in this icebox cake?
Yes, you can substitute graham crackers for vanilla wafers. Graham crackers will provide a slightly different flavor profile and a bit more firmness, even after chilling. Ensure you use them for the layers as intended, and they will soften over time, though perhaps not to the exact same tender texture as vanilla wafers.
How do I know when my strawberry shortcake icebox cake is ready to serve?
Your icebox cake is ready when it has chilled for at least 4-6 hours, or ideally overnight. You’ll notice the cookies on the inside layers have softened significantly, becoming cake-like. The cake should hold its shape when sliced, and the layers should be distinct but cohesive.
My cream cheese filling is lumpy, what did I do wrong?
Lumpy cream cheese filling is almost always caused by using cold cream cheese. For a smooth filling, ensure your cream cheese is at room temperature before you start mixing. Beat it well with the sugar until it’s completely fluffy and smooth before adding other ingredients.
Can I assemble this strawberry shortcake icebox cake the day before a party?
Absolutely. Assembling this icebox cake the day before is ideal. The longer chilling time allows the cookies to soften wonderfully, creating a better texture. Just be sure to cover it tightly after assembly to keep it fresh and moist.
What’s the best way to customize this icebox cake for a special occasion?
To customize this icebox cake, consider adding a layer of lemon curd for a citrusy twist, or even a thin layer of cheesecake batter (baked first) for added richness. Decorate the top with fresh mint leaves or edible flowers for an extra festive touch, or use colorful sprinkles that match the occasion.
CONCLUSION
This Strawberry Shortcake Icebox Cake is a delightful, no-bake dessert that’s as beautiful as it is delicious. It’s the perfect way to enjoy the classic flavors of strawberry shortcake with minimal effort and maximum reward. Give it a try and discover the irresistible blend of creamy filling, tender cookie layers, and sweet berries that makes this treat a true summer favorite.


