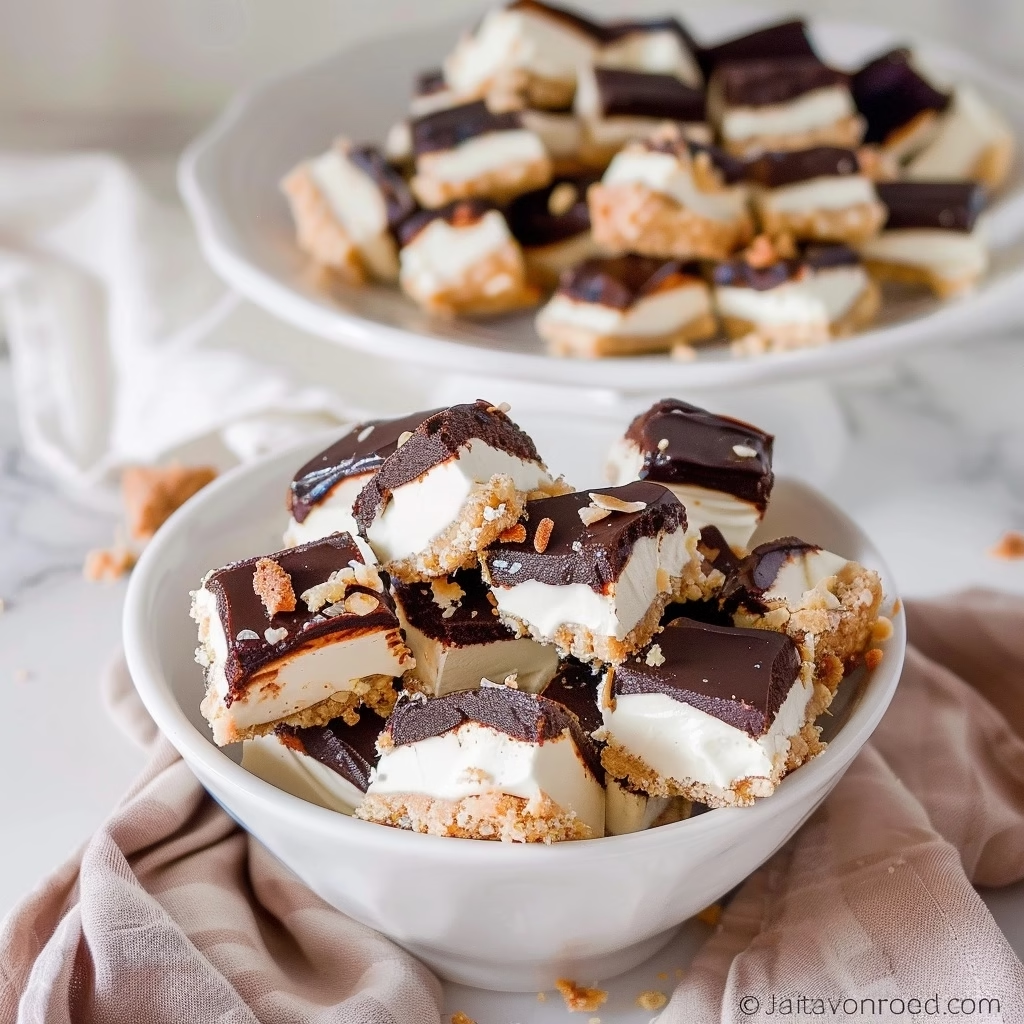
No bake cheesecake bites are a mini dessert for your sweet tooth. Served frozen, this treat is perfect for a hot summer day! This recipe is an absolute gem for those moments when a craving strikes but the thought of turning on the oven feels too daunting. I remember the first time I tried making these; it was during a sweltering summer heatwave, and the last thing I wanted was more heat in my kitchen. These little bites came to the rescue, offering that classic creamy cheesecake flavor without any fuss.
They’re incredibly simple to put together, making them a go-to for last-minute parties, afternoon snacks, or just a little something sweet to share (or not share!). The beauty of no bake cheesecake bites lies in their adaptability and the sheer joy they bring. They’re like little pockets of happiness, ready to be enjoyed straight from the freezer, offering a delightful contrast of cool, creamy filling and a satisfyingly crisp crust. Plus, the chocolate drizzle? It just takes them over the top!
What is No Bake Cheesecake Bites?
No bake cheesecake bites are essentially miniature, no-oven-required versions of classic cheesecake. They feature a creamy, sweet filling almost always made from cream cheese, sugar, and vanilla, nestled on a simple graham cracker crust. What makes them truly special, especially this version, is that they are designed to be served frozen, giving them a delightful fudgy texture that’s incredibly refreshing. This isn’t your traditional dense, baked cheesecake; it’s a lighter, more approachable dessert that delivers all the delicious flavor with none of the baking time or fuss.
Originating from the desire to enjoy cheesecake without the heat and time commitment of baking, no-bake versions have become a staple in home kitchens. They’re perfect for warmer months, potlucks, or any time you need a quick dessert solution. The ‘bite’ size makes them ideal for portion control (or so we tell ourselves!) and they’re incredibly fun to make, especially with loved ones. The addition of a chocolate coating further elevates these humble bites into something truly irresistible, almost like a mini ice cream bar but with that unmistakable cheesecake tang.
Reasons to Try No Bake Cheesecake Bites
The biggest draw for these no bake cheesecake bites is, of course, the “no bake” part! This means no preheating the oven, no worrying about water baths, and no risk of a cracked cheesecake. It’s a fantastic way to get that amazing cheesecake flavor and texture without any of the traditional baking stress. For anyone who’s ever felt intimidated by baking, this recipe is your gateway to serving a crowd-pleasing dessert that looks and tastes like you spent hours on it.
They are incredibly versatile and perfect for any occasion. Think summer barbecues, holiday gatherings, or even just a simple weeknight treat. Busy parents will love how quickly they come together, offering a special dessert without sacrificing precious family time. Kids can even get involved in the preparation, helping to press the crust or drizzle the chocolate! The small, individual portions also make them great for parties, allowing guests to grab a bite without needing plates or forks, making cleanup a breeze. It’s the ultimate easy-elegant dessert.
Ingredients Needed to Make No Bake Cheesecake Bites
-
10 graham cracker sheets, finely crushed (about 1 1/2 cups crumbs)
-
¼ cup (31 g) confectioners’ sugar
-
½ teaspoon kosher salt
-
6 Tbs (85 g) unsalted butter, melted
-
2 cups (16 ounces or 450 g) block-style cream cheese, softened
-
1 cup (120 g) confectioners’ sugar, sifted
-
1 teaspoon pure vanilla extract
-
2 cups (12 oz or 300 g) chocolate chips, melted (for drizzling or dipping)
Instructions to Make No Bake Cheesecake Bites – Step by Step
Step 1: Prepare the Graham Cracker Crust
First things first, let’s get that delicious base ready. Grab a 9×9-inch baking pan and line it with parchment paper or aluminum foil. I like to spray it lightly with nonstick cooking spray too; it makes lifting the finished cheesecake out so much easier later on. In a good-sized mixing bowl, combine your finely crushed graham crackers, a quarter cup of confectioners’ sugar for a touch of sweetness, and half a teaspoon of kosher salt to balance everything out. Pour in your six tablespoons of melted unsalted butter and give it all a good stir with a spoon or spatula until all those graham cracker crumbs look nicely moistened and absorb the butter. It should feel like damp sand.
Step 2: Press and Chill the Crust
Now, take that lovely graham cracker mixture and press it evenly into the bottom of your prepared baking pan. You can use the bottom of a measuring cup or a flat-bottomed glass to get a nice, firm, and even layer. This step is crucial for a crust that holds together well. Once it’s all pressed down, pop the pan into the freezer for about 15 minutes. This chilling step helps the butter solidify, creating a wonderful base that won’t crumble when you cut the bites later.
Step 3: Mix the Creamy Cheesecake Filling
While the crust is getting firm in the freezer, let’s whip up the star of the show: the cheesecake filling. In a mixing bowl, ideally using a stand mixer with a paddle attachment or a hand mixer, combine your two cups of softened block-style cream cheese. Make sure it’s softened; it makes a world of difference for a smooth texture! Add in one cup of sifted confectioners’ sugar – sifting is key here to avoid any lumps – and a teaspoon of pure vanilla extract for that classic, comforting flavor. Beat these ingredients together on medium speed until the mixture is wonderfully smooth and creamy. You want to scrape down the sides of the bowl with a spatula occasionally to ensure everything is incorporated perfectly.
Step 4: Assemble and Freeze the Cheesecake
Once your crust is chilled and your filling is smooth, it’s time to bring them together. Take the chilled graham cracker crust out of the freezer. Carefully spread the creamy cheesecake mixture evenly over the top. Use your spatula to smooth it out, creating a beautiful, flat surface. Slide the pan back into the freezer, and this time, let it chill for a good two hours. This longer freeze is what transforms the filling into a firm, sliceable texture, perfect for cutting into bites.
Step 5: Cut the Bites and Prepare Chocolate
After the cheesecake has had its full freezing time, it’s ready to be transformed into delightful little bites. Gently lift the frozen cheesecake block out of the pan using the parchment paper or foil lining. Place it onto a cutting board. Now, using a sharp knife, carefully cut the cheesecake into 1 1/2-inch wide strips, first vertically and then horizontally, to create your mini cheesecake bites. Be sure to wipe your knife clean between cuts if needed; this helps for those really clean edges. Arrange the finished bites on a tray lined with parchment paper and keep them cold in the refrigerator while you prepare the chocolate. This prevents them from softening too much while you work.
Step 6: Melt the Chocolate and Finish the Bites
For the finishing touch, let’s melt the chocolate. In a medium microwave-safe bowl, combine your two cups of chocolate chips. Microwave them on 50% power for 90-second intervals, stopping to stir well every 30 seconds. This slow and steady approach prevents the chocolate from burning and ensures it melts into a beautifully smooth, glossy liquid. Once melted and smooth, it’s time for the fun part! Dip the top of each chilled cheesecake bite into the melted chocolate, letting any excess drip off back into the bowl. Carefully place the chocolate-dipped bites back onto your parchment-lined tray. Repeat this with all the bites, moving with a steady hand. Once all bites are dipped, place the tray back into the freezer for another 15 minutes to set the chocolate. Then, they’re ready to be enjoyed!
Chef’s Tips for a Perfect Result
-
Use block-style cream cheese, not the spreadable kind in a tub. Block cream cheese has less air and moisture, which is essential for a firm, rich, and creamy no-bake cheesecake filling.
-
Ensure your cream cheese is truly softened to room temperature before whipping. This is crucial for a completely smooth filling without any lumps, which is the hallmark of a great cheesecake.
-
Sift your confectioners’ sugar, both for the crust and the filling. This simple step prevents grainy textures and ensures your cheesecake is as smooth and luscious as possible.
-
For the cleanest cuts on your frozen cheesecake, dip a sharp knife in hot water and wipe it dry between each slice. This creates smooth, professional-looking edges.
-
Don’t skip the freezing steps! Chilling the crust firms it up, and freezing the cheesecake makes it sliceable. The final freeze sets the chocolate beautifully.
-
When melting chocolate, use a microwave-safe bowl and stir frequently. Overheating chocolate can make it seize and become unusable, so patience here pays off.
Variations and Substitutions
Vegan Option
For a delicious vegan no bake cheesecake bite, swap the cream cheese for a combination of softened vegan cream cheese and soaked raw cashews blended until very smooth. You can use vegan butter for the crust and vegan chocolate chips for dipping. This results in a wonderfully rich and creamy dessert that everyone can enjoy.
Gluten-Free Alternative
To make these gluten-free, simply substitute the graham crackers with a gluten-free cookie or graham cracker alternative. Many brands offer excellent gluten-free options that will provide a similar texture and flavor to the crust. Ensure any substituted cookie is finely crushed for best results.
Fruity Twist
Infuse fruity flavors by adding a tablespoon or two of fruit puree (like raspberry or strawberry) to the cream cheese filling. Alternatively, you can swirl in a thin layer of your favorite fruit jam between the crust and the filling before freezing for a delightful surprise within each bite.
Chocolate Lover’s Dream
Amplify the chocolate impact by using chocolate graham crackers for the crust. You can also add a tablespoon of unsweetened cocoa powder to the cream cheese filling for a deeper chocolate flavor. For an extra decadent finish, drizzle with both dark and white chocolate.
Budget Swap
If confectioners’ sugar is a bit pricey, you can make your own by blending granulated sugar in a powerful blender until it’s powdery. For the chocolate coating, you can use chocolate candy melts as a more budget-friendly alternative to chocolate chips, though the flavor will be slightly different.
How to Serve and Pair
These no bake cheesecake bites are best served straight from the freezer. Their small size makes them perfect for a delightful single-serving treat, or you can serve a few on a small plate for an elegant dessert. They are wonderful on their own, but for an extra special touch, you can add a small dollop of whipped cream or a fresh berry on the side. They make a beautiful addition to any dessert table, brunch spread, or as a sweet ending to a meal.
Pair these bites with a glass of cold milk, a hot cup of coffee, or a soothing herbal tea. For a more festive occasion, a sparkling non-alcoholic cider or a light, fruity spritzer would also be lovely companions. They are particularly popular during warmer months for summer parties and barbecues, but their comforting flavors make them a welcome treat any time of year, from holiday gatherings to simple family movie nights.
Storage and Reheating
Refrigerator
Store any leftover cheesecake bites in an airtight container in the refrigerator for up to 1 week. Keep them in a single layer if possible, or with parchment paper between layers to prevent them from sticking together. They will soften over time in the fridge, so for the best texture, try to consume them within a few days.
Freezer
For longer storage, keep the cheesecake bites in an airtight container or a heavy-duty freezer bag in the freezer for up to 1 month. Freezing them is actually their ideal serving state, so they hold up wonderfully. Ensure they are well-wrapped to prevent freezer burn and maintain peak freshness and texture.
Room Temperature
These no bake cheesecake bites are not recommended for storage at room temperature, especially if they have a chocolate coating. They are made to be enjoyed cold and will melt quickly once they are out of the freezer or refrigerator. It’s best to keep them chilled until ready to serve.
Reheating
Reheating is not necessary for these no bake cheesecake bites, as they are designed to be served frozen or very cold. If they happen to thaw out too much, simply place them back in the freezer for at least 30 minutes to firm up again before serving. Avoid microwaving them, as this will cause the cream cheese filling to melt and the chocolate to become greasy. Patience and chilling are your best friends here!
Nutritional Values
-
Serving: 1 cheesecake bite
-
Calories: 44kcal
-
Carbohydrates: 3g
-
Protein: 1g
-
Fat: 3g
-
Saturated Fat: 2g
-
Cholesterol: 9mg
-
Sodium: 44mg
-
Potassium: 11mg
-
Fiber: 1g
-
Sugar: 2g
-
Vitamin A: 110IU
-
Calcium: 7mg
-
Iron: 1mg
Approximate values.
Frequently Asked Questions (FAQ)
Can I substitute the cream cheese?
For the best texture and flavor in this no bake recipe, block-style cream cheese is highly recommended. Using spreadable cream cheese from a tub can result in a softer, less firm filling due to higher moisture content, so it’s best to stick with block-style cream cheese.
How do I know when the cheesecake bites are done freezing?
The cheesecake bites are done freezing and ready to slice when the entire block is firm to the touch and you can easily insert a knife without it bending. They should feel solid but not rock-hard, indicating they’re ready for cutting and dipping.
My cheesecake filling is lumpy, what did I do wrong?
Lumpy filling usually happens when the cream cheese isn’t properly softened to room temperature, preventing it from emulsifying smoothly with the sugar and vanilla. Ensure your cream cheese is soft, and for an extra smooth texture, consider sifting your confectioners’ sugar before mixing.
Can I make these cheesecake bites ahead of time?
Absolutely! These no bake cheesecake bites are perfect for making ahead. They store exceptionally well in the freezer for up to a month, making them a fantastic option for preparing for parties or holidays in advance.
What are the best ways to customize my cheesecake bites?
You can customize your cheesecake bites by adding cocoa powder to the filling for a chocolate version, or by swirling in fruit preserves before freezing. Drizzling with different types of chocolate, chopped nuts, or even sprinkles after dipping adds unique flair.
CONCLUSION
These no bake cheesecake bites offer a delightful, fuss-free way to enjoy a classic dessert. They are surprisingly easy to make, incredibly satisfying, and perfectly portioned for a sweet bite. The irresistible combination of a buttery crust, creamy filling, and rich chocolate makes them a delightful treat that’s hard to resist.
Print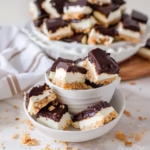
Easy No Bake Cheesecake Bites
- Prep Time: 15
- Cook Time: 30
- Total Time: 45
- Yield: 24 bites 1x
- Category: desserts
- Method: Freezing
- Cuisine: American
- Diet: Vegetarian
Description
Miniature chilled cheesecake bites with a graham cracker crust and creamy filling, drizzled with chocolate. Perfect for summer or anytime sweet cravings.
Ingredients
1 cup graham cracker crumbs
4 tablespoons halal-certified butter, melted
8 oz cream cheese (softened)
1/2 cup powdered sugar
1 teaspoon vanilla extract
8 oz firm tofu (optional, for vegan version)
1/4 cup halal chocolate chips, melted
Optional: halal buttercream for garnish
Instructions
Mix graham cracker crumbs with melted butter to form crumbs.
Press into mini cupcake liners or small molds.
In a bowl, combine softened cream cheese, powdered sugar, and vanilla extract until smooth.
For vegan option: blend 8 oz tofu into the cream cheese mixture.
Spoon filling into prepared crusts and smooth tops.
Freeze for 30 minutes to set.
Drizzle melted halal chocolate chips over each bite.
Store in freezer until ready to serve.
Notes
Chill in airtight container for up to 3 days.
Freeze in single layers first if stacking containers.
Use smaller molds for bite-sized pieces.
Nutrition
- Serving Size: 1 bite
- Calories: 150
- Sugar: 10g
- Sodium: 80mg
- Fat: 7g
- Saturated Fat: 4g
- Carbohydrates: 18g
- Fiber: 1g
- Protein: 3g
- Cholesterol: 20mg