Pear puff pastry tarts are a celebration of simple, natural flavors, transforming humble ingredients into something truly special. There’s something about the combination of sweet, tender pears nestled in a crisp, buttery puff pastry that just melts away any worries. It’s the kind of dessert that feels both sophisticated enough for guests and comforting enough for a quiet afternoon with a cup of tea. Making these tarts is less about complicated techniques and more about letting the quality of the ingredients shine through, which is exactly how I love to cook.
This recipe for pear puff pastry tarts takes simple store-bought puff pastry and pairs it with fresh pears and a hint of sweetness. The beauty lies in its ease; you can whip them up without a fuss, yet they deliver a stunning presentation and a delightful taste. It’s a reminder that delicious doesn’t have to mean difficult. I remember my first attempts at puff pastry were a bit of a disaster, but finding reliable ways to get that amazing flakiness, like using a good store-bought version for simplicity, made all the difference.
What is Pear Puff Pastry Tarts?
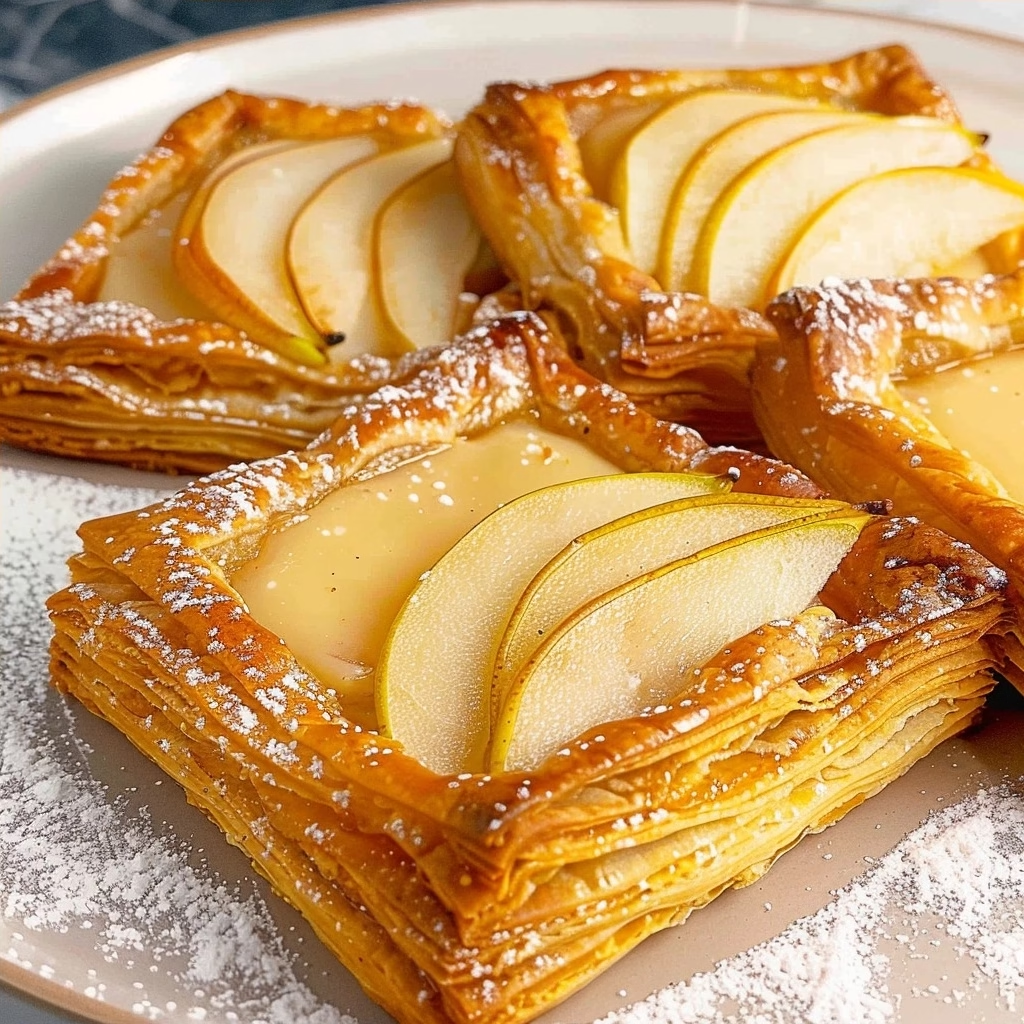
Pear puff pastry tarts are individual desserts that feature ripe pears baked atop a base of light, airy puff pastry. The pastry is known for its many delicate layers, which puff up dramatically when baked, creating a wonderfully crisp and flaky texture. This dessert typically uses fresh pears, sliced thinly and arranged artfully over the pastry before being baked until golden brown and tender. It’s a classic pairing that highlights the subtle sweetness of the fruit against the rich, buttery pastry.
While other fruits like apples or berries often get the spotlight in pastry dishes, pears offer a unique, delicate sweetness and a soft texture when cooked that complements puff pastry beautifully. The origin is rooted in simple European baking traditions, where fruits were often combined with enriched doughs or pastries to create comforting desserts. Our version keeps it wonderfully approachable, designed for home cooks who want a quick yet impressive treat. The addition of almond flour beneath the pears is a clever little trick to help absorb any excess moisture, ensuring a crisp pastry base.
Reasons to Try Pear Puff Pastry Tarts
If you’re looking for a dessert that looks impressive but is surprisingly easy to make, these pear puff pastry tarts are an absolute winner. They’re perfect for those busy weeknights when you want something sweet after dinner without spending hours in the kitchen. The combination of textures – the crisp pastry, the soft pears, and a light dusting of sugar – is incredibly satisfying. Plus, they look so elegant, you’d never guess how little effort they actually require.
These tarts are incredibly versatile and are well-suited for anyone from beginner bakers to seasoned pros looking for a delightful shortcut. Imagine serving these at a brunch, a tea party, or just as an afternoon pick-me-up. They are a wonderful way to showcase seasonal fruit, and the individual portions make them perfect for easy serving. It’s a recipe that brings a little bit of joy and a lot of deliciousness to any table, proving that you don’t need to be a pastry chef to create something wonderful.
Ingredients Needed to Make Pear Puff Pastry Tarts
To create these delightful pear puff pastry tarts, you’ll need just a few key ingredients. The star of the show, besides the flaky pastry, is, of course, the pears. Choosing ripe but firm pears will give you the best texture and sweetness.
- 2 packs store-bought puff pastry (or 2 portions of homemade rough puff pastry), kept chilled
- 6 ripe but firm pears (such as Bosc or Anjou), cut in half and cored
- 6 tablespoons almond flour, for absorbing excess juice
- 6 tablespoons brown sugar, for a touch of sweetness and caramelization
- 1 large egg, beaten with a splash of milk, for a beautiful golden egg wash
Storing your puff pastry properly is crucial. It should remain cold throughout the process to ensure maximum puffiness. If it starts to feel warm while you’re working with it, don’t hesitate to pop it back in the fridge or freezer for a few minutes to firm up again. This simple step makes a world of difference in achieving that desirable flaky texture we all love.
Instructions to Make Pear Puff Pastry Tarts – Step by Step
Let’s get started on these beautiful pear puff pastry tarts! It’s a process that’s surprisingly straightforward, and seeing them bake up golden and delicious is truly rewarding. Remember to work relatively quickly with the puff pastry so it stays cold and develops those lovely layers.
Step 1: Prepare Your Oven and Pastry
Begin by preheating your oven to a consistent 190°C (370°F) without using the fan function. This moderate, even heat is ideal for puff pastry. While the oven heats up, take your puff pastry out of the packaging. If it’s frozen, allow it to thaw gently in the refrigerator, but ensure it stays nice and cold to the touch. This is key to achieving those amazing flaky layers, so if it warms up while you’re handling it, don’t worry – a quick chill in the freezer will help.
Step 2: Slice the Pears and Address Moisture
Next, let’s prepare the beautiful pears. Cut each of the six halved pears lengthwise into very thin slices. The thinner you slice them, the more tender they will become during baking. After slicing, lay the pear slices onto a few sheets of kitchen paper towel. Gently press down to help absorb any excess juice. This step is so important for preventing a soggy bottom on your tarts, ensuring the pastry stays crisp.
Step 3: Shape the Pastry Bases
Now it’s time to prepare the pastry bases for our little tarts. Take one sheet of the chilled puff pastry and unfold it. Using a sharp knife or a pizza cutter, carefully cut the sheet into six equal rectangles. These will form the base of each tart. Try to make your cuts clean and precise for a neater finished product. You should aim for rectangles that are a good size for individual servings.
Step 4: Assemble the Tarts
With your pastry rectangles ready, it’s time to assemble. On the center of each pastry rectangle, evenly spread about half a tablespoon of almond flour. This acts as a barrier, soaking up any residual moisture from the pears. Arrange your thinly sliced pear halves fanned out on top of the almond flour. Don’t overcrowd them, but ensure good coverage. Finally, sprinkle each pear-topped pastry with about half a tablespoon of brown sugar, which will caramelize beautifully as it bakes.
Step 5: Apply the Egg Wash
To give your tarts that irresistible golden-brown sheen, whisk together the egg with a small splash of milk in a small bowl. Using a pastry brush, gently brush this egg wash mixture all around the edges of the pastry. Be careful not to get too much egg wash on the pear slices themselves, as it can cause them to glaze over rather than caramelize. Edges only will help them puff up nicely and turn a beautiful golden hue.
Step 6: Bake to Perfection (in Batches!)
Repeat the assembly process with the second sheet of puff pastry so you have a total of 12 delicious tarts. You’ll likely need to bake them in batches, so arrange six tarts on your baking sheets at a time. Place them in your preheated oven and bake at 190°C (370°F) for approximately 45 minutes. About 15 minutes into baking, you might notice the pastry browning too quickly; in this case, loosely tent the tarts with aluminum foil to prevent them from becoming too dark while they finish baking.
Step 7: Cool and Serve
Once they’re perfectly golden and the pears are tender, carefully remove the baking sheets from the oven. Let the pear tarts cool slightly in the baking tray for about 3 minutes. This brief resting period helps them set. Then, gently transfer them to a wire cooling rack to cool further. They are absolutely best served warm, where the pastry is at its crispiest and the pears are wonderfully soft and fragrant. Enjoy that amazing aroma filling your kitchen!
Chef’s Tips for a Perfect Result
- Keep Pastry Chilled: The colder your puff pastry is, the more distinct and flaky its layers will be. If it gets warm, don’t hesitate to pop it into the freezer for 5-10 minutes before proceeding.
- Thinly Slice Pears: Slice your pears as thinly as possible (about 1/8 inch thick). This ensures they cook through beautifully and become wonderfully tender without leaving the pastry soggy.
- Drain Pear Moisture: After slicing, press your pear slices gently between paper towels to remove excess liquid. This is crucial for a crisp pastry base.
- Almond Flour Barrier: Don’t skip the almond flour; it’s your secret weapon against a soggy bottom by absorbing any shy moisture from the pears.
- Watch the Browning: If your pastry edges start to brown too quickly during baking, loosely tent the tarts with aluminum foil. This protects them while the rest of the tart finishes cooking.
- Exact Temperature is Key: Use an oven thermometer to ensure your oven is at the precise 190°C (370°F). Ovens can vary, and consistent temperature is vital for perfect puff pastry.
Variations and Substitutions
While this recipe is wonderfully classic, it’s easy to put your own spin on these pear puff pastry tarts. Here are a few ideas and swaps that work beautifully:
- Fruity Friends: Feel free to mix in other fruits with your pears. Thinly sliced apples, a few cranberries, or even some dried apricots chopped small can add delightful new dimensions of flavor and texture. They might slightly alter the baking time or moisture, so keep an eye on them.
- Nutty Alternatives: If you don’t have almond flour or prefer a different taste, finely ground walnuts or pecans can be used as a substitute beneath the pears. They offer a richer, earthier flavor. Just ensure they are very finely ground so they don’t add too much texture.
- Sweetener Swap: Instead of brown sugar, you could use a little maple syrup or even a sprinkle of granulated sugar mixed with a pinch of cinnamon. Maple syrup will provide a deeper, more caramel-like sweetness, while cinnamon adds warmth.
- A Touch of Spice: For a warmer flavor profile, add a pinch of cinnamon, nutmeg, or even cardamom to the brown sugar before sprinkling it over the pears. This is especially lovely during the fall and winter months.
- Fancy Finish: After baking and while still warm, you can brush the pears lightly with a simple glaze made from apricot jam or honey. This adds an extra layer of shine and a hint of fruity sweetness. A dusting of powdered sugar just before serving also looks elegant.
How to Serve and Pair
Pear puff pastry tarts are truly a delight to serve, and they present beautifully with minimal fuss. The natural elegance of the flaky pastry and glistening pears speaks for itself. For a lovely presentation, arrange two or three tarts on individual dessert plates. A small dollop of lightly sweetened whipped cream or a scoop of vanilla bean ice cream alongside is always a welcome addition, offering a cool contrast to the warm pastry and fruit.
These tarts pair wonderfully with a cup of hot tea – perhaps an Earl Grey or a fragrant herbal blend – or a simple black coffee. For a slightly more special occasion, a dessert wine like a late-harvest Riesling or a Sauternes can be a sophisticated accompaniment, its sweetness echoing the pears without overpowering the delicate flavors.
They are perfect for any occasion that calls for a touch of homemade sweetness. Think of them as a delightful treat for a casual afternoon get-together with friends, a charming addition to a holiday dessert spread, or simply as a lovely way to end a family dinner. Their individual portions make them ideal for easy serving at parties, allowing guests to help themselves.
Storage and Reheating
If you happen to have any leftover pear puff pastry tarts, storing and reheating them properly will help preserve their delightful crispness and flavor. They are honestly best enjoyed fresh, but they do hold up reasonably well for a day or two.
Refrigerator
Store cooled tarts in an airtight container in the refrigerator for up to 2-3 days. They will lose some of their crispness over time as the moisture from the fruit and pastry can make the base a bit softer. It’s best to let them come to room temperature before reheating rather than eating them cold straight from the fridge.
Room Temperature
For the best texture if eating within a few hours, you can leave them at room temperature. Ensure they are covered loosely to protect them from dust, but avoid sealing them completely as residual steam could make them soggy. This is ideal if you’re serving them as part of a larger spread.
Reheating
To revive the crispness of your pear puff pastry tarts, reheating is the way to go. The best method is to use a preheated oven or toaster oven at around 150-160°C (300-325°F). Place the tarts on a baking sheet and warm them for 5-10 minutes, or until they are heated through and the pastry feels crisp again. Avoid using a microwave if you want to maintain any semblance of crispness, as it tends to make pastries soggy. If you do use the microwave, reheat in very short bursts and expect a softer texture.
Nutritional Values
- Calories: 99kcal
- Protein: 2g
- Carbohydrates: 20g
- Fat: 2g
- Fiber: 3g
- Sugar: 15g
Approximate values.
Frequently Asked Questions (FAQ)
Can I substitute the pears in this recipe?
Yes, you can absolutely substitute the pears with other fruits like apples, firm peaches, or even a mix of berries. Adjust baking time slightly if using softer fruits to prevent them from becoming too mushy.
How do I know when these pear puff pastry tarts are done baking?
Your tarts are done when the puff pastry is deeply golden brown, puffed up significantly, and feels crisp to the touch. The pears should be tender when gently poked with a fork.
My puff pastry is becoming too warm and sticky while I work, what should I do?
If your puff pastry becomes warm and difficult to handle, simply pop it back into the refrigerator or freezer for 10-15 minutes until it’s firm again. Cold pastry is essential for achieving those desirable flaky layers.
Can I prepare these pear puff pastry tarts ahead of time?
You can slice the pears and prepare the egg wash a few hours in advance and store them separately in the refrigerator. Assemble and bake the tarts closer to serving time for the best texture.
What’s the best way to customize or serve these tarts?
Serve them warm with a dusting of powdered sugar for elegance, or add a dollop of whipped cream or a scoop of vanilla ice cream. A drizzle of caramel sauce or a sprinkle of cinnamon sugar over the pears before baking adds extra flavor.
CONCLUSION
These pear puff pastry tarts are a delightful testament to how simple ingredients can create something truly extraordinary. They’re easy enough for any home cook yet elegant enough for a special occasion. The irresistible combination of tender, sweet pears and incredibly flaky, buttery pastry is a comforting and utterly delicious treat that always feels like a hug.
Print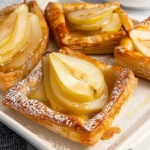
Pear Puff Pastry Tarts: A Simply Elegant Dessert
- Prep Time: 15
- Cook Time: 25
- Total Time: 40
- Yield: 12 tarts 1x
- Category: desserts
- Method: Baking
- Cuisine: European-American
- Diet: Vegetarian
Description
Indulge in the delicate harmony of sweet, tender pears and flaky puff pastry. These elegant individual tarts are effortless to make and perfect for impressing guests or enjoying a quiet afternoon treat.
Ingredients
1 package store-bought puff pastry sheets
2 ripe pears
2 tablespoons almond flour
2 tablespoons granulated sugar
1/2 teaspoon pure vanilla extract
Optional: Cinnamon for garnish
Instructions
Preheat oven to 400°F (200°C)
Line a baking sheet with parchment paper
Cut puff pastry into 12 round bases (1″ wider than pears)
Place pear slices in each base
Sprinkle 1/2 teaspoon almond flour per tart
Sprinkle sugar and vanilla extract over pears
Bake 20-25 minutes until golden and puffed
Cool slightly before serving
Garnish with optional cinnamon
Notes
Use halal-certified puff pastry if required
Almond flour prevents sogginess
Experiment with Anjou or Bartlett pears
Store leftovers in an airtight container
Best served fresh but can freeze unbaked for 1 month
Nutrition
- Serving Size: 1 tart (1 piece)
- Calories: 270
- Sugar: 12g
- Sodium: 200mg
- Fat: 14g
- Saturated Fat: 6g
- Carbohydrates: 29g
- Fiber: 1g
- Protein: 3g
- Cholesterol: 30mg