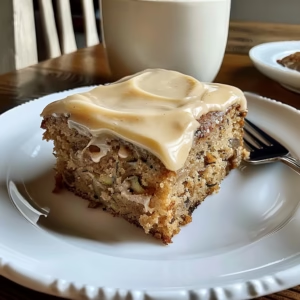
Strawberry Lasagna is more than just a dessert—it’s a celebration of summer in every delicate slice. This layered masterpiece combines the creamy, dreamy texture of cheesecake with the refreshing tang of freshly folded strawberries and a buttery, crumbly Oreo base. Best of all, you don’t need an oven to make it, just a few simple ingredients and a few hours in the fridge to let the flavors meld. Imagine cutting into a swirl of bright red confetti right at the kitchen table: this is the kind of dessert that brings a smile to even the most jaded adult, and keeps kids begging for seconds. What’s fascinating is how this version subverts the traditional Italian lasagna, transforming it into a sweet, no-cook adaptation that feels both nostalgic and refreshingly modern.
At first glance, calling this a “lasagna” might raise an eyebrow—but once you experience the symphony of layers, the name makes perfect sense. The base is like a warm crumb cake, the middle strata softly jiggling with essence of strawberry, and the top crowned with plump, glistening berries and whipped peaks. Each component can stand alone, yet together they form a harmony that’s greater than the sum of its parts. Trust me, the moment your knife hits the edge of this dish and the layers wobble just so, you’ll forget all about looking for angel hair pasta between the crevices.
What is Strawberry Lasagna?
Strawberry Lasagna is a dessert reimagined from its savory counterpart. While traditional lasagna layers pasta, sauce, and cheese, this version substitutes those elements with a substantially buttery base, a silky no-bake cream filling, and vibrant strawberry gelatin. The beauty of this dish lies in its simplicity and bold flavors—it requires no baking, no complicated techniques, yet delivers a showstopping visual that commands attention on any table.
Though not an authentic Italian creation, this dessert version is unmistakably inspired by the layering concept of lasagna. The Oreo crust provides a rich, chocolatey foundation reminiscent of a baked crust without the labor, while the strawberry filling captures the freshness of summer on a plate. What makes it unique is the seamless blending of textures: the crunch gives way to softness, the sweetness of berries is balanced by the tang of whipped cream, and each layer complements the next in a way that feels both playful and composed.
Worth noting: this dish is entirely memory-proof but profoundly memorable. Its structure is forgiving, and even if a few edges are a bit wobblier than ideal after slicing, no one will notice or care. In fact, those “imperfections” often become the most charming parts of the presentation because what counts is the bold taste of the magic growing in the kitchen fridge, not the geometric precision of each slice.
Reasons to Try Strawberry Lasagna
There’s a reason this dessert has become a summer staple in households that value both convenience and flavor. First, it’s an absolute crowd-pleaser: from kids to seniors, the layers of sweetness, colorful presentation, and subtle crunch create an appealing canvas for any gathering. Second, it’s shockingly easy to prepare—most of the work involves mixing, spreading, and waiting. No sticky kitchen, no roaring oven, no complicated dishes buried in the sink as a result of your efforts.
For busy individuals and home cooks still improving their kitchen confidence, this recipe is a gift. It requires no advanced skills beyond basic measuring and layering, and it promises high praise with minimal effort. With a base made from just Oreos and butter, a creamy filling that’s whipped rather than baked, and a fruit component that’s adaptable to what you have in your kitchen, it’s a recipe that forgives beginner mistakes and rewards even the most casual of attempts.
Additionally, its versatility makes it ideal for any occasion. Tweak the berries for the season, change the crust to a graham cracker version for a more traditional feel, or substitute Oreo with gluten-free versions for dietary needs. It’s like hosting’s version of a canvas—playful and adaptable in texture, flavor, and presentation. And for those who refuse to prioritize planning ahead, it’s perfect make-ahead dessert that just needs time in the fridge to finish its transformation.
Ingredients Needed to Make Strawberry Lasagna
- 36 Golden Oreos (see substitution note below)
- 1/2 cup melted butter (unsalted, room temperature or warm)
- 1 (8-ounce) block cream cheese, softened to room temperature
- 1 cup powdered sugar (make sure it’s sifted to avoid clumps)
- 1 (8-ounce) container thawed Cool Whip (chilled before folding in)
- 3/4 cup boiling water (for activating the gelatin)
- 1 (3-ounce) package strawberry Jell-O (or any brand of strawberry gelatin)
- 1/4 cup ice cubes (to stop the gelatin from over-cooking in the fridge)
- 1/2 cup heavy cream (add 1/4 teaspoon of vanilla extract for subtle extra flavor)
- 1 (8-ounce) container additional thawed Cool Whip (for a second layer—especially helpful for the final topping)
- 1 1/2 cups fresh strawberries, chopped into 1/4-inch pieces
Note: For a vegan alternative, substitute the butter with coconut oil and use a vegan Cool Whip or whipped cashew cream. If you’re unable to get fresh strawberries, canned drained berries work well too, though you may want to reduce the amount of sugar slightly because they can be tangy.
Instructions to Make Strawberry Lasagna – Step by Step
Step 1:
Start by prepping your work surface. You’ll be using a 9 x 13-inch rectangular pan, so grab non-stick spray or parchment paper cut to fit. Gently apply the spray to the pan and set it aside. The key here is not to overdo it—just a light coat so the layers won’t stick when it’s time to set. Meanwhile, take a food processor or blender and pulse the Oreos with about 1/4 cup of melted butter. Aim for a coarse crumb—in other words, you don’t want it to become smooth or pasty. Think of the texture you’d get when pressing down a crumb crust in a pie. If the mixture is too dry, it won’t bind well. If it’s too wet, it’ll melt under pressure or crumble under the weight of the layers above.
Step 2:
Once the Oreo mixture reaches the right texture, pour it into the prepared pan and use the back of a spoon or your hand (a plastic spatula hand pad works well) to press the crumbs evenly and firmly across the bottom. This step is critical. The crust holds the entire dessert together and needs to be strong enough to support the layers of filling. Be clear about the edges, creating smooth corners that will frame the final product perfectly. I like to run a ruler or pan level over the top to make sure everything is evenly compressed. Once pressed, the crust act like a base for the subsequent layers and cannot be resurfaced after it’s been touched by the filling, so don’t rush it—take the time to make sure it’s even and dense.
Step 3:
Before moving on, chill the pan in the fridge for about 10-15 minutes. You don’t need to refrigerate for a full hour yet, just enough time to let the base firm up. This step helps to stabilize the crust before adding the next layer. Whether you do this with or without the fridge is up to your schedule, but I find chilling speeds up the entire process and prevents the layers from slumping, which is especially helpful when you’re eager to taste this later in the evening.
Step 4:
While the crust chills, make the cream cheese layer. In a large mixing bowl, add the soft cream cheese and powdered sugar. Use an electric hand mixer to smooth it into a thick, glossy paste. As you beat it, you might notice a few small lumps creating air gaps in the cream cheese. These are definitely not a dealbreaker—just a few more turns of the mixer will help disperse them. Once it’s smooth, carefully fold in the first can of thawed Cool Whip. The goal here is to keep the texture silky without creating too much tear in the whipped cream. It’s okay if things look a little rough, as long as it’s blended and usable later. The result should feel like a soft, loose cloud but with cream cheese structure underneath—like an airy cream cheese frosting if you could imagine that.
Step 5:
Now, once the Oreo crust is chilled, evenly spread the cream cheese mixture across the top. Use a spatula or any smooth, flat tool and make sure to get to the corners of the pan. Remember, a layer that is too light will cause the subsequent gelatin layer to sag downwards. Press down slightly to smooth out the surface and eliminate any large air pockets or humps. Once spread, this cream cheese layer does double duty: it holds the crust together and gives the filling a foundational richness that prevents the final layer from over-crumbling.
How to Serve and Pair
Strawberry Lasagna is best served chilled, straight from the fridge—cold enough to keep the layers stable but not so icy that the texture turns unpleasant. Before serving, chill the entire dessert for at least 4 hours but preferably overnight to allow the layers to fully set and the flavors to deepen. When it’s time to present, lift the lasagna from the pan first, using a spatula and gently tracing the edges with a small knife to release it. Turn it onto a clean plate and use a clean brushing to wipe any stray crumbs from the surface before topping it with the final Cool Whip.
The final step is to gently spread a second layer of Cool Whip across the top. Use the Cool Whip sparingly—enough to create a thick, even coat, but not so much that it runs off the edges. A trick I use is to use a small offset spatula and move in smooth, sweeping circles to build up the texture evenly. After spreading the Cool Whip, place the strawberries on top. You can use larger whole berries for a presentation, or scatter them in small bits for contrast. A final whimsical touch is to use a pastry brush and gently dust the top with a bit of powdered sugar—this adds a visual pop while enhancing the flavor with that characteristic sweetness and crunch of cold cream meeting dusted sugar.
Chef’s Tips for a Perfect Result
- Always use room temperature cream cheese to avoid lumps and air bubbles in the filling.
- Chill the crust after pressing to stabilize it before adding layers—it’s unforgiving if you skip this step.
- When spreading the cream cheese and Cool Whip mixture, smooth it out with the back of a spoon or spatula without dragging across the surface—this helps maintain the layers’ integrity.
- Condition the gelatin well by whisking in the boiling water until it dissolves completely—this prevents clumps that can ruin the filling texture.
- Before adding the fresh strawberries, let the gelatin layer cool to room temperature. This ensures the strawberries are inserted at the right temperature and won’t cause the mixture to separate or become runny.
- For the final Cool Whip layer, consider adding a splash of vanilla extract—if your Cool Whip doesn’t have it. This elevates the flavor from generic to something more like authentic whipped cream and is often overlooked in store-bought containers.
Variations and Substitutions
Strawberry Lasagna is a flexible dish that accepts substitutions and variations you might have in your pantry or based on dietary restrictions. Here’s how to customize it:
- Vegan Option: Replace the butter with coconut oil, the cream cheese with a vegan brand, the Cool Whip with a non-dairy alternative like vegan whipped cream made from coconut milk or store-bought vegan Cool Whip, and ensure the strawberries are organic if concerns about pesticides exist.
- Gluten-Free Alternative: Use a gluten-free cracker like graham crackers or gluten-free Oreos (Vegan Oreo now offers a gluten-free version). Make sure the Cool Whip is certified gluten-free and check the strawberries for any pre-packaged items that may contain gluten.
- Low-Carb Version: For the crust, combine crushed almonds or walnuts with melted butter and a small amount of erythritol or monk fruit sweetener. Replace the powdered sugar in the cream cheese with a low-carb sweetener like allulose and swap out the Cool Whip with a whipped cream made from heavy cream and a low-carb sweetener.
- Budget Swap: Instead of separated containers of Cool Whip, buy in bulk and split across the layers. The recipe only needs two cans for the full lasagna—saving can be done by buying regular Cool Whip instead of Cool Whip Light for the second can.
- Color Options: Use different flavored gellins like raspberry, mixed berry, or even orange for a citrus twist. These pair beautifully with the creamy textures and work well in layering—just adjust the seasoning with a dash of the relevant fruit’s zest if possible to enhance the flavor.
- Texture Variations: For a less heavy dish, use whipped cream (heavy cream and sugar whipped together) in place of Cool Whip in the top layer. It gives a softer, cloud-like topping and can be more decadent in its texture and feel when served.
Storage and Reheating
Strawberry Lasagna is best enjoyed fresh but can last multiple days when stored properly. Here’s how to maintain quality:
Refrigerator: Keep the lasagna covered with a lid or wrapped in plastic wrap and tucked into the coldest part of your fridge. It will stay fresh for up to 3 days. Make sure the layers are fully firm before storing and don’t expose it to excessively open spaces that might cause condensation and spoil the crust. For the longest shelf life, serve this dessert within 48 hours, as the softer layers tend to pick up moisture and lose structural integrity over time.
Freezer: While not ideal, the lasagna can be frozen for up to 1 month—ideally wrapped in plastic wrap and then in aluminum foil for a triple layer to prevent freezer burn. Thaw in the fridge overnight before serving to re-establish a smooth texture. Freezing will slightly firm up the cream cheese layer—so be prepared for a denser texture when serving, but the flavor will remain bold and vibrant.
Room Temperature: This dish is not suited for long display at room temperature. While it can be left out for 2–3 hours for serving at a picnic or palette, it will begin to soften after that. If you suspect heat as a concern, slice the lasagna into smaller pieces and serve it individually to maintain the quality of the layers.
Reheating: No reheating is required when chilled, but if needed, you can keep specific slices warm in the oven at 300°F (150°C) for 30 to 45 seconds to slightly reheat them. However, note that this will make the crust soften and potentially become too loose—best served cold with all layers intact as originally set.
Nutritional Values
- Calories: ~420 per serving
- Protein: ~5g
- Carbohydrates: ~58g
- Fat: ~21g
- Fiber: ~2g
Approximate values.
Frequently Asked Questions
Can I substitute the Oreo crust?
Absolutely. Ores are not a required ingredient for this recipe. A classic graham cracker crust, crushed up brownie bits, or even a store-bought crumb crust (like those from the refrigerated section) work well. Just note that the flavor will subtly change—graham crackers have a more nutty and dense base, while brownies will create a richer, sweeter underlayer. Whatever you choose, dampen and press the crust firmly to the bottom to prevent slumping.
How do I tell when the lasagna is fully set?
When you push gently into the surface with your fingertip, it should distort slightly but recover and firm up. The top layer should be fully smooth and not bouncy. The internal jelly layer should jiggle when you shake the pan but not flow overly fluid. A complete set typically takes at least 4 hours, but 8 hours in the fridge is ideal to let the layers bond and stabilize for slicing.
Why does my lasagna slouch when I slice it?
This is most often caused by an unstable or under-prepped crust or by adding layers too warm. Ensure the crust is firmly pressed and chilled for at least 15 minutes before adding the cream cheese layer. If the layers are added at room temperature, the gelatin can over-soften with the Cool Whip or cream cheese, leading to sink-holes in the middle. Chill the lasagna fully before slicing to avoid this issue.
Can I make this in advance for a party?
Definitely. Make it the night before, as the flavors develop more fully over time. Just ensure it is fully set and properly covered before leaving it in the fridge. To present it, simply unwrap, dust with powdered sugar for a fresh look, and pop it on the serving platter. You can even make the layers separately (crust and cream cheese base the night before, the rest the next morning) to make the preparation more manageable.
What’s the best way to serve additions to this dessert?
Top the lasagna with additional strawberries, a dollop of fresh whipped cream, or a drizzle of strawberry syrup for extra flair. For an extra elegant presentation, use a small offset spatula to create mini dunes of Cool Whip on the surface and then evenly distribute the strawberries across the peaks. You can also serve it with a glass of iced tea, berry compote, or even rosemary-infused lemonade to match the fresh and sweet flavor profile.
Conclusion
Strawberry Lasagna is a dessert that defies expectations. With its bold layering of textures and flavors, it’s both a minimal-effort creation and a showstopping center piece at your summer gatherings. Whether you bring it to a picnic, serve it at a barbecue, or simply press a slice again next to your morning tea for a gloriously decadent treat, it’s already a modern classic in its own right. And really, what sets it apart is that first spoonful of strawberry filling meets Cool Whip: that perfect balance of sweet, tangy, and creamy that just feels like an endless summer breeze on your tongue. Try it for yourself, and discover why this dessert has become a household legend in just a few simple layers.
Print
Strawberry Lasagna: A Layered Dessert That Feels Like Summer
- Prep Time: 45 minutes
- Total Time: 45 minutes
- Category: Dessert
- Method: No-Bake
- Cuisine: American
- Diet: Vegetarian
Description
Strawberry Lasagna is a light and delicious no-bake layered dessert with a creamy cheesecake layer, fluffy strawberry filling, and a whipped topping that tastes like strawberry shortcake in the summer.
Ingredients
- 36 Golden Oreos
- 1/2 cup butter, melted
- 1 (8 oz) cream cheese, softened
- 1 cup powdered sugar
- 1 (8 oz) Cool Whip, thawed
- 3/4 cup boiling water
- 1 (3 oz) strawberry Jello gelatin
- 1/4 cup ice cubes
- 1/2 cup heavy cream
- 1 (8 oz) Cool Whip, thawed
- 1 1/2 cups fresh strawberries, chopped
- 1 (8 oz) Cool Whip, thawed
Instructions
1. Spray a 9 x 13 pan with non-stick spray and set aside.
2. Pulse Oreos and melted butter together until a crust forms.
3. Spread the crust evenly into the bottom of the pan and press down firmly.
4. In a large bowl, beat together softened cream cheese and powdered sugar.
5. Fold in the thawed Cool Whip until well combined.
6. Spread the cheesecake mixture evenly over the crust.
7. Whisk boiling water with strawberry gelatin until dissolved, then stir in ice cubes until melted. Let cool to room temperature.
8. Slowly stir in heavy cream, then fold in thawed Cool Whip and chopped fresh strawberries until well combined.
9. Carefully spread the strawberry mixture over the cheesecake layer.
10. Refrigerate for several hours or until fully set.
11. Once set, spread thawed Cool Whip evenly on top.
Notes
Keep the dessert refrigerated until ready to serve.
Let the gelatin mixture cool to room temperature before folding in the cream and whipped topping.
For cleaner slices, chill thoroughly before serving.
Fresh strawberries give the best flavor and texture.