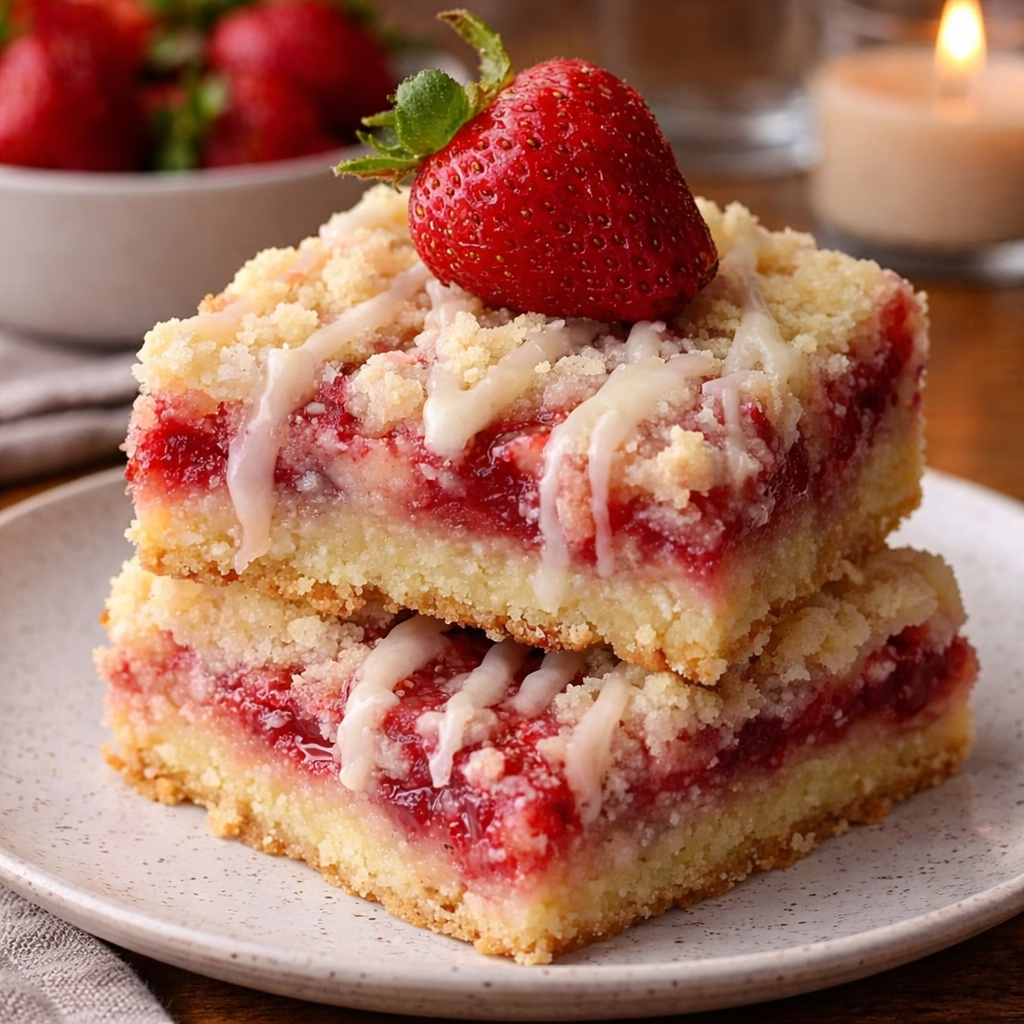
Strawberry Shortcake Bars are a true celebration of springtime flavor—a harmony of buttery shortbread, fresh strawberry filling, and a velvety vanilla glaze, all baked into a single, shareable treat. Their delicate balance of textures and seasonal brightness makes them a favorite for potlucks, dinner parties, and even lazy weekend afternoons with tea. What sets these bars apart is their ease: a single crumble-like crust that doubles as both base and topping, saving time without sacrificing flavor. This recipe, with its simple yet precise method, ensures the perfect balance of crisp, juicy, and sweet in every bite.
What Is Strawberry Shortcake Bars?
Strawberry Shortcake Bars are a modern, portable adaptation of the classic American dessert, shortcake. Where traditional shortcake relies on delicate meringue topping and whipped cream, these bars embrace a layered, no-fuss approach: a buttery shortbread crust holds a tender strawberry filling, crowned with a golden crumble topping and a glossy vanilla glaze. The result is a dessert that marries the best parts of crumble and pie into a bar form. Though not bound to regional tradition, they reflect a home-style baking ethos—simple ingredients, vibrant fruit, and comforting warmth.
What sets this version apart is its seasonal focus on strawberries. Unlike canned or frozen alternatives, fresh strawberries shine here, their natural juiciness and brightness creating a contrast with the crisp shortbread and sweet glaze. Each layer adds purpose: the crust provides a stable base, the filling delivers bursts of fruit, and the topping acts as a protective barrier, locking in flavor. It’s a dessert that tastes like summer in a single square.
Reasons to Try Strawberry Shortcake Bars
These bars are a joy for cooks of all skill levels. Their method is forgiving—no裱花 or pastry tricks required—yet the results feel indulgent. The single-batch crust simplifies prep, and the crumb topping can be adjusted for texture depending on how moist the strawberries become during baking. Even timing is relaxed, with a total oven time of just under an hour, making them ideal for weeknight desserts or early-morning baking sessions.
Another draw is their versatility. The recipe scales for different strawberry seasons: swap underripe fruit for a tangy twist, or add a handful of blueberries for a mixed-fruit crumble. For families or gatherings, the bar format eliminates messy serving, and the glaze can be omitted for a lighter finish. Parents will appreciate the short oven time and kid-friendly sweeteners, while home entertainment enthusiasts love their portability and crowd-pleasing appeal.
Beyond practicality, these bars are a joy to eat. The first bite—buttery crust, soft fruit, and glossy glaze—evokes memories of summer gardens and picnic baskets. They’re equally at home as a post-dinner treat or a morning breakfast indulgence, proof that simple desserts can carry the highest satisfaction.
Ingredients Needed to Make Strawberry Shortcake Bars
All-purpose flour: 3 ¾ cups total (1 ¾ cups for the crust, 1 ¾ cups divided between crust and crumb topping depending on texture desired, though the recipe specifies 1 ¾ cups base with remaining for topping addition)
Granulated sugar: ⅓ cup for the crust, 2 tablespoons for the strawberry filling (adjust to 1 tablespoon for tart fruit)
Packed light brown sugar: 3 tablespoons (adds depth and chewiness to the crust)
Salted butter, melted: ¾ cup (or unsalted with added pinch of salt): 170g to keep the dough from being greasy
Pure vanilla extract: 1 teaspoon (bake portion) + ¼ teaspoon (glaze portion): For enhanced aroma
Chopped fresh strawberries: 3 cups (about 12-15 strawberries, cut into small pieces to avoid overpacking)
All-purpose flour for the filling: 1 tablespoon (prevents soggy base while balancing acidity)
Glaze ingredients: ½ cup powdered sugar (for smooth texture) + 1 tablespoon whipping cream (or milk for a lighter glaze) + ¼ teaspoon vanilla (for complexity)
Instructions to Make Strawberry Shortcake Bars – Step by Step
Step 1: Prepare the Baking Pan and Ingredients
Preheat the oven to 350°F (175°C), a temperature that ensures even browning without burning. Line an 8×8-inch square baking pan with parchment paper, extending edges for easy lifting. While the oven preheats, gather all ingredients—measure sugars and flour now to conserve time during assembly. If using unsalted butter, add a pinch of salt to the dry ingredients to balance sweetness. This step also includes washing and portioning the strawberries, their vibrant color a cheerful preview of what’s to come.
Step 2: Make the Crust and Crumb Mixture
In a medium bowl, combine 1 ¾ cups flour, ⅓ cup granulated sugar, 3 tablespoons brown sugar, and any added salt. Use a whisk to eliminate clumps, especially in the brown sugar, which can harden over time. Add the melted butter and 1 teaspoon vanilla extract, incorporating with a spoon until thick crumbs form. Then, use your fingertips to create larger, coarse pieces—a technique that balances crispness with texture. Divide this mixture: press two-thirds into the pan in an even layer using floured hands and a spatula to smooth. The base should be dense enough to hold the filling, yet airy for a classic crumble feel.
Step 3: Prepare and Add the Strawberry Filling
In another bowl, mix 3 cups chopped strawberries with 2 tablespoons sugar and 1 tablespoon flour. This step is critical to avoid a soggy crust—flakey flour gently thickens fruit juices while preserving brightness and juiciness. Spoon the mixture over the baked crust, distributing evenly with care to avoid overloading any section. The strawberries should appear nested in the shortbread, their natural width creating gaps in the layer below. This basic filling amplifies springtime’s best quality: fresh fruit that requires minimal intervention.
Step 4: Complete the Crumb Topping and Bake
Now, crumble the remaining crust mixture and sprinkle it evenly over the strawberry layer. Use a fork to gently dislodge larger crumbs, spacing them so strawberries remain visible—a visual that seats both sweetness and fruitiness upfront. Bake for 30-35 minutes until the topping is golden and the filling bubbles gently. This dual-bake is the secret to perfect texture: the initial bake solidifies the crust, while the second allows fruit to soften and release juices trapped between layers.
Step 5: Prepare and Glaze the Cooling Bars
While the bars cool (which is essential—they must be fully cooled for glaze stability), make the vanilla glaze in a small bowl. Whisk together ½ cup powdered sugar, 1 tablespoon cream, and ¼ teaspoon vanilla until smooth. The cream adds a silky quality; for a lighter alternative, substitute equal parts whole milk. Drizzle evenly over the cooled bars, starting from one edge to create even coverage. Allow the glaze to set slightly, then cut into 12 bars using a sharp knife or pizza cutter. A light dusting of powdered sugar over the final product completes the rustic look.
Chef’s Tips for a Perfect Result
- Chill the crust mixture for 10-15 minutes before pressing: This step firms the butter, creating a crisp base, and reduces the risk of greasiness even on warm filling.
- Use ripe but slightly firm strawberries: They release just enough juice for sweetness to spread but not enough to soften the crust. Test batches are worthwhile for seasonal fruit variation.
- Brush the crust with chilled butter after baking: This quick step creates a delightful golden sheen and a faint ‘butter-washed crumb’ texture.
- Don’t skip the glaze cool-down: Pouring it over warm bars causes run-off, losing the clean lines and glossy finish. Wait at least an hour after oven time before drizzling.
Variations and Substitutions
- Vegan Option: Swap butter with melted coconut oil; use maple syrup in place of granulated and brown sugar. For the glaze, substitute vegan powdered sugar and almond milk for cream. The result is a nutty, tropical twist.
- Gluten-Free Alternative: Replace all-purpose flour with almond or oat flour (increase by 10% for binding). Adjust sugar quantities if using a paleo flour blend with added sweetness.
- Budget Swap: Use frozen strawberries (thawed, drained, and pulsed briefly in a food processor). Add 1 teaspoon cornstarch during the filling step to absorb excess liquid.
- Low-Carb Version: Substitute coconut flour for all-purpose (use 1/4 cup for 1 cup) and replace granulated sugar with erythritol. Add a touch of honey to counterbalance the dryness of the sugar alternative.
How to Serve and Pair
These bars are best presented on a rustic wooden board or a striped ceramic platter to echo their home-kitchen origin. Pair them with chilled white wine like Pinot Grigio or a crisp sparkling rosé for afternoon tea. For a heartier contrast, serve with tangy Greek yogurt or cream cheese tarts nearby. Presentation-wise, garnish with fresh basil leaves or mint for a burst of garden-fresh aromas. At gatherings, label the tray with a handwritten sign offering ‘vanilla glaze on request’ to accommodate dietary preferences.
Storage and Reheating
Refrigerator: Store in an airtight container at the back (coldest section) for 3-4 days. The glaze hardens slightly, which is fine to soften with finger warmth. Avoid cutting into bars before storage to maintain shape.
Freezer: Wrap individual bars in plastic wrap and place in a zip-top bag for up to 2 months. Thaw at room temperature for 2-3 hours before serving; the glaze may crack slightly. For baking fresh, assemble and freeze unbaked bars for later oven sessions, adding 5-7 minutes to the total baking time.
Room Temperature: Leave in a cool, dry location for up to 24 hours. Bars stay nicely firm, though they are best eaten under 12 hours to preserve crust crispness (especially in humid weather).
Reheating: Preheat oven to 300°F (150°C). Wrap in aluminum foil and heat for 5-7 minutes to warm through. Avoid microwave use, which softens the crust. Alternatively, place on a baking sheet and use a broiler setting for 1-2 minutes for a slight crusty finish.
Nutritional Values
Each serving (1 bar, 12 servings total):
- Calories: 220
- Protein: 3g
- Carbohydrates: 29g
- Fat: 11g (saturated 6g, trans 0g)
- Fiber: 2g
Approximate values.
Frequently Asked Questions
Can I substitute granulated sugar for brown sugar in the crust?
Yes, but expect a slightly drier, less rich shortbread. Replace 3 tablespoons of brown sugar with 3 tablespoons granulated for a crisper result. Add 1 teaspoon molasses to replicate part of the brown sugar texture.
How do I know if the bars are fully baked?
The top crumb should be golden brown with visible liquid bubbling in the filling, and the crust feels firm when lifted with a knife. The bars should release a fragrant vanilla and fruit aroma during the final 5 minutes of baking.
My crust is greasy. What went wrong?
Excess melted butter or insufficient flour in the mixture can cause a shortcomings. To fix: chill the mixture for 10 minutes before pressing and ensure your flour is fully sifted. Avoid overmixing the dough once butter is added.
Can I make these bars ahead?
Absolutely. Assemble all layers un-glazed, refrigerate for up to 24 hours, then glaze and cut before serving. This method also works for freezing; thaw refrigerated bars for 12 hours overnight.
What if I want to add a twist to the glaze?
Add 1-2 tablespoons of fresh lemon juice or a teaspoon of almond extract for a floral note. Skip the glaze entirely and brush the bars with melted butter and a sprinkle of Demerara sugar for a crumb-top finish.
Conclusion
Strawberry Shortcake Bars are a testament to the power of simplicity in dessert-making. With layers that sing with seasonal beauty and textures that delight the senses, they’re a recipe that invites both skill and spontaneity. Begin with ripe strawberries, a well-balanced shortbread, and a warm glaze, and you’ll have a dessert that feels both comforting and remarkable. The signature burst of jewel-like fruit against the golden crumble makes each bite a reason to pause, savor, and feel a little happier in the kitchen.
Print
Strawberry Shortcake Bars: A Flavorful Twist on Classic Comfort
- Prep Time: 10 minutes
- Cook Time: 29 minutes
- Total Time: 39 minutes
- Yield: 12 servings 1x
- Category: Dessert
- Method: Baking
- Cuisine: American
- Diet: Vegetarian
Description
These Strawberry Shortcake Bars combine a tender, buttery shortbread crust with a juicy fresh strawberry filling, topped with a sweet vanilla glaze for an easy spring and summer dessert.
Ingredients
Crust and Crumb:
- 1 3/4 cups all-purpose flour
- 1/3 cup granulated sugar
- 3 tablespoons packed light brown sugar
- 3/4 cup salted butter, melted
- 1 teaspoon pure vanilla extract
Strawberry Filling:
- 3 cups chopped fresh strawberries
- 2 tablespoons granulated sugar
- 1 tablespoon all-purpose flour
Glaze:
- 1/2 cup powdered sugar
- 1 tablespoon light or heavy whipping cream
- 1/4 teaspoon pure vanilla extract
Instructions
1. Preheat the oven to 350°F (175°C) and line an 8×8-inch square baking pan with parchment paper, leaving an overhang on the sides for easy removal.
2. In a medium bowl, combine the flour, granulated sugar, brown sugar, melted butter, and vanilla extract until large crumbs form.
3. Press about two-thirds of the crumb mixture evenly into the bottom of the prepared pan.
4. Bake the crust for 15 to 20 minutes, until lightly golden, then set aside to cool slightly.
5. In another bowl, mix together the chopped strawberries, granulated sugar, and flour until the fruit is evenly coated.
6. Spoon the strawberry mixture evenly over the slightly cooled crust.
7. Crumble the remaining crumb mixture evenly over the strawberry layer.
8. Bake for 30 to 35 minutes, until the strawberry juices are bubbling and the crumb topping is golden brown.
9. Let the bars cool completely in the pan.
10. In a small bowl, whisk together the powdered sugar, cream, and vanilla extract until smooth, then drizzle the glaze evenly over the cooled bars.
11. Cut into bars and serve.
Notes
Use ripe but firm strawberries for the best texture and flavor.
If using unsalted butter, add a pinch of salt to the crust mixture.
Allow the bars to cool completely before glazing so the glaze does not melt.
Store leftover bars in an airtight container in the refrigerator for up to 3 days.
These bars can be served chilled or at room temperature.
Nutrition
- Serving Size: 1 bar