The best apple pie bars bring all the cozy, nostalgic flavors of a classic orchard dessert into a handheld form that’s perfect for sharing. I remember when I first started baking in my tiny kitchen, feeling overwhelmed by the thought of rolling out traditional pie dough, but this recipe changed everything for me. It combines a buttery, shortbread-style base with juicy, spiced apples and a crunchy, cinnamon-infused streusel topping that delivers that comforting, warm aroma we all crave.
These treats have become a staple at my weekend gatherings because they offer the complete apple pie experience without the fuss of a flaky crust. Whether you are hosting a fall brunch or simply need a sweet pick-me-up on a drizzly Tuesday, the best apple pie bars prove that you don’t need professional training to create something truly special and delicious.
What is The Best Apple Pie Bars?
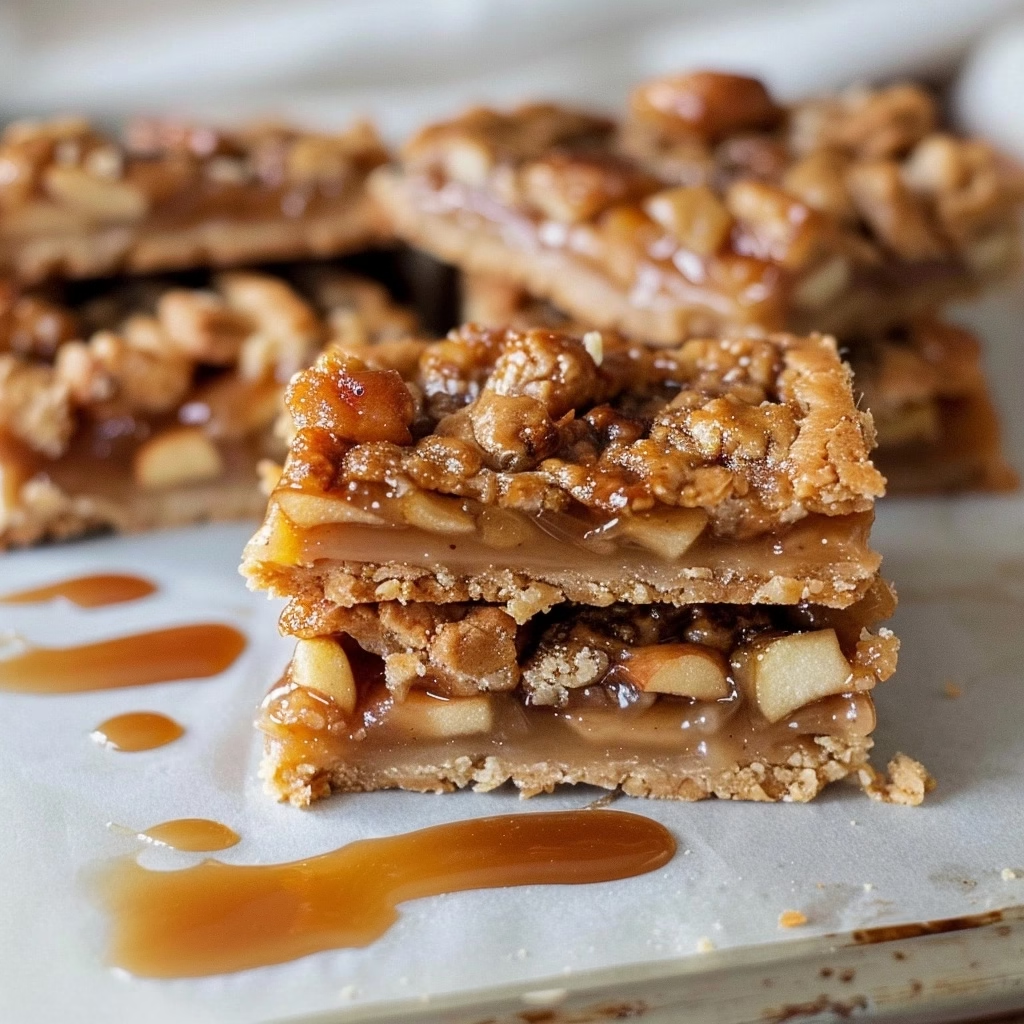
The best apple pie bars are a layered dessert that bridges the gap between a classic pie and a buttery cookie bar. They feature a sturdy, crisp shortbread crust that holds up perfectly under a generous heap of tart apple slices tossed in cinnamon and brown sugar. The final layer is a rustic, oat-based streusel that adds the necessary crunch to contrast with the tender fruit filling.
Unlike a traditional apple pie that can be messy to serve, these bars are designed to be sliced into neat squares. They rely on the cooling process to help the filling set, making them an excellent choice for potlucks, lunchboxes, or a simple afternoon tea. They rely on humble pantry staples like flour, butter, and brown sugar, making the entire process feel grounded and incredibly rewarding.
Reasons to Try The Best Apple Pie Bars
If you are looking for a dessert that delivers maximum flavor with minimal kitchen anxiety, this is the recipe for you. These bars are significantly more forgiving than a full pie, as you don’t have to worry about achieving the perfect crimped edge or a soggy bottom. They are essentially foolproof for beginners while still satisfying the highest standards of apple-loving dessert enthusiasts.
They are also remarkably convenient for busy lives. Since they hold their shape beautifully after chilling, you can bake them a day in advance without compromising their texture. Sharing these with friends has always been one of my favorite ways to slow down, and their warm, spiced scent transforms any kitchen into a cozy sanctuary regardless of the season.
Ingredients Needed to Make The Best Apple Pie Bars
Shortbread Crust:
1 cup all-purpose flour
¼ cup granulated sugar
⅛ teaspoon salt
½ cup unsalted butter, cold and cut into small cubes
½ teaspoon pure vanilla extract
Apple Filling:
3 large tart apples (Granny Smith work best), peeled, cored, and sliced into ¼-inch thick slices
2 tablespoons unsalted butter, melted
½ teaspoon pure vanilla extract
¼ cup + 1 tablespoon light or dark brown sugar
3 tablespoons all-purpose flour
1 ½ teaspoons ground cinnamon
⅛ teaspoon ground nutmeg (optional)
⅛ teaspoon salt
Cinnamon-Streusel Topping:
⅓ cup all-purpose flour
¼ cup old-fashioned rolled oats
¼ cup light or dark brown sugar
¼ teaspoon ground cinnamon
Pinch of salt
¼ cup unsalted butter, cold and cut into small cubes
Instructions to Make The Best Apple Pie Bars – Step by Step
Step 1: Start by preheating your oven to 350°F (180°C). Prepare an 8×8-inch baking pan by either greasing it well or lining it with parchment paper, making sure you leave enough overhang on the sides so you can easily lift the bars out once they are set.
Step 2: To create the shortbread crust, place your flour, sugar, and salt into a food processor and pulse briefly to combine. Add your chilled, cubed butter and the vanilla, pulsing until the mixture looks like coarse, wet sand; if you don’t have a processor, simply use a pastry cutter or your hands to work the butter in until you reach the same texture. Press this mixture firmly and evenly into your prepared pan and bake for 15 to 25 minutes until the edges are shimmering with a beautiful golden hue.
Step 3: While the crust is baking, prepare your filling by tossing the apple slices with the melted butter and vanilla extract in a medium bowl. In a separate smaller bowl, stir together the brown sugar, flour, cinnamon, salt, and nutmeg, then sprinkle this over your apples and toss well so every slice is beautifully coated in those warm spices.
Step 4: Now, prepare the streusel topping by combining the flour, oats, brown sugar, cinnamon, and salt in a bowl, then use a pastry cutter or your fingers to crumb in the cold butter until you have small, delicious clusters. Once the crust is ready, layer the apple mixture over it, pressing the slices down so they fit snugly, and scatter the streusel evenly over the top.
Step 5: Bake for 30 to 35 minutes, or until the topping is golden brown and the apple juices are bubbling slightly. The patience part comes next: let the bars cool completely on a wire rack, then pop them in the refrigerator for at least two hours to ensure they slice into perfect, clean bars.
Chef’s Tips for a Perfect Result
- Keep your butter strictly cold for the crust and streusel, as this ensures the texture remains crumbly and light rather than greasy.
- Using Granny Smith or other tart apples is essential to balance the sweetness of the sugar and keep the dessert from tasting one-note.
- Do not skip the refrigeration stage; it is the secret to getting crisp, distinct squares instead of a crumbling mess.
- If your crust looks a little dry before pressing, a tiny splash of cold water will help everything bind together effortlessly.
- Slice through the chilled bars with a hot knife wiped clean after each cut to keep your edges looking sharp and professional.
Variations and Substitutions
Gluten-Free Alternative: Swap the all-purpose flour for a high-quality 1-to-1 gluten-free baking blend. The texture remains remarkably similar, though you may need to add an extra pinch of xanthan gum if your blend doesn’t already contain it.
Nutty Crunch: Add a quarter-cup of chopped pecans or walnuts to the streusel topping before baking. This adds a lovely earthy depth and a secondary crunch that complements the softness of the baked apples.
How to Serve and Pair
Serve these at room temperature or slightly warmed for the best flavor experience. They pair beautifully with a dollop of unsweetened whipped cream or a small scoop of vanilla bean ice cream to balance the intensity of the cinnamon. If you’re feeling fancy, a light drizzle of homemade caramel sauce over the top just before serving adds an extra layer of decadence that guests always appreciate.
Storage and Reheating
Refrigerator: Keep these in an airtight container for up to 4 days. The flavors actually meld and deepen by the second day, making them even better after a night in the fridge.
Freezer: Wrap individual bars tightly in parchment paper and place them in a freezer-safe bag for up to 2 months. Thaw them in the refrigerator overnight before serving.
Reheating: If you prefer them warm, pop a bar into a 300°F oven for about 5 to 8 minutes. Avoid the microwave if possible, as it can make the crust lose its signature shortbread snap.
Nutritional Values
- Calories: 210 per serving
- Protein: 2g
- Carbohydrates: 28g
- Fat: 10g
- Fiber: 2g
Approximate values.
Frequently Asked Questions (FAQ)
Can I use a different fruit like pears?
Yes, you can substitute peeled and sliced pears for apples with great success. Keep in mind that pears soften faster than apples, so make sure they are not overly ripe to avoid a mushy texture.
How do I know when the bars are done?
The bars are fully baked when the streusel topping is golden brown and the apples have softened sufficiently when pierced with a fork. You should also notice the filling bubbling gently around the edges of the pan.
My crust is falling apart when I cut it, why?
If your bars are crumbling, it is likely because they were not chilled long enough or the crust was not pressed down firmly enough initially. Always ensure the bars reach room temperature before putting them in the fridge to set completely.
Can I make these a day before an event?
These are actually better when made a day in advance, as it allows the moisture from the apples to distribute evenly through the crust. Simply store them in an airtight container in the refrigerator until you are ready to serve.
How can I customize these bars?
You can customize these by adding a pinch of ground ginger or cardamom to the apple mixture for a more complex spice profile. Alternatively, sprinkling a bit of sea salt over the caramel drizzle enhances the sweetness and creates a sophisticated finish.
CONCLUSION
The best apple pie bars offer that nostalgic, comforting taste of home in every single buttery, spiced bite. Creating them is a simple, rewarding process that transforms basic pantry staples into a show-stopping treat perfect for any gathering. Give this recipe a try this weekend, and let the irresistible aroma of baked cinnamon and apples fill your home with warmth and joy.
Print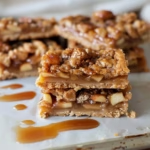
The Best Apple Pie Bars
- Prep Time: 20
- Cook Time: 45
- Total Time: 65
- Yield: 16 bars 1x
- Category: desserts
- Method: Baking
- Cuisine: American
- Diet: Vegetarian
Description
These apple pie bars capture the nostalgic warmth of a classic orchard dessert in a convenient, handheld form. Featuring a buttery, shortbread-style base topped with tart, cinnamon-spiced apples and a satisfyingly crunchy oat streusel, they offer the perfect balance of textures. Easy to bake and even easier to share, these bars bridge the gap between a traditional pie and a cookie, making them an ideal treat for potlucks, brunch, or a cozy afternoon snack. No complex pie crust rolling required; they are foolproof, delicious, and deeply comforting.
Ingredients
1 cup all-purpose flour
1/4 cup granulated sugar
1/8 teaspoon salt
1/2 cup unsalted butter, cold and cubed
1/2 teaspoon pure vanilla extract
3 large Granny Smith apples, peeled, cored, and sliced
2 tablespoons unsalted butter, melted
1/2 teaspoon pure vanilla extract
1/3 cup brown sugar
1 teaspoon ground cinnamon
1/2 cup old-fashioned oats
1/4 cup all-purpose flour
2 tablespoons brown sugar
2 tablespoons unsalted butter, melted
Instructions
Preheat your oven to 350°F and grease an 8×8 inch baking pan.
For the crust, combine 1 cup flour, 1/4 cup sugar, and salt; cut in cold butter and vanilla until crumbly.
Press the crust mixture firmly into the bottom of the prepared pan and bake for 12-15 minutes.
While the crust bakes, toss the apple slices with melted butter, vanilla, brown sugar, and cinnamon.
Spread the apple mixture evenly over the partially baked crust.
In a small bowl, combine the oats, 1/4 cup flour, 2 tablespoons brown sugar, and 2 tablespoons melted butter to create the streusel.
Sprinkle the streusel topping over the apples.
Bake for 30-35 minutes or until the apples are tender and the topping is golden brown.
Allow the bars to cool completely in the pan before slicing into squares.
Notes
Ensure the apples are sliced thinly and uniformly to ensure they cook through evenly. Letting the bars cool completely is essential for the filling to set properly, making them sliceable. These can be stored in an airtight container at room temperature for up to 3 days.
Nutrition
- Serving Size: 1 bar
- Calories: 210
- Sugar: 14g
- Sodium: 45mg
- Fat: 11g
- Saturated Fat: 7g
- Carbohydrates: 28g
- Fiber: 2g
- Protein: 2g
- Cholesterol: 30mg